Q2 Finish-Along Goals

Linking up with Adrianne for the Second Quarter of the 2015 Finish-Along … 

1. Smoke Damage. I’m tired of this one. Really. It’s about 1/4 embellished now. Looks cool, but I’m sick of it.

Smoke Damage Cathedral Windows, 2012

 2. His. About half-quilted now. 

IMG_6585 

3. Peacock. Layered and ready to quilt. 

IMG_5732     

4. Tessellation Quilt, just to get it off of my list.

Tessellation quilt, unknown start date

5. Underwater scene. Still scared of this but working up the guts to pounce on it.

Storm At Sea Experiment

6. Zebratown. It’s at Mom’s house. I’d have to go get it. And my skill level has improved so much since last time I quilted on it I’m almost scared to look at it.

ZebraTown, 2008
ZebraTown, 2008

7. Hers. I took this down off the wall and put it back in a box so I could use the wall for something else.

IMG_6042 

8. Placemats using up my leftover fabrics from two quilts… There are 12 placemats and 2 table runners. I have them stored with the correct batting sizes now and some even have backings paired with them. This would be such a quick finish, really. 

IMG_8085.JPG       

9. Black Wholecloth quilt. Very excited about this one and I have no idea where it’s leading me at this point.

IMG_8158.JPG    

10. Mystery Quilt from a a few years ago… It’s ready to layer but I don’t have a backing for it yet.

HQH Mystery 2011
HQH Mystery 2011

11. Grand Illusion. Backing and batting are ready. Just need to layer. 

grand illusion top     

12. Tree. 


IMG_9325.JPG

13. Log Cabin Star

IMG_9006.JPG

14. Fibonacci Circles

IMG_8997.JPG

15. Modern Circle Illusion. I want to finish this one as a miniquilt for my classroom wall.


Ready, Set, GO!!!

Finished: Queen of Fibonacci Squared

Bound and washed and here are the Fence Photos! I just love how it crinkled up — it looks so cozy!

Here’s Queen of Fibonacci Squared next to the original Fibonacci Squared, which I finished almost exactly a year ago. I told Helen, who not 13 yet and already 2.5″ taller than I am, that the following photo demonstrates what I feel like when I stand next to her.

IMG_9413.JPG

Wanna see it a little closer?

IMG_9415.JPG

Closer still?

IMG_9419.JPG

From the other side?

IMG_9420.JPG

Even closer? Really?

IMG_9421.JPG

Oh, look. What a surprise.  A nerdy math quilt with nerdy math fabric on the back. Again.

IMG_9422.JPG

I’m finishing up the pattern and hopefully will have it in my Etsy shop very soon. It’s super simple to put together (and not difficult to figure out), but people have been most interested in the math behind the quilting design, so I have included that. 

In Process: Fibonacci Circles

So I was doodling in Adobe Illustrator. I started with circles that had diameters of 1″, 2″, 3″, 5″, 8″, and 13″ After playing with placements, I came up with this concept, which created an illusion. I wanted to incorporate flying geese, so I added the 10.5″, 6.5″, 4″, 2.5″ and 1.5″ circles to guide them.

IMG_9405.PNG


Radiating from the center circle, I divided the 360 degrees into an even number of wedges, and built the geese on those divisions and colored them in — Duke Blue, naturally. Because I didn’t want the wings of the geese to end in the same places, I alternated the direction and placement of the geese so that they’d “float” and assembly would be easier. This created a pretty spectacular illusion, even in the monochromatic color scheme.

monochromatic goose illusion


Then I sat down with my Prismacolor pencils and played (it’s flipped from the monochromatic version because my original design had the geese flying down on the outside ring, but I ultimately changed my mind about that).

IMG_8579.JPG

Yes. I think so. I sent the foundations to my local copy shop, and they enlarged them for me on a large format printer. The biggest circle is about 37.5″ in diameter. The empty circle in the middle is 2.5″ in diameter. This makes the geese in the smallest ring really, really tiny. Turns out this was the easiest of the 5 rings to assemble because I wasn’t wrestling with a large foundation under the machine over and over. I didn’t want to cut any of them apart because I was concerned about the accuracy of trying to reassemble the rings after they were finished.

IMG_8954.JPG

Each ring has 25 geese in it (except the biggest ring has 26, since the smallest piece isn’t microscopic), so each one had over 75 pieces of fabric. The process took a while.

IMG_8958.JPG

The big blue ring was the hardest to do, by far. I put the green center in as a placeholder just so it wouldn’t be white, until I could get the red rings done and make a final decision about what color that center should be.

IMG_8964.JPG

When all of the rings were assembled and the biggest one was stay-stitched around the edge, I reverse-appliqued the rings together from the inside out and then starched the circle almost rigid.

IMG_8997.JPG

My mom thinks it looks like a dragon’s eyeball.

I may paint the light blue sections or something to calm them down, but they bother me less as time goes on.

For the moment, I’m just living with it on my design wall, trying to decide how I’m going to finish it. Trapunto to accentuate the 3D feel? Appliqued to something else? I’m not sure, but hopefully I’ll figure it out soon.

This thing was a beast to put together, but I love how it turned out. So far, anyway.

In Process: Personal Growth

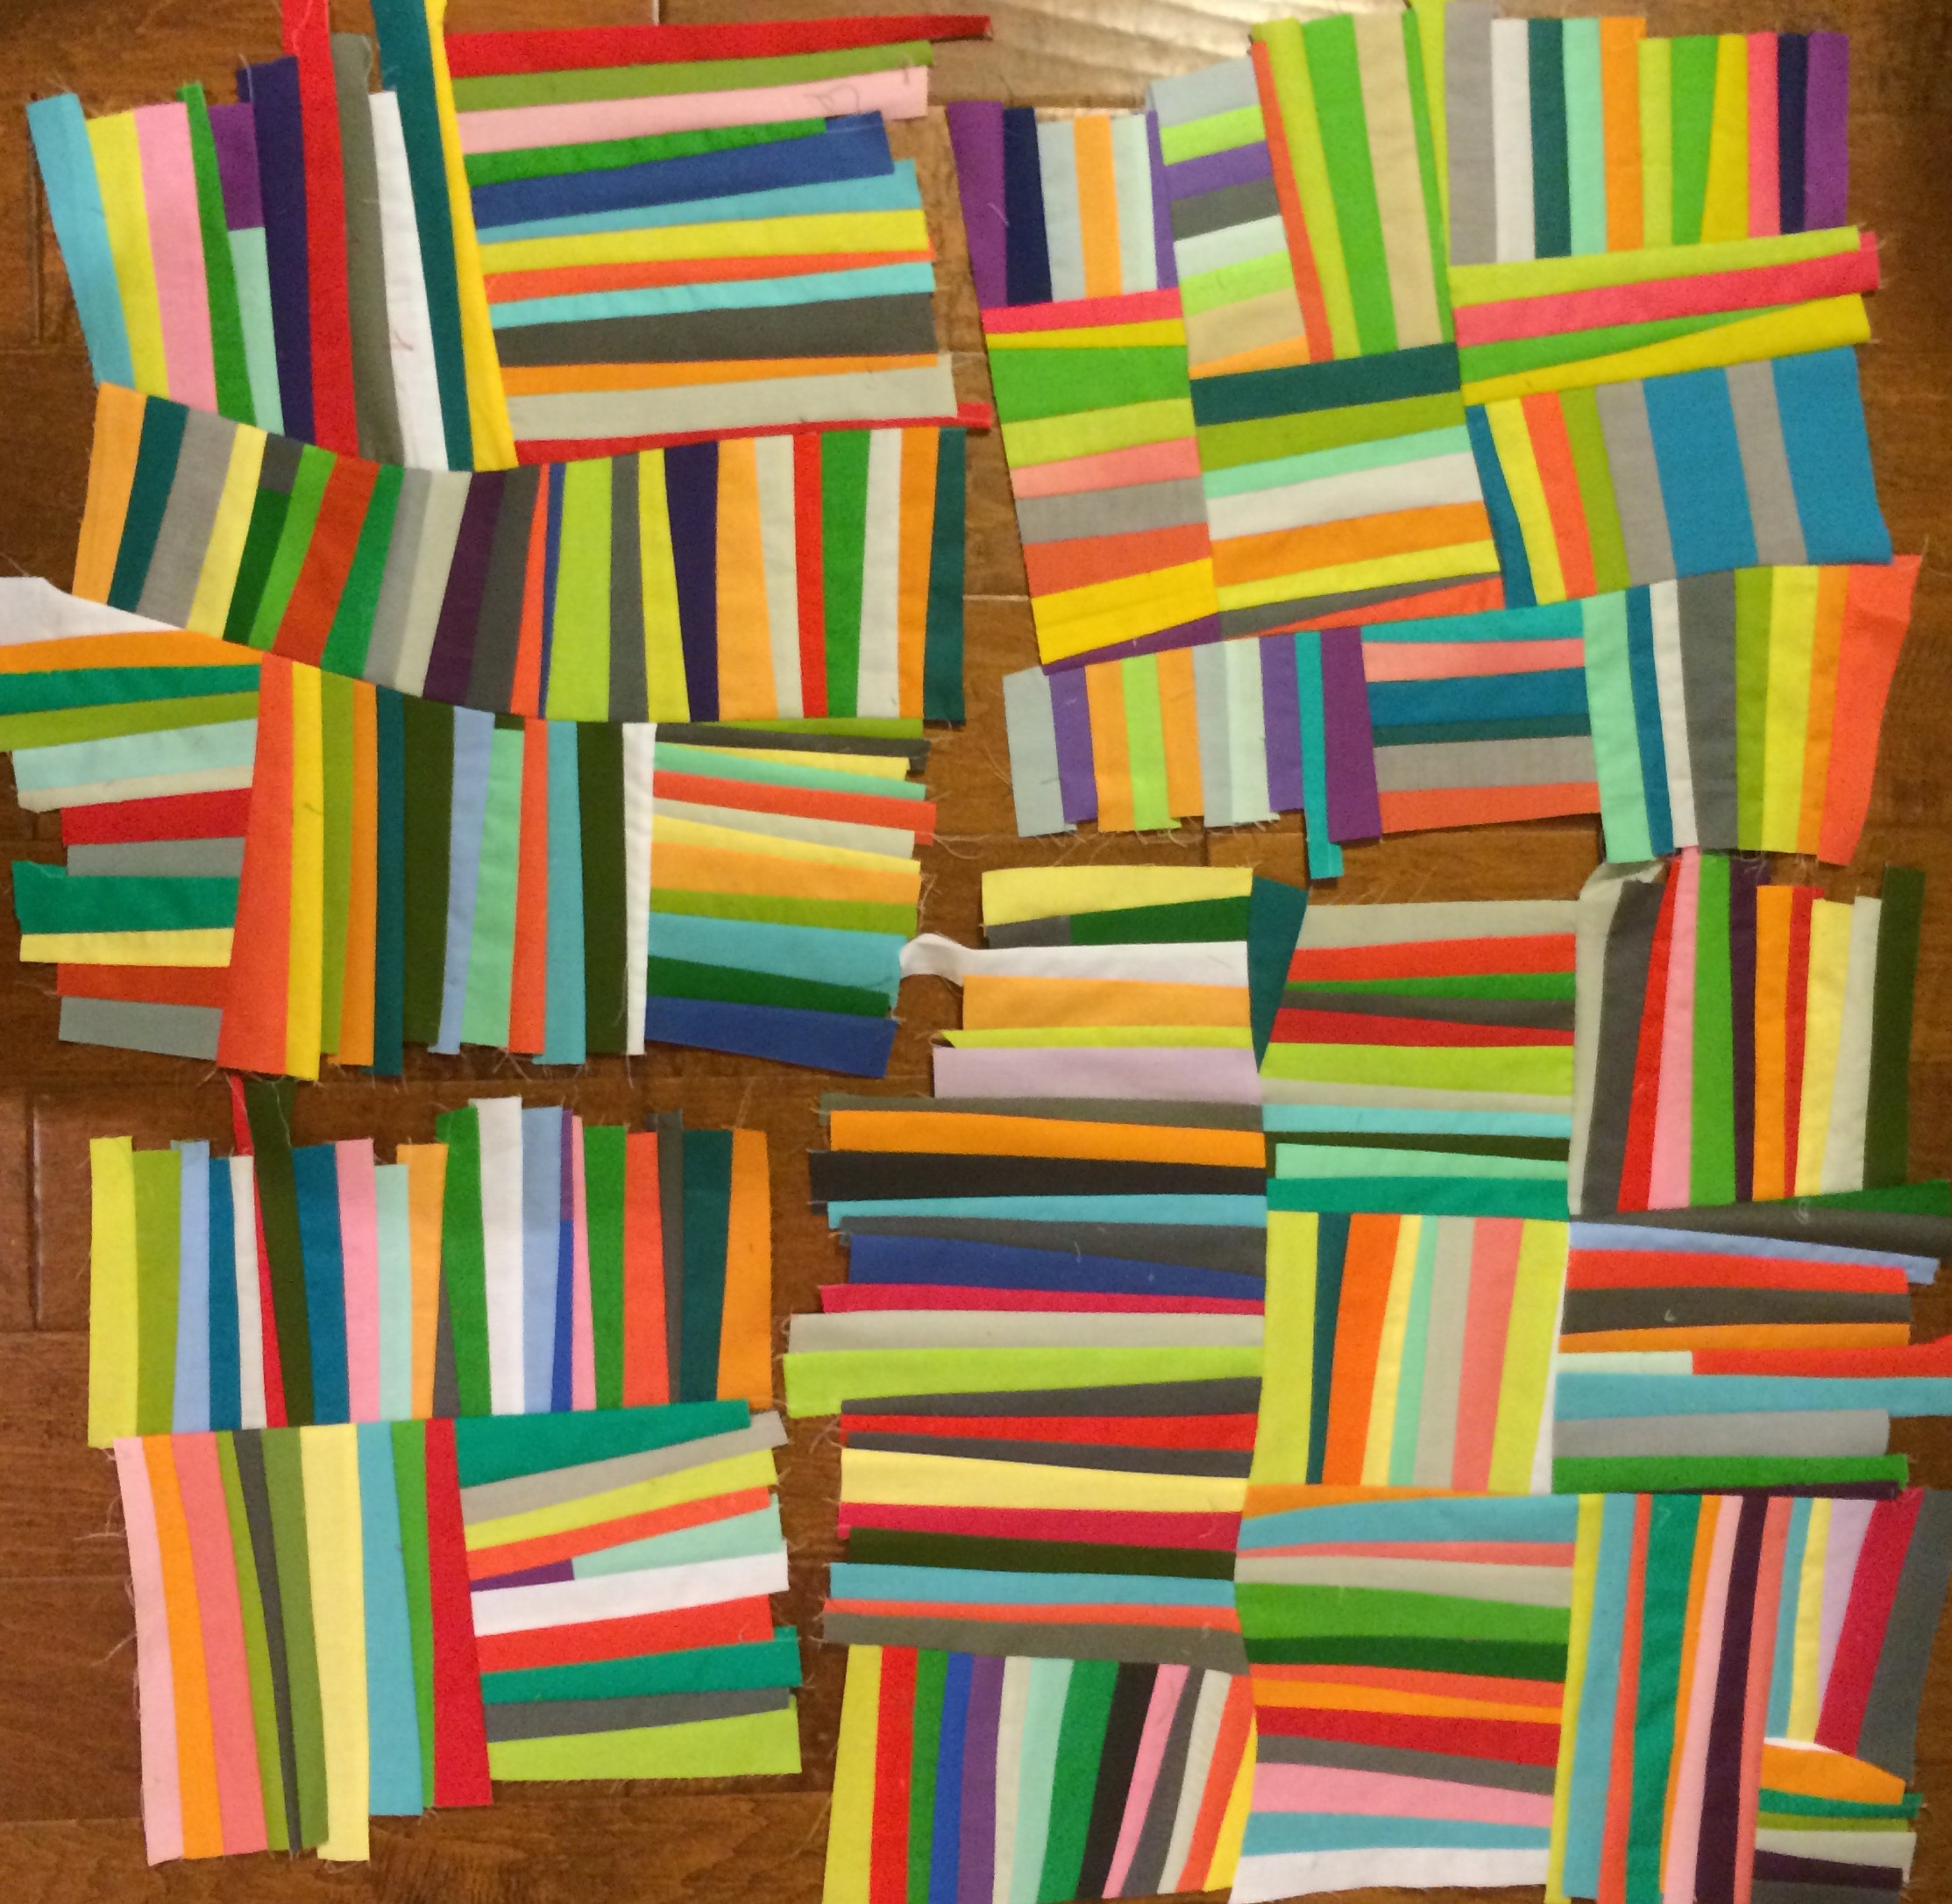
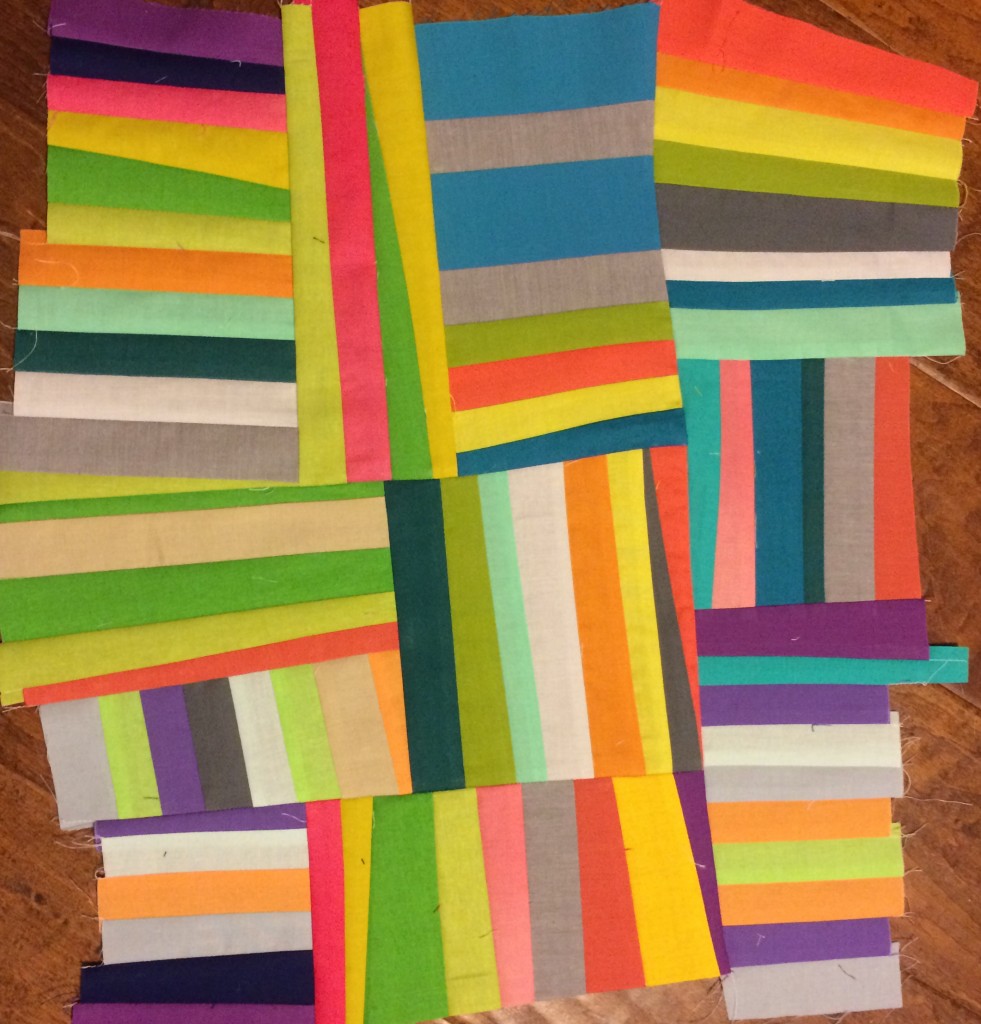
One of the people I follow on Instagram, Elizabeth Dackson (@dontcallmebetsy), recently offered a medium USPS box stuffed with scraps of fabrics for $16 or something like that. I happened to see it right after she posted the offer, so I ended up getting this box of happiness about a week later. Some of these fabrics were solids, and combined with my own sad stash of solid fabrics I had enough to try something I’ve been wanting to play with for a while. When I made It’s Loud in Here, it was my first time really exploring improv piecing. I enjoyed it and was scared of it at the same time, but I knew that I wanted to play with the idea more. And I wanted to use solids, but I didn’t have very many colors since I haven’t done a lot of work with solids in the past. As I was working on the Log Cabin Star (which also features a lot of Elizabeth’s scraps), I’d sew bits of these solids together into chunks. Then I decided to abandon the ruler when I cut them apart and sewed them together again, and this slab of color was born. It was about 15″ square, probably.

IMG_9045.JPG

Soon it had some friends, and I started to get an idea of what I wanted to do.

IMG_9159.JPG

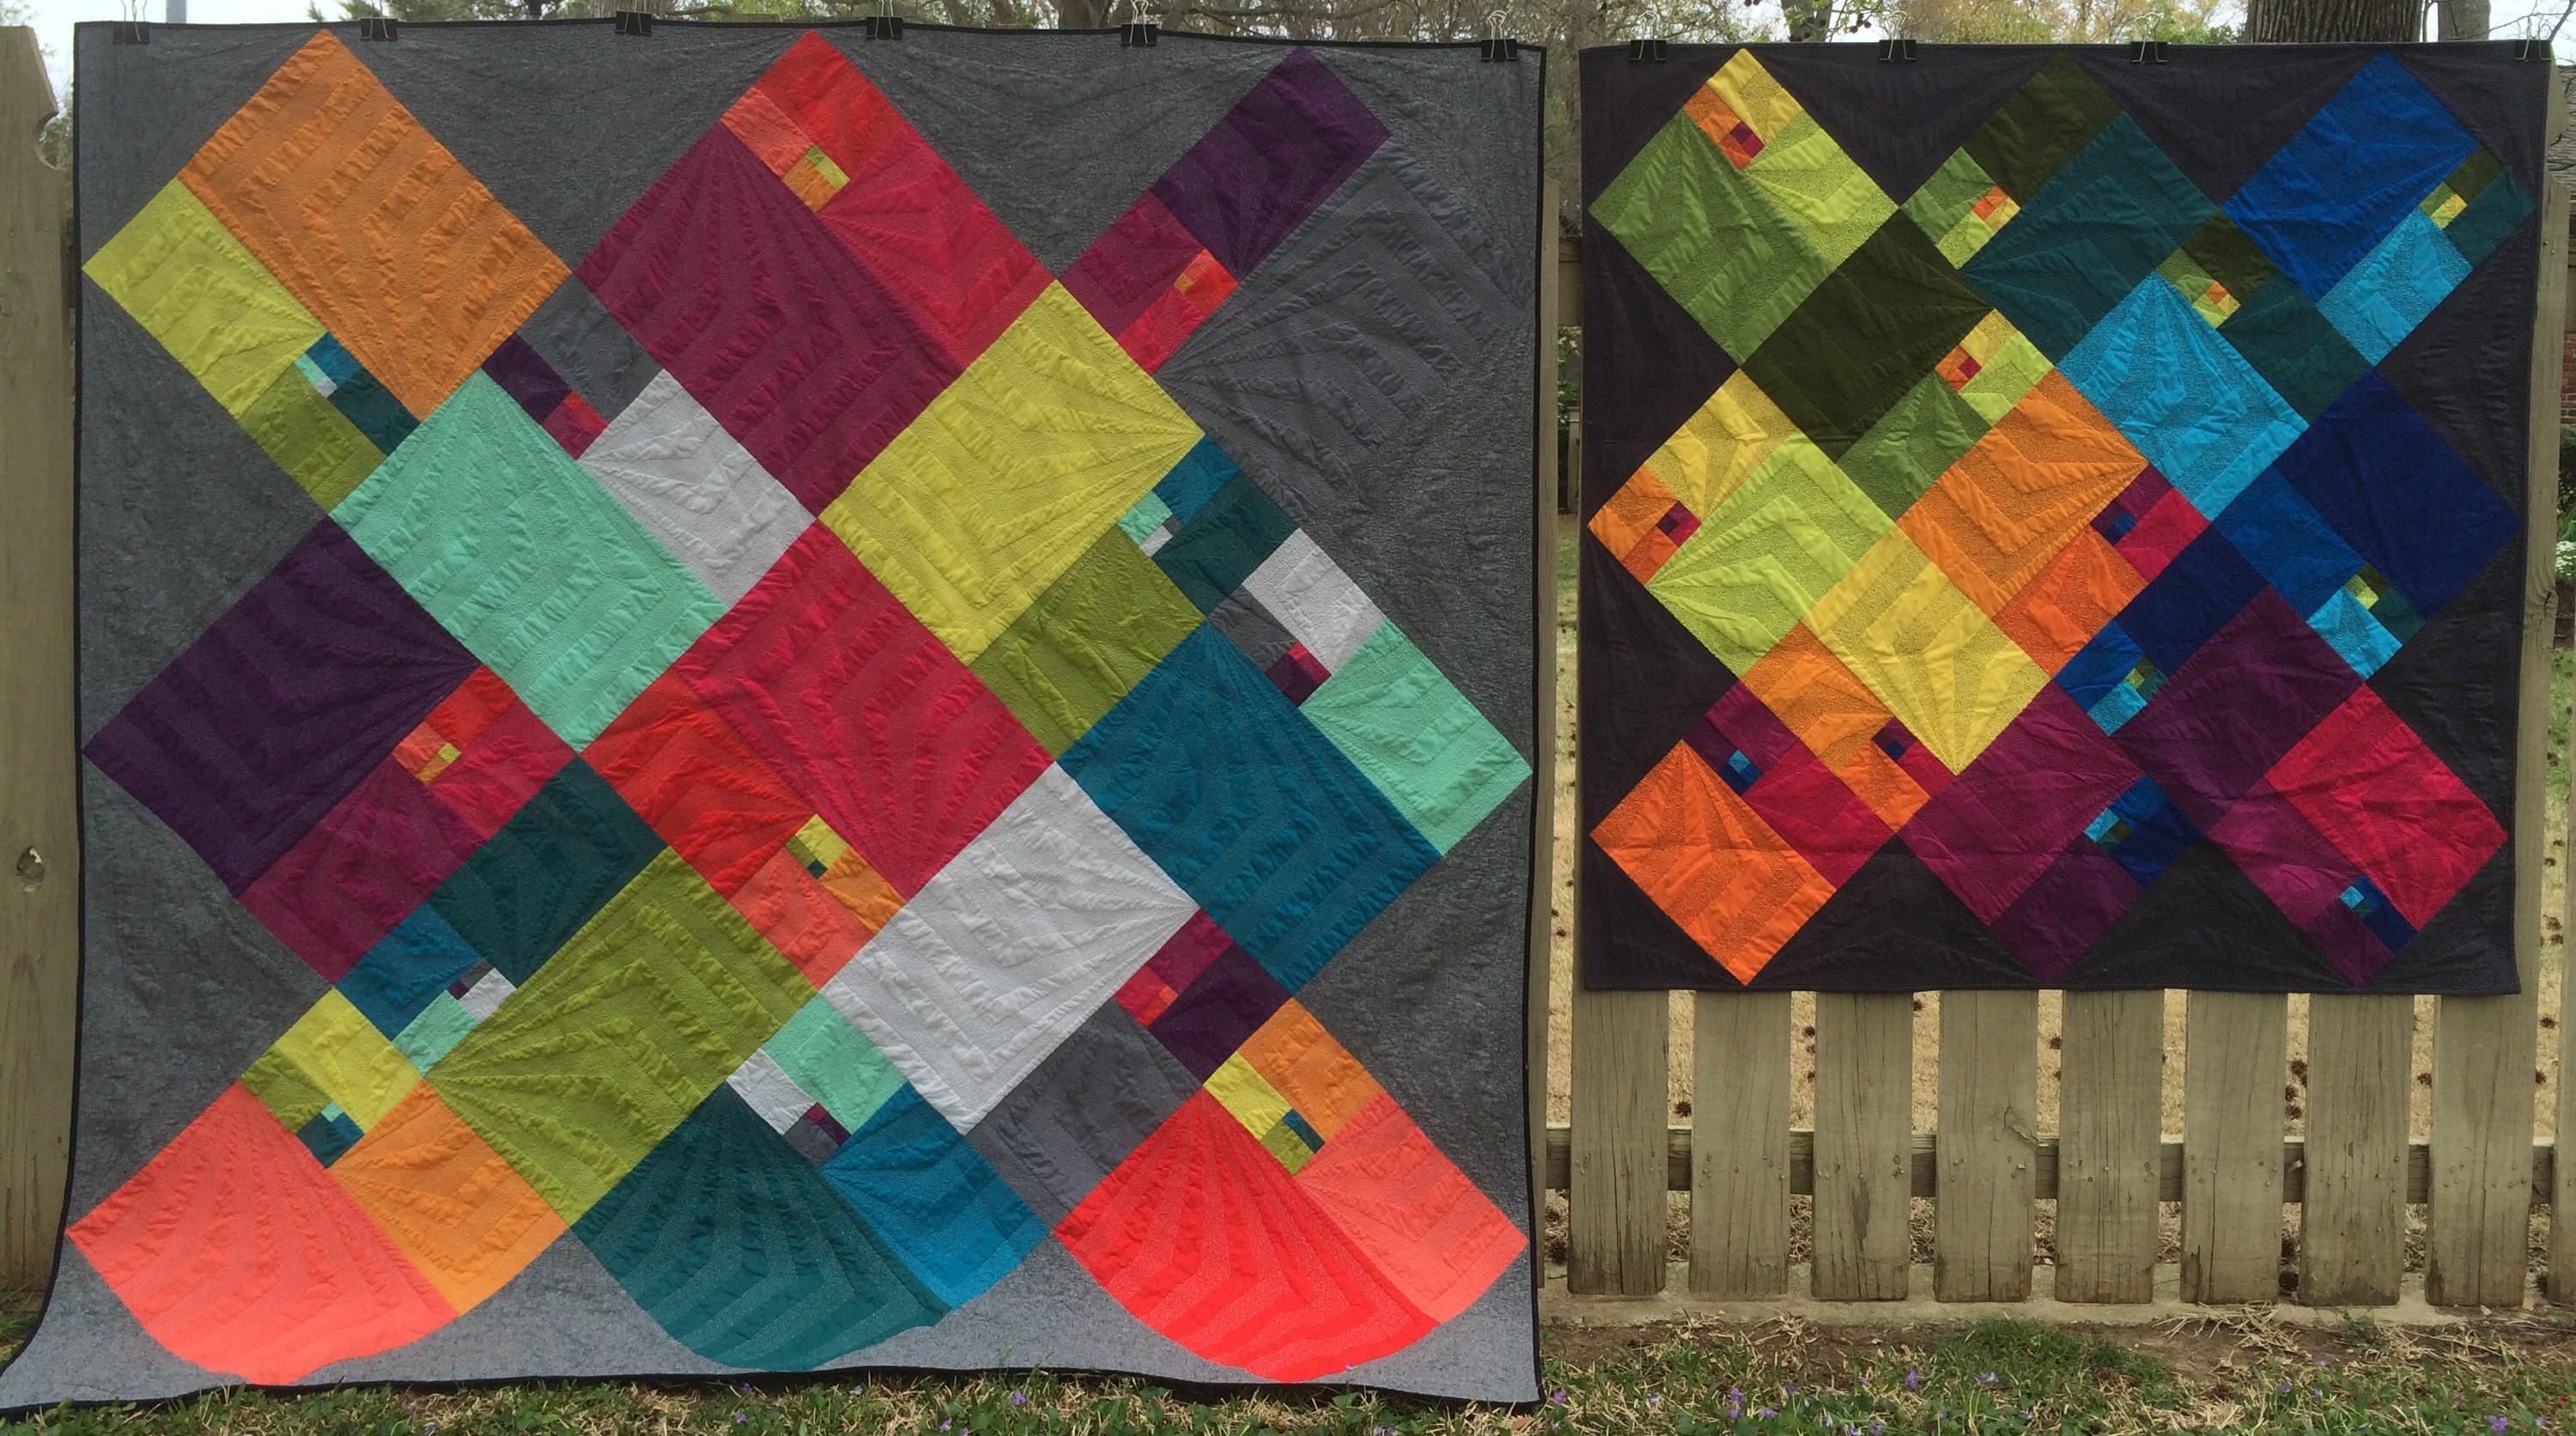
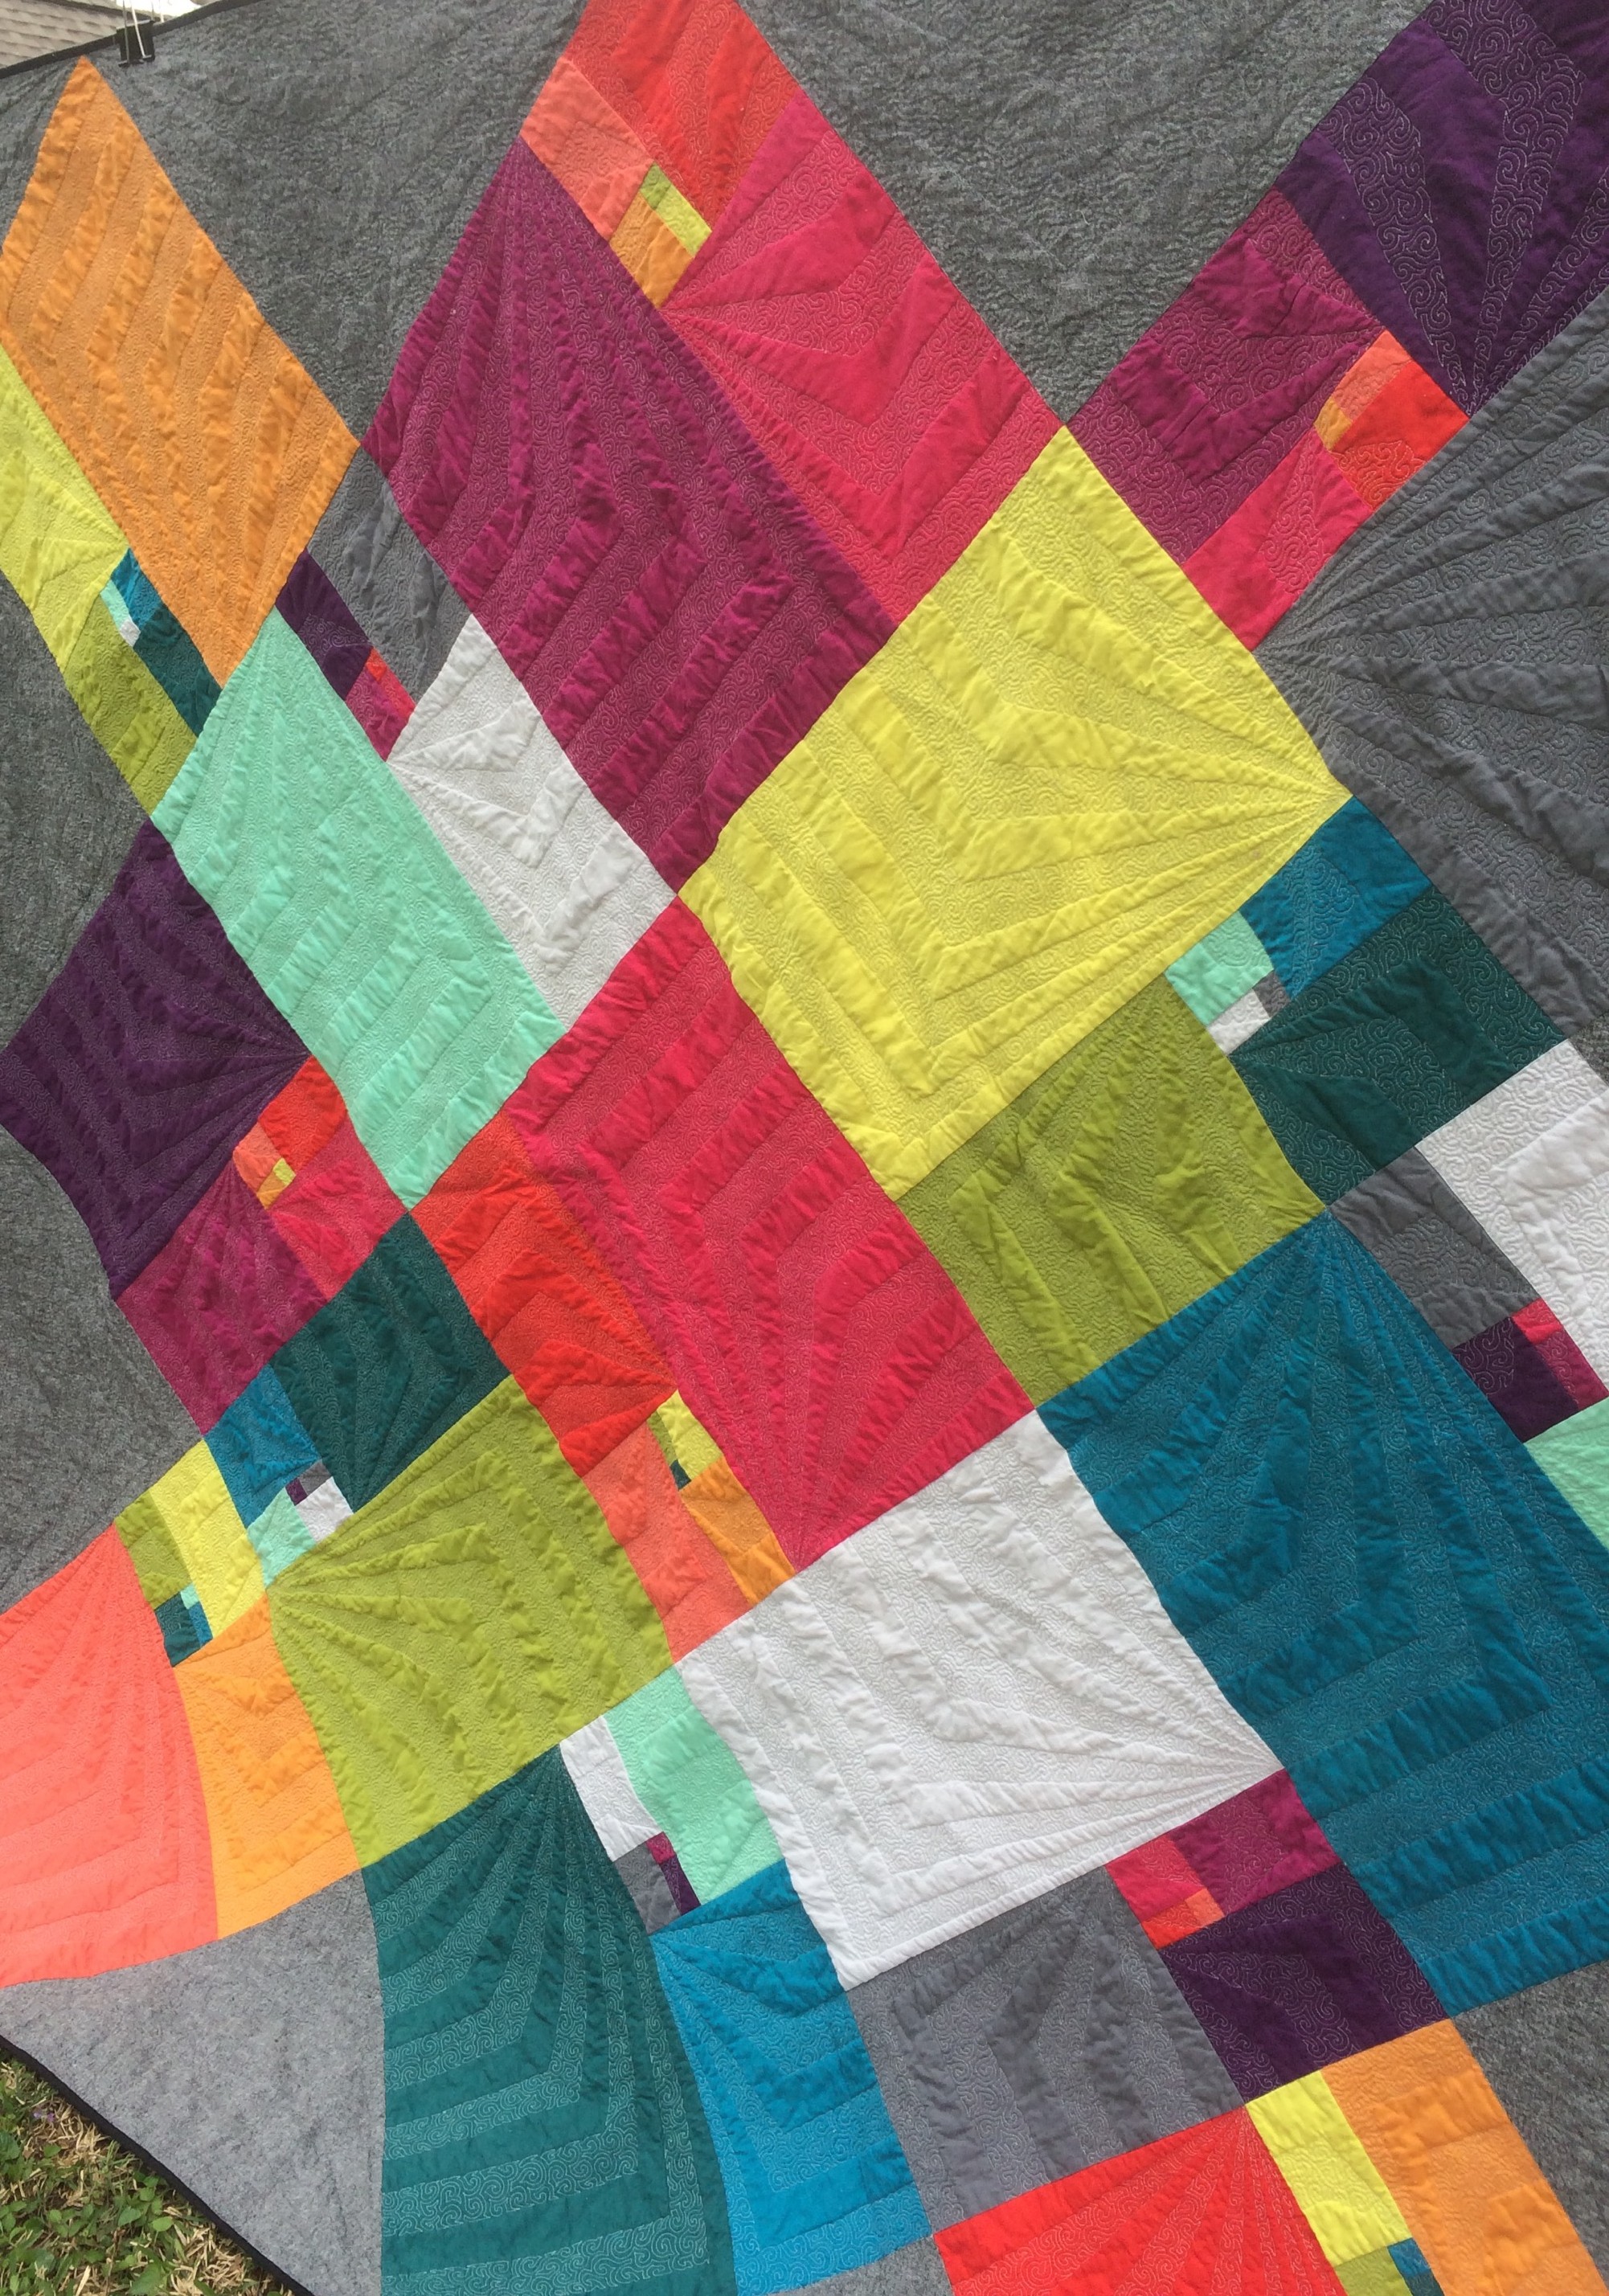
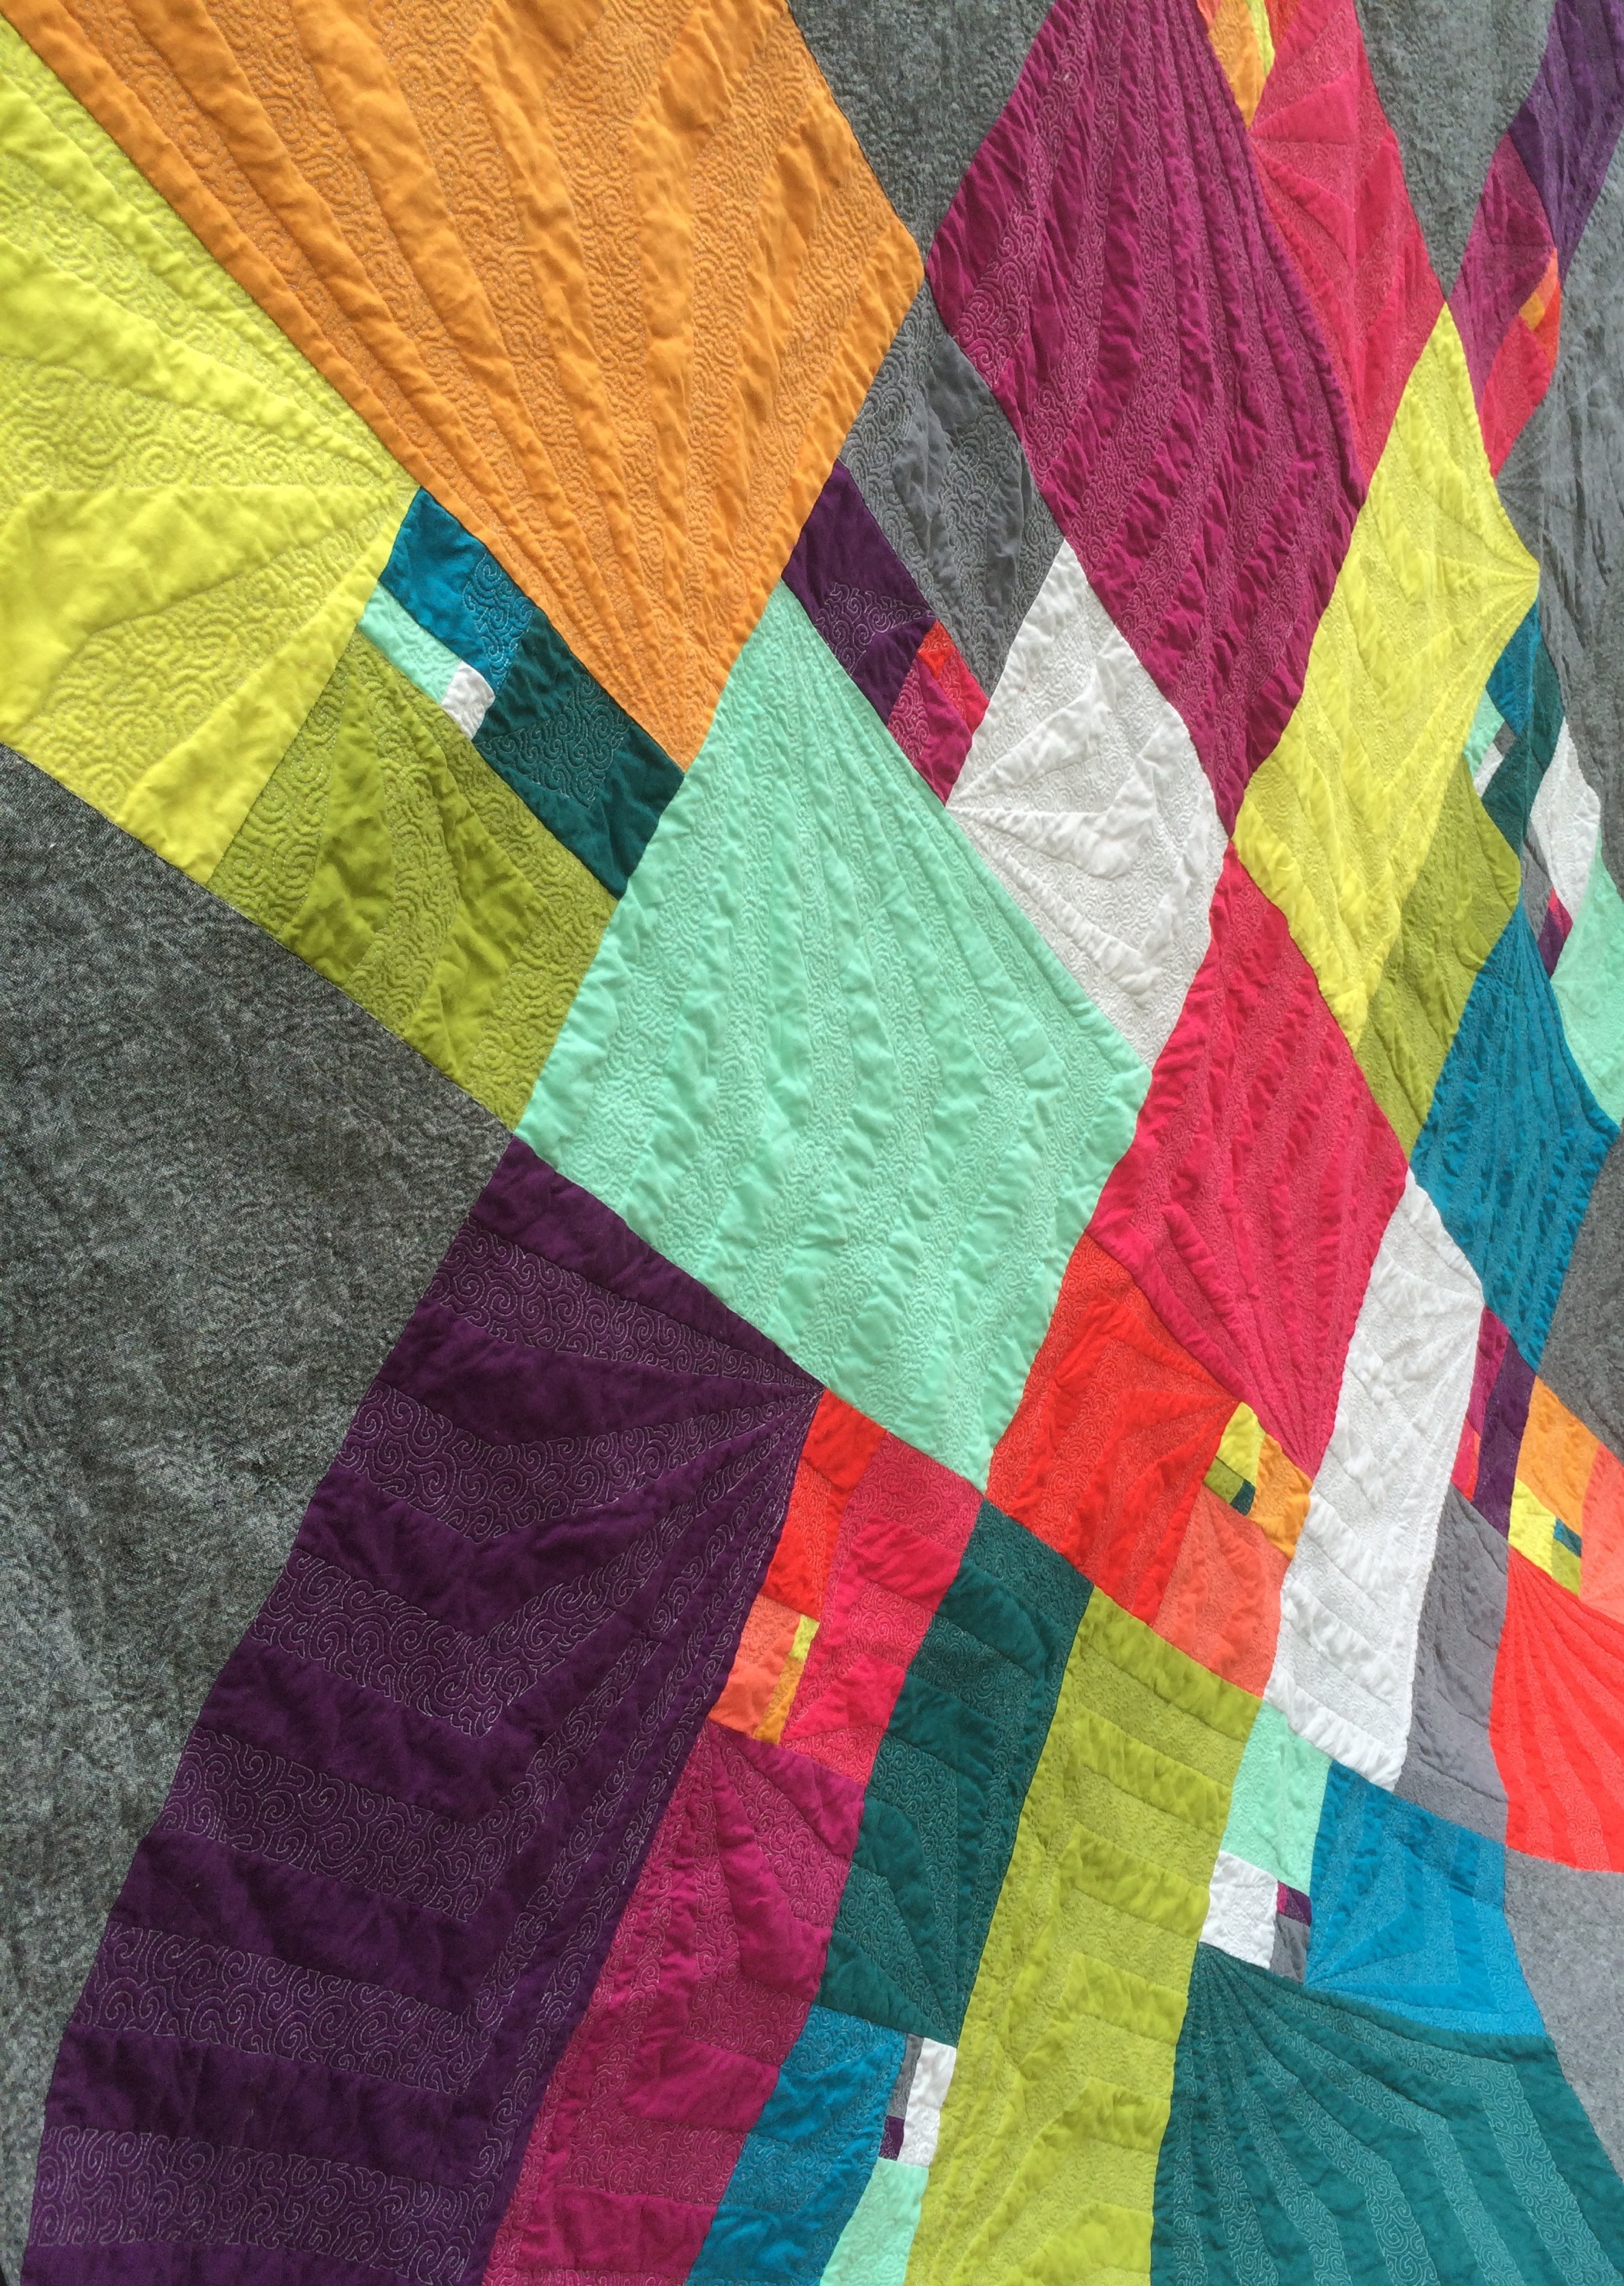
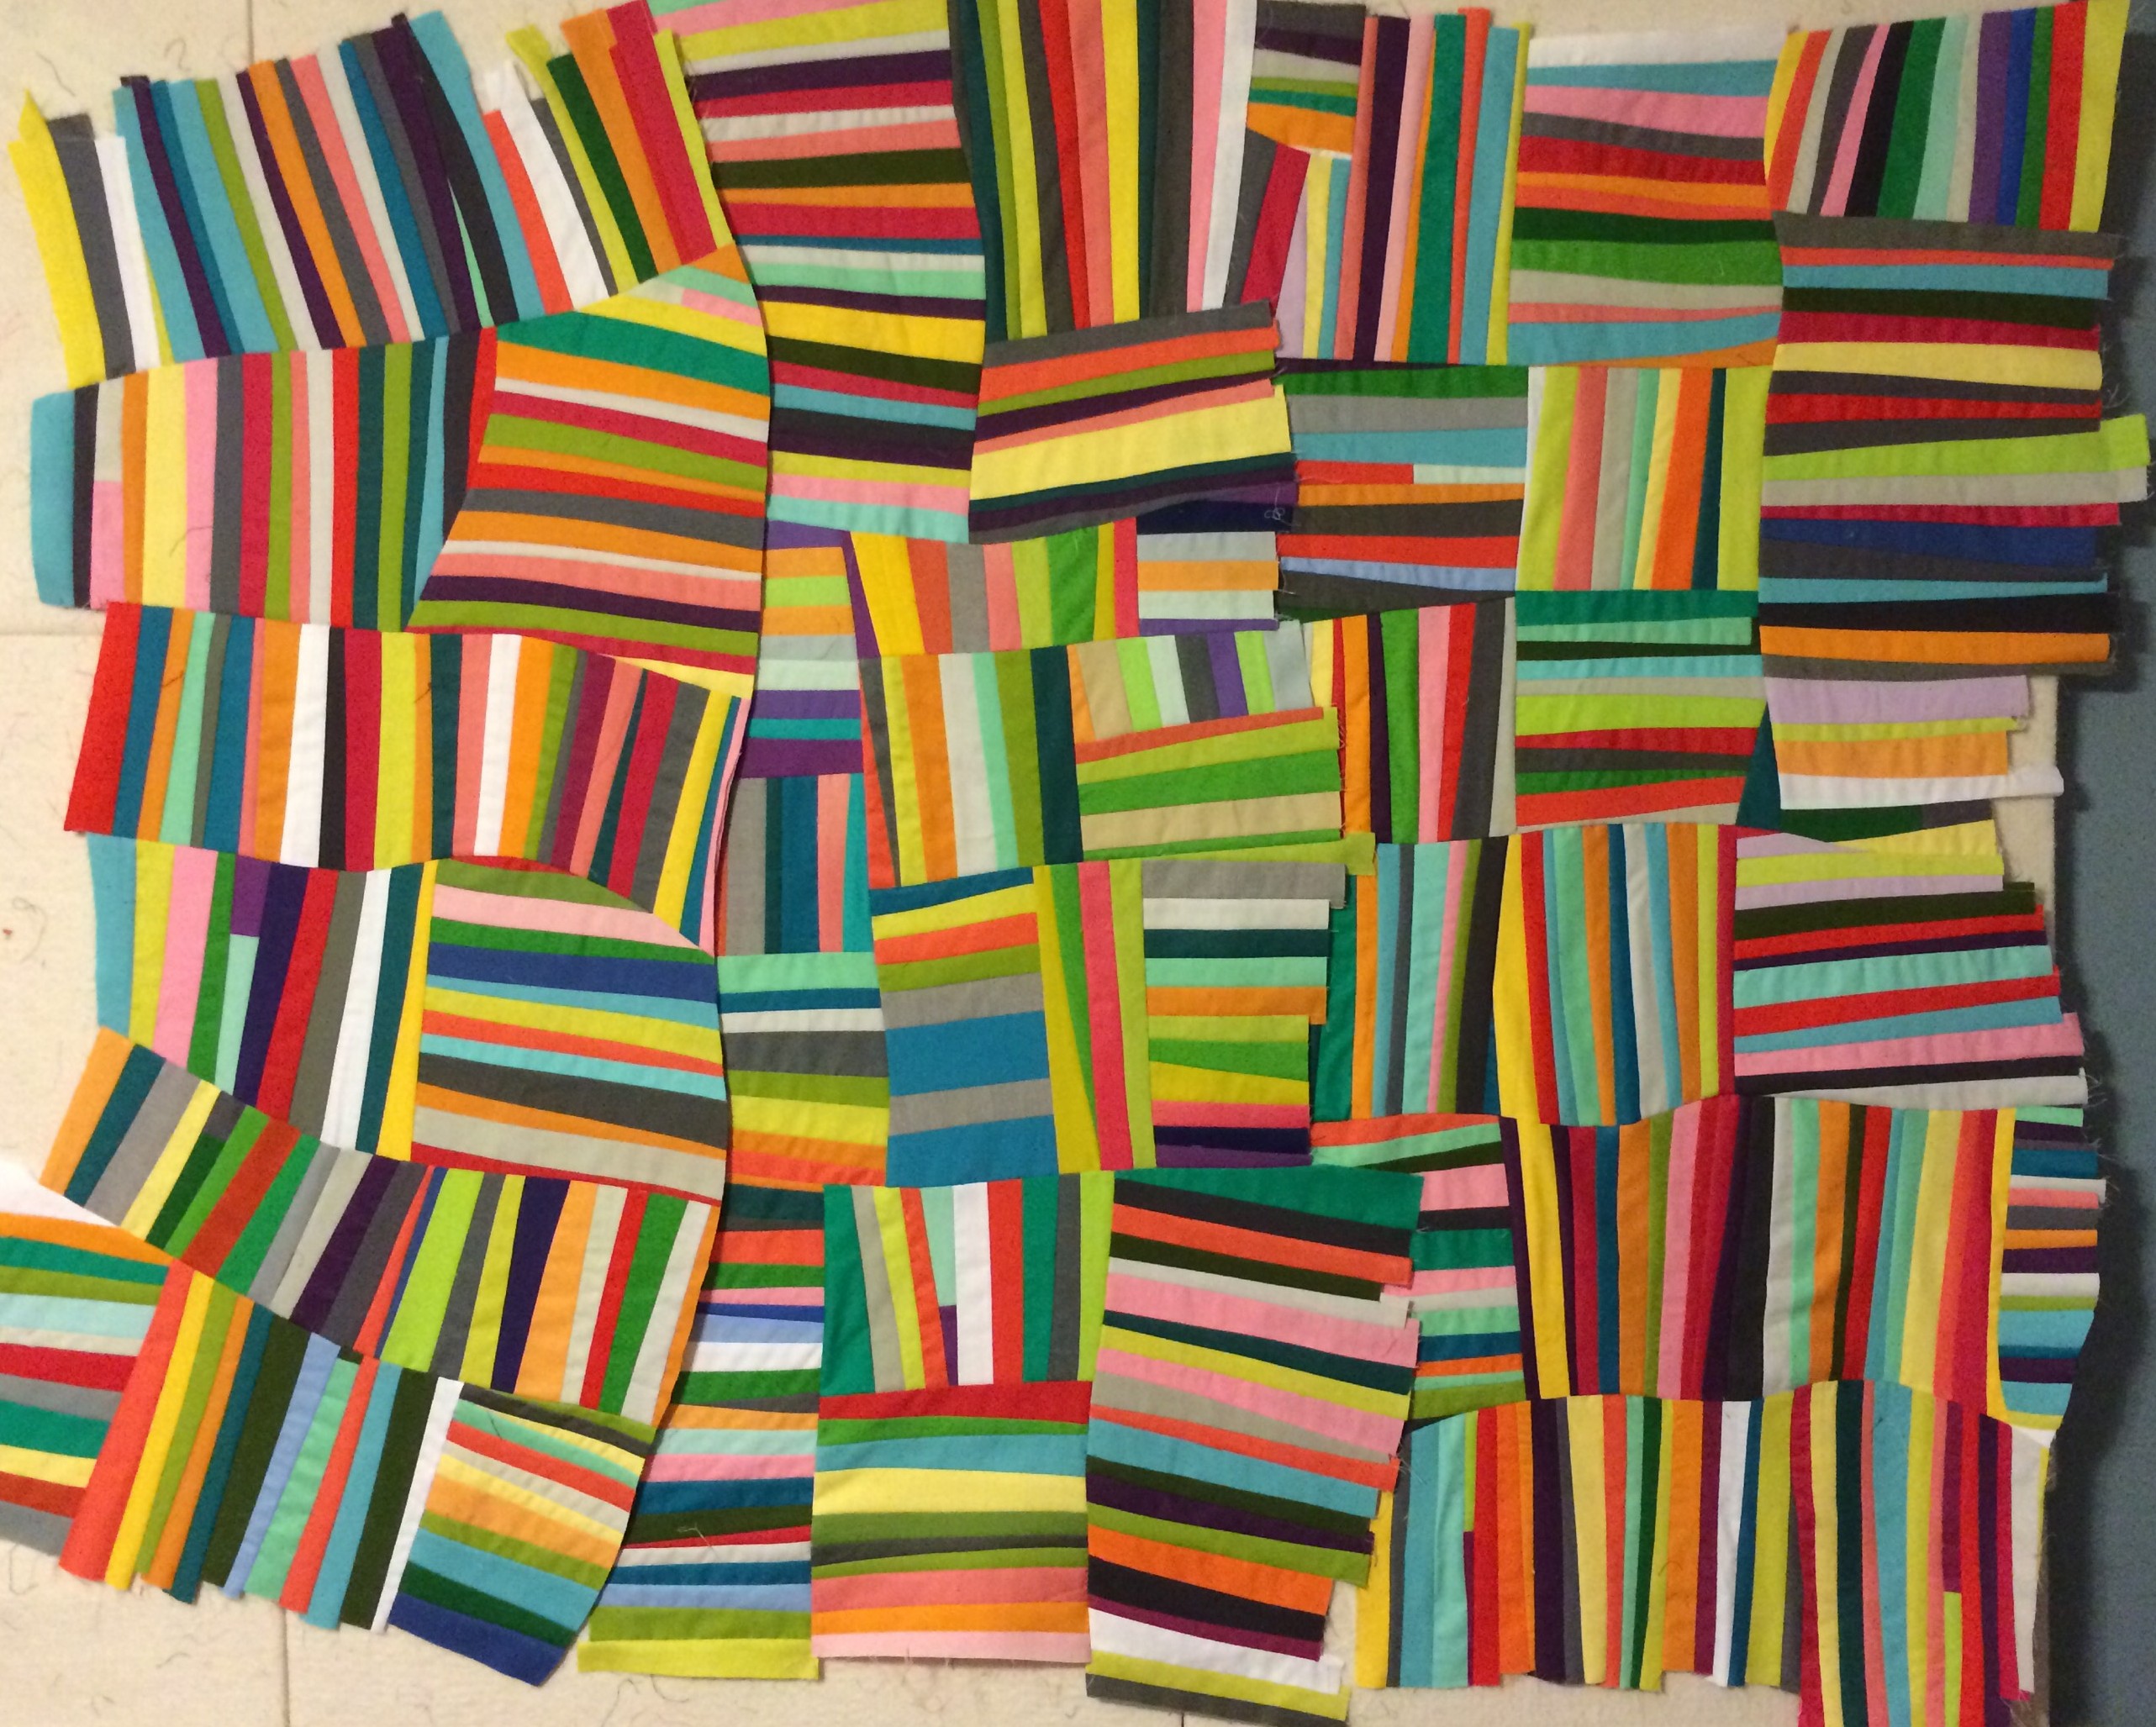
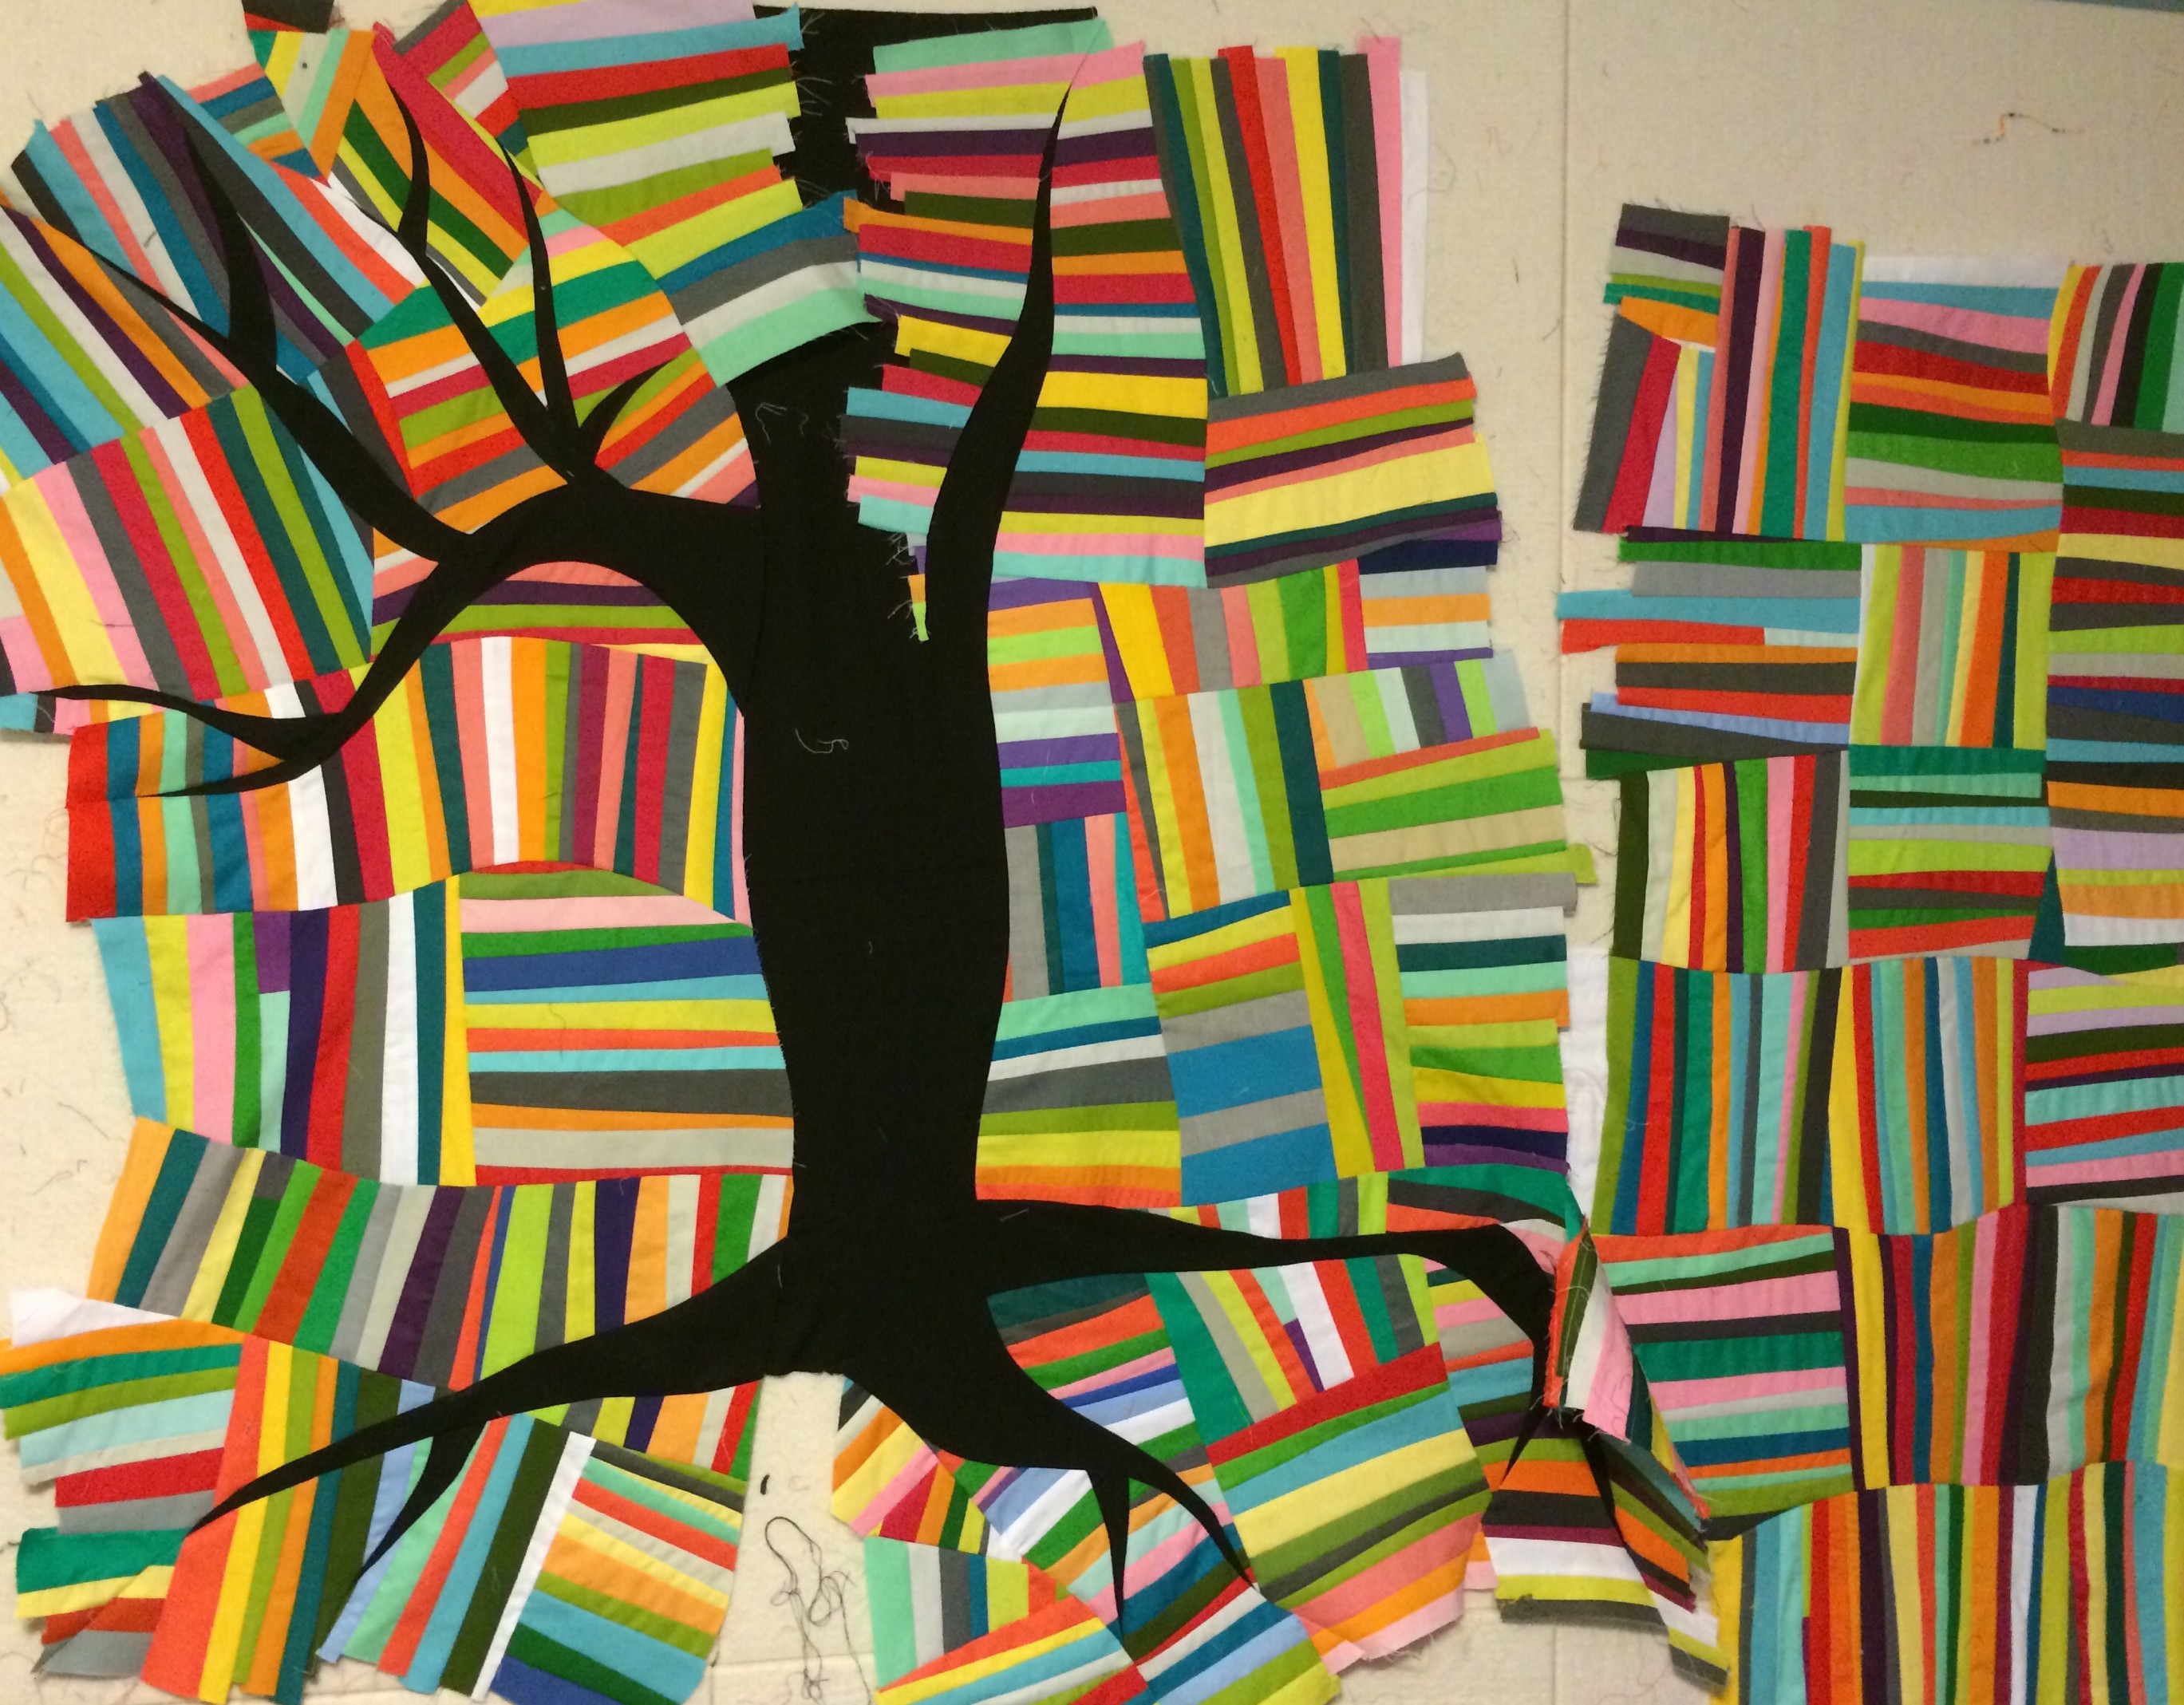
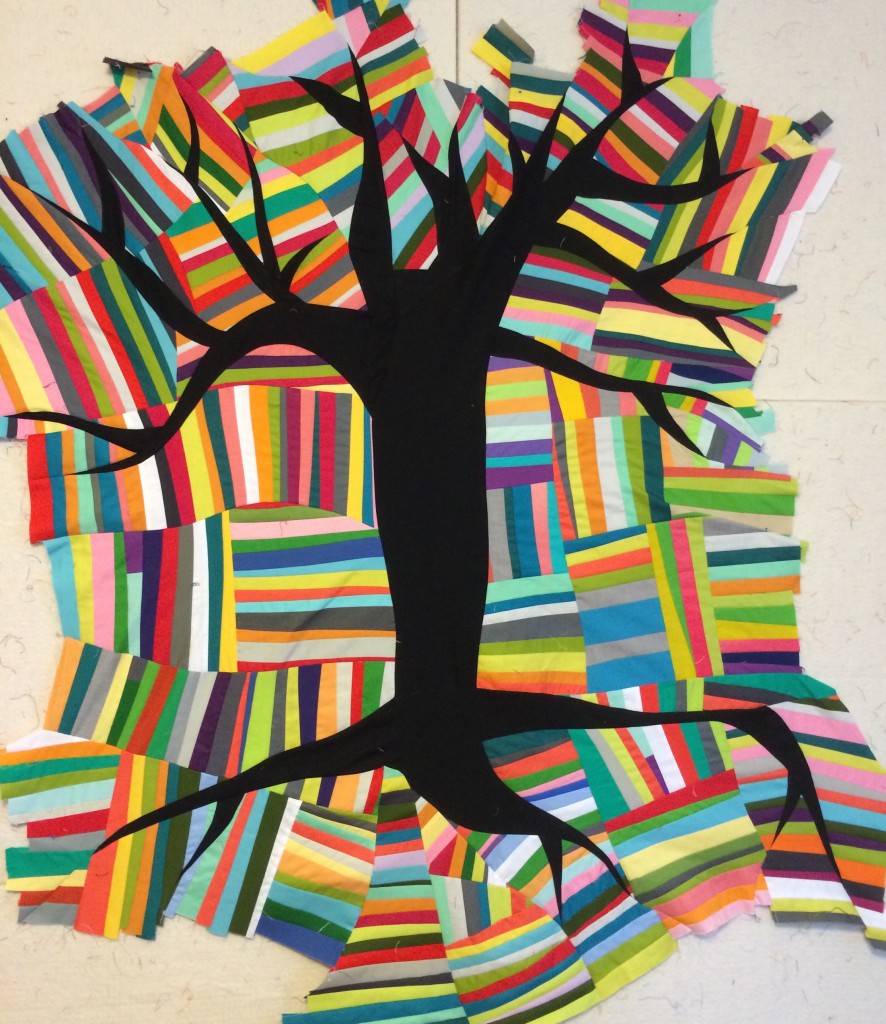
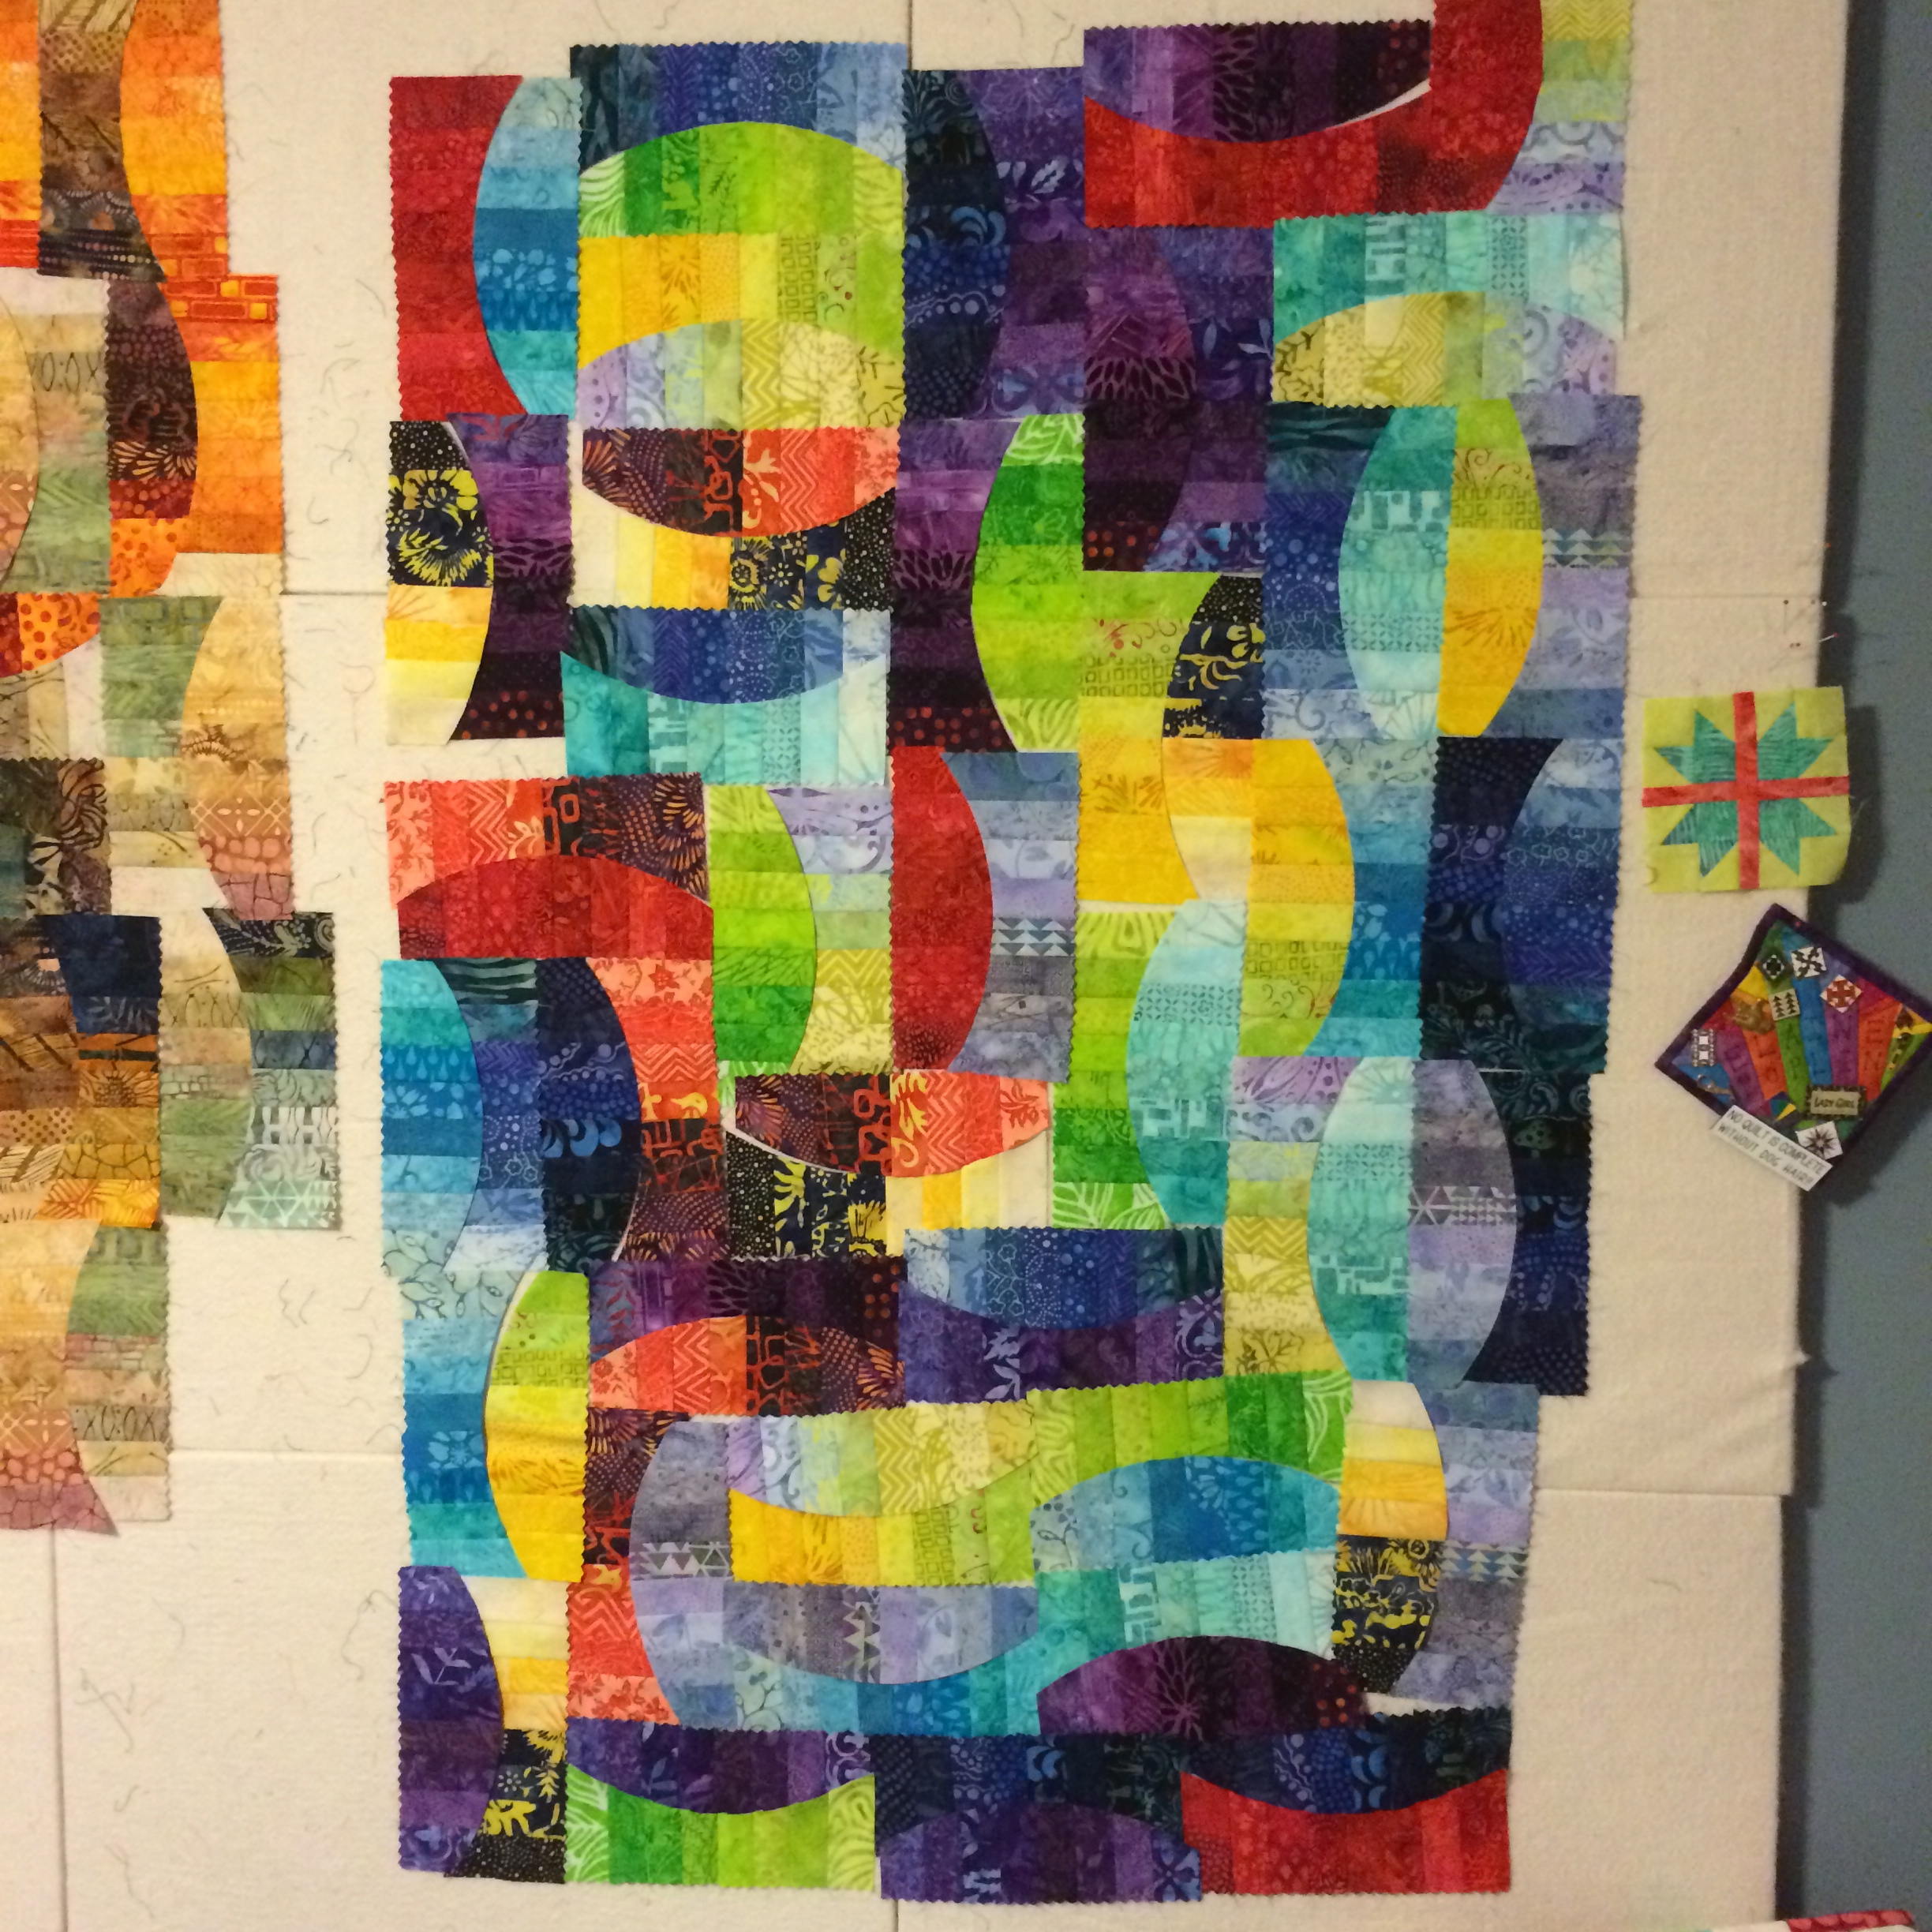
After I finished piecing Queen of Fibonacci Squared, I cut up all of the leftovers from that quilt into wide strips for improv piecing, and chain pieced large sections into more slabs. It was so much fun! Then I tried to figure out how to put them all together into something usable, so I assembled the slabs into three vertical pieces about 18″ wide each. The next day, I decided to try to slash-and-insert a free-form tree with roots between the left two slabs. My intention was to have the tree be off-center, and the final third would be added to the right side after the tree was assembled.

IMG_9305.JPG       I discovered that this process is a lot more complicated than I had anticipated, and it also devours fabric as gaps have to be filled in because of how cuts were made and how the inserts change the distribution of fabrics. I also had to adjust again and again to make sure that the fabrics would lie flat after pressing, which isn’t a simple task when you’re improv-piecing curves. I kept having to make more slabs from scraps to compensate for these issues, but ultimately I ran out of the solid scraps.

IMG_9307.JPG  


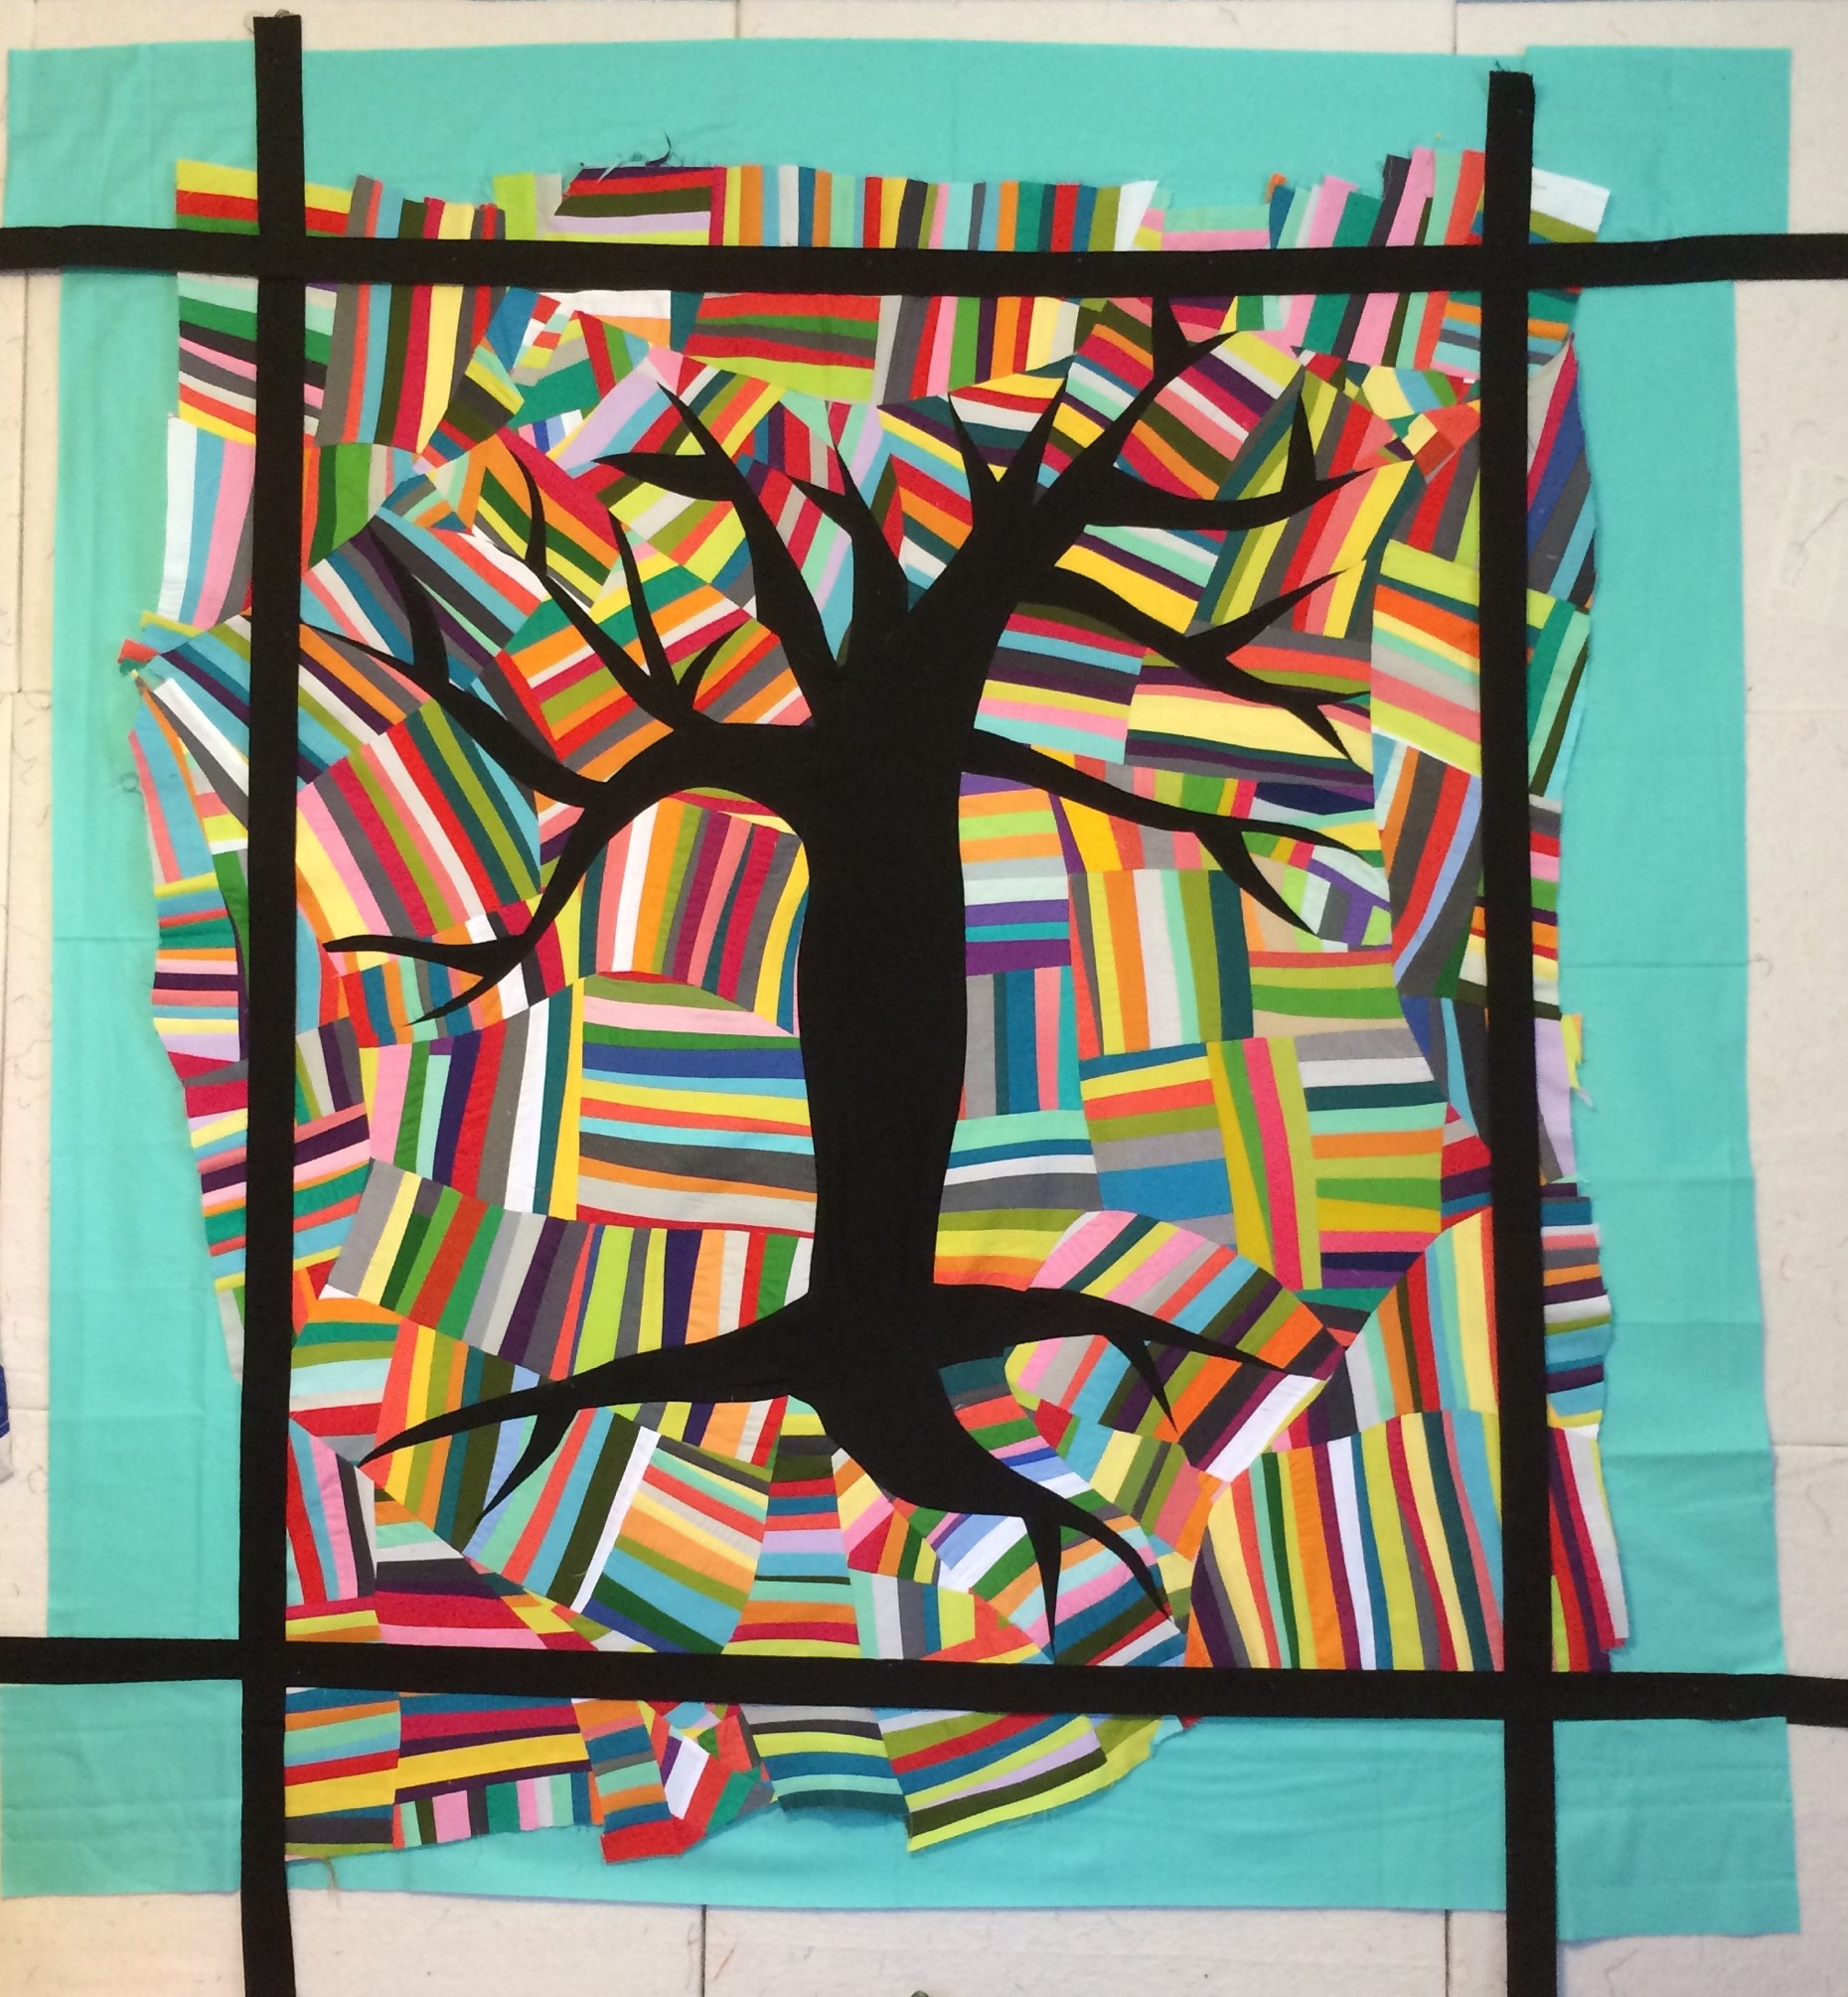
I finally caved in and started incorporating the right third of fabric into the spaces needed to surround the tree.

IMG_9312.JPG

And then I had the whole tree together. There were a few branches that would require some applique to flesh them out, but the piecing part of the tree was done.

IMG_9315.JPG

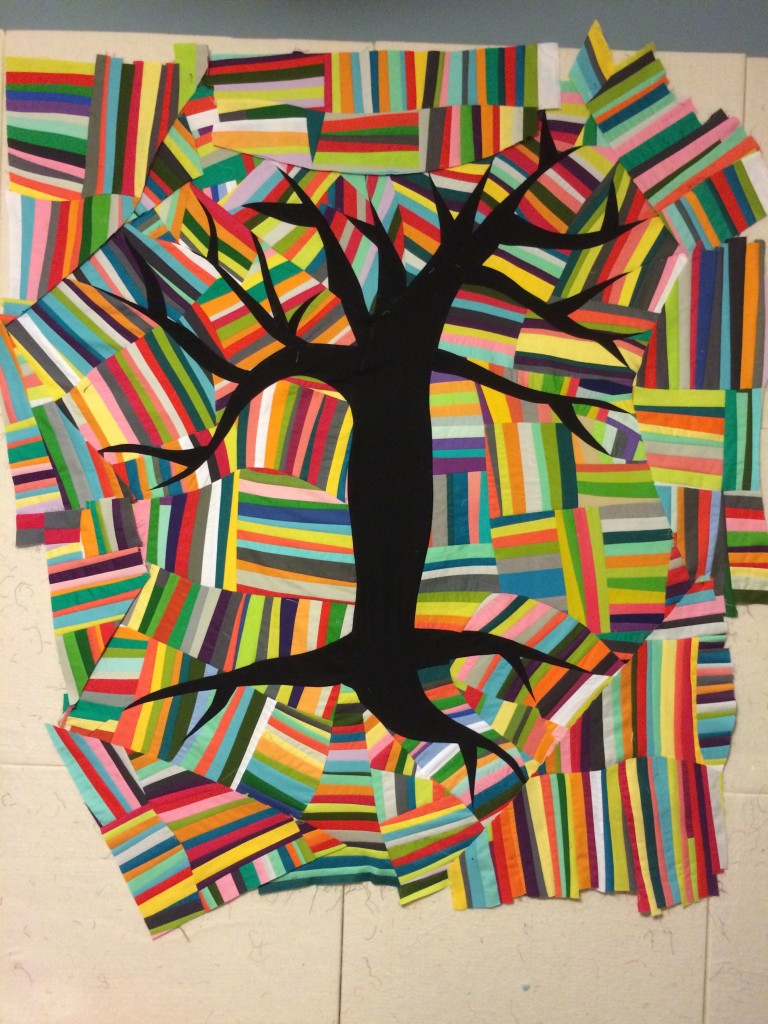
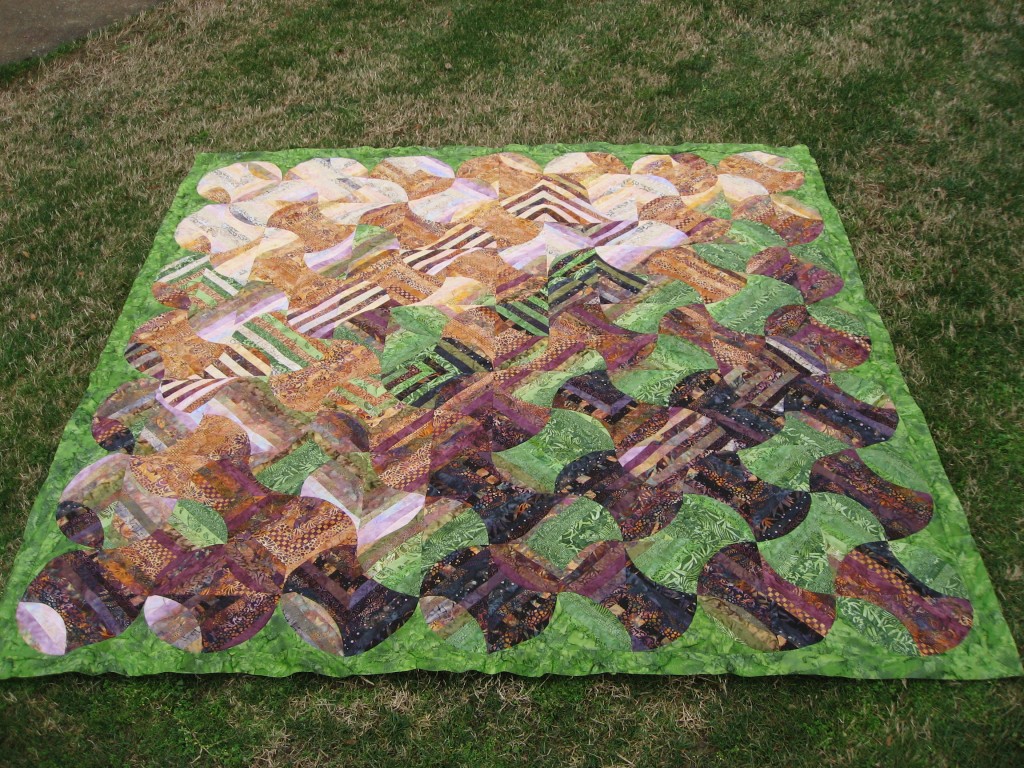
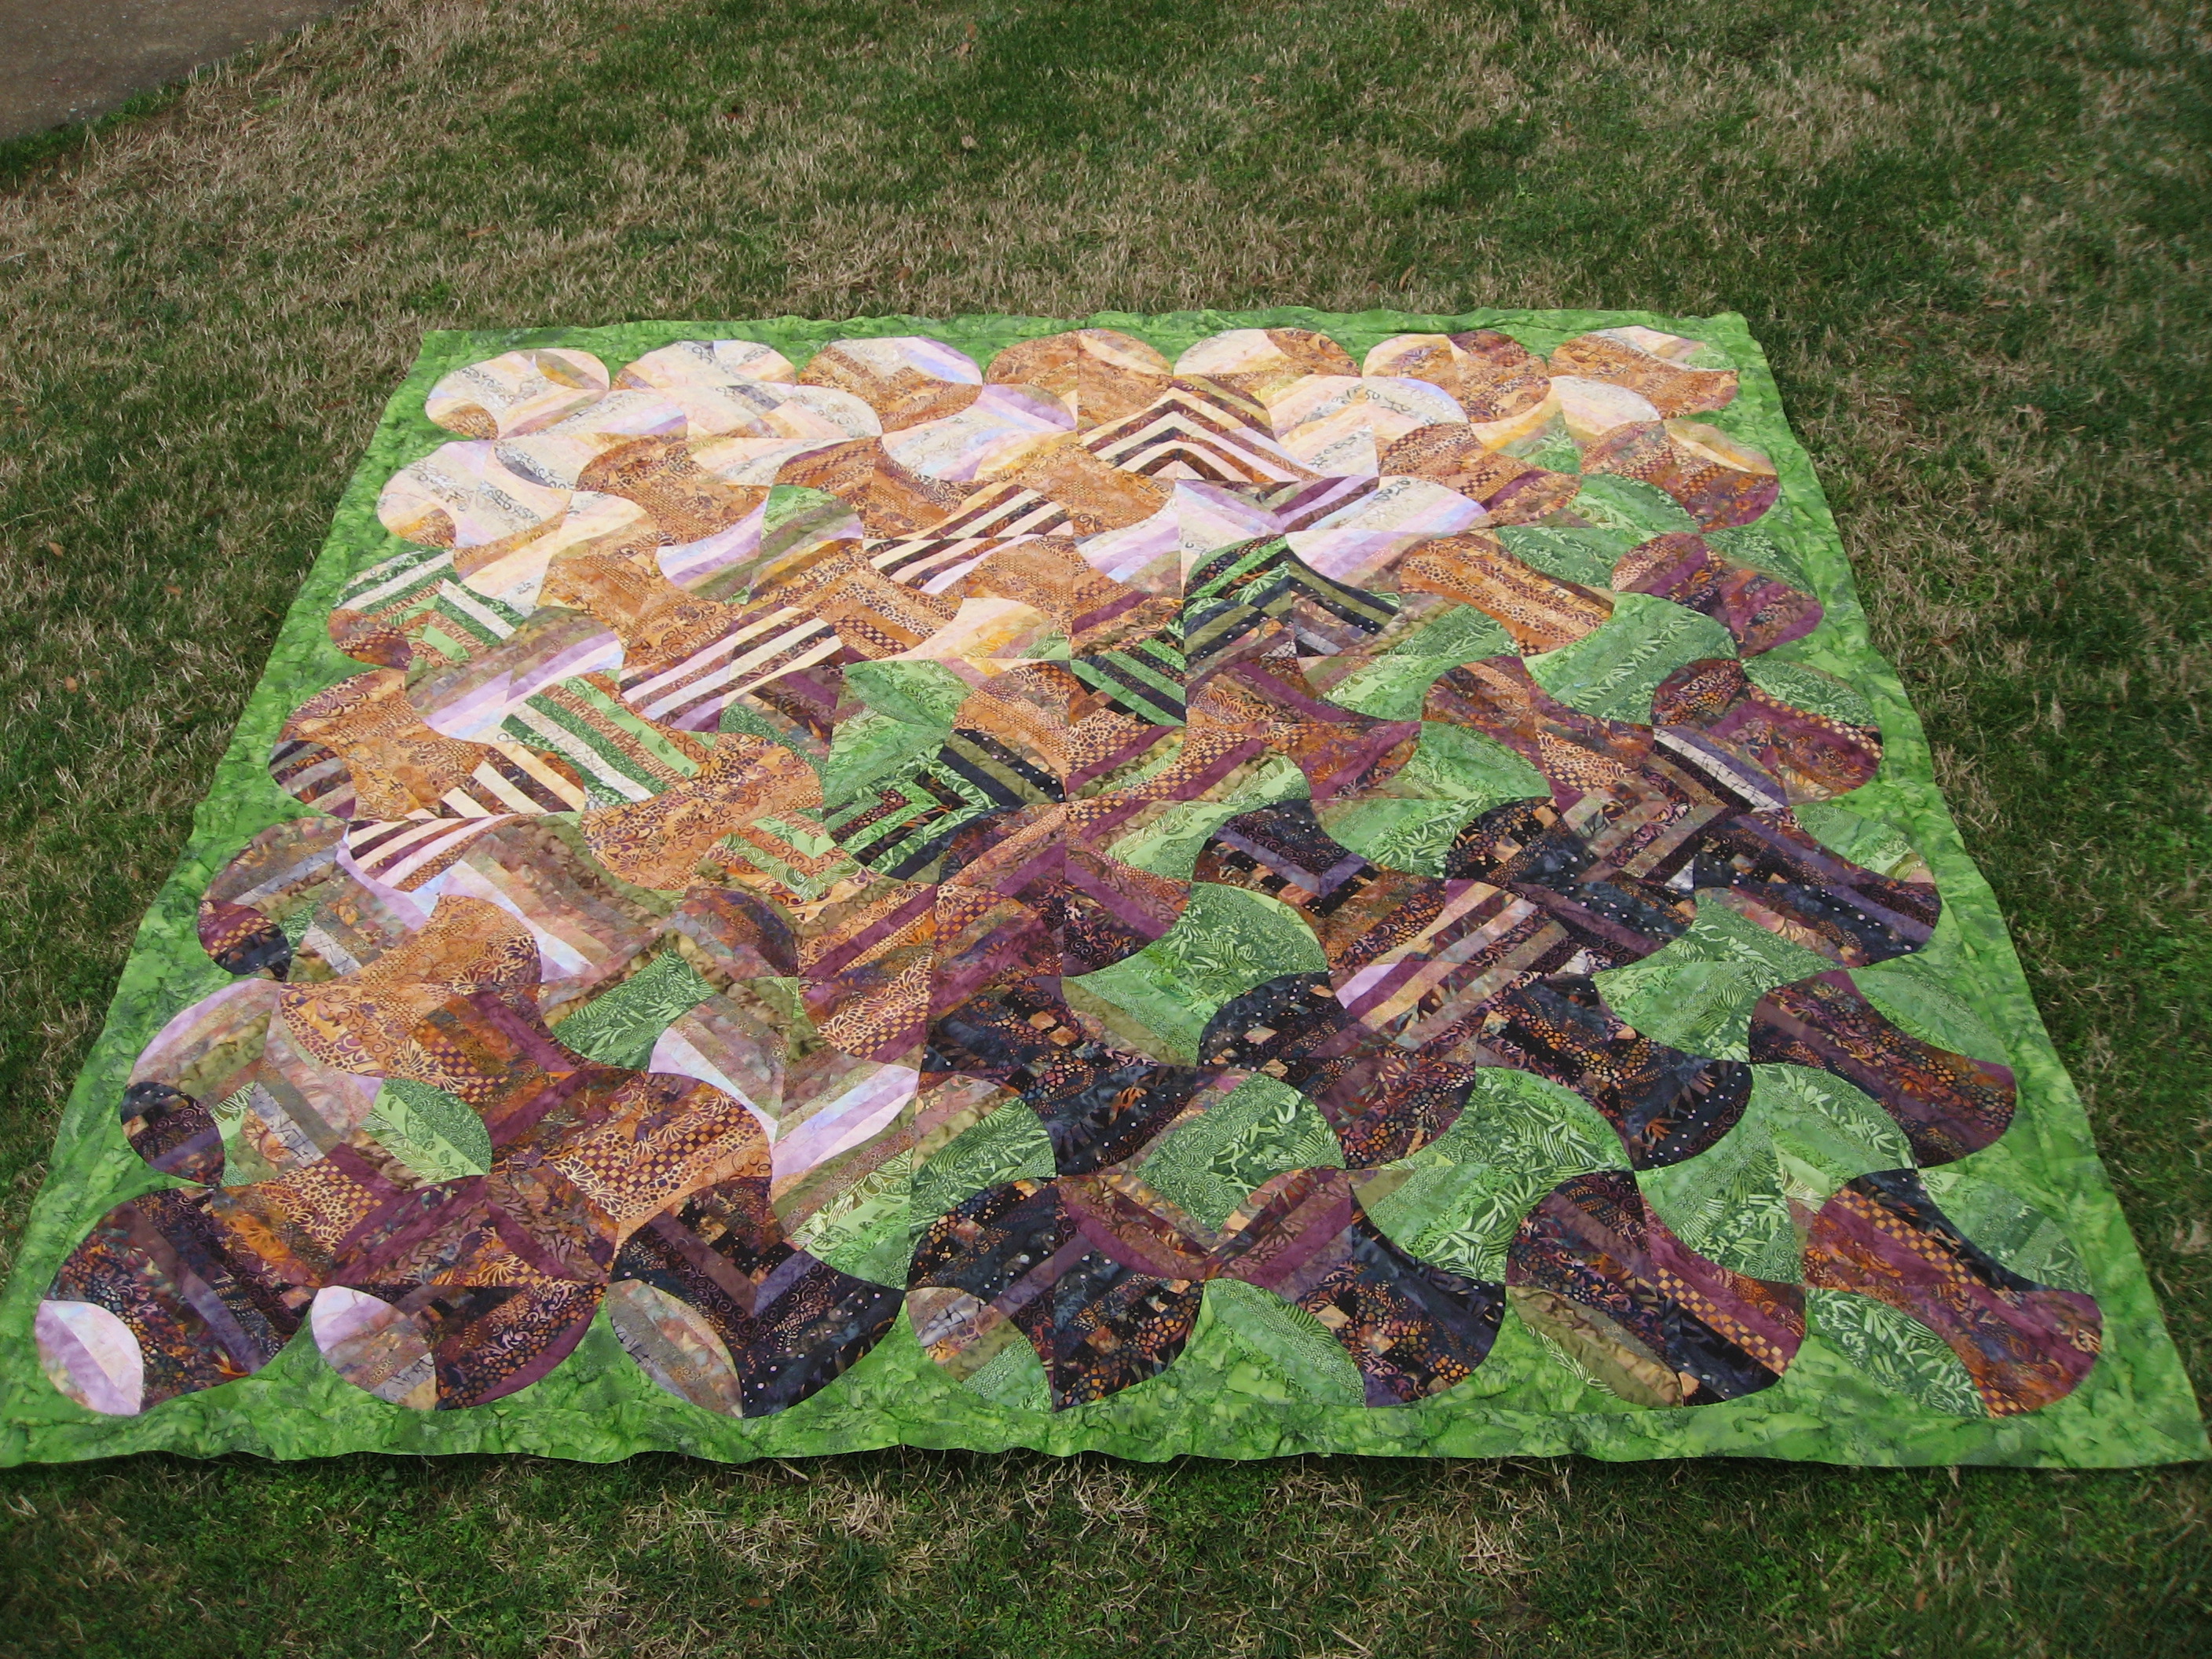
I loved the ragged borders and didn’t want to lose that, but I wanted to enclose the tree to settle some of the chaos, and I wanted to have a solid border to give the eye somewhere to rest. So I cut some strips of solid black and found an aqua border that I loved after determining that green and red would blend too much.


IMG_9324.JPG


After an afternoon of challenging sewing (sewing, deciding it wasn’t right, ripping out, trying again), I had the quilt top assembled AND flat on the design wall. Hooray! While the edges were smoothed by the addition of the aqua, it’s still asymmetrical, which I wanted. And the black inner border is almost perfectly rectangular, which is something I had to fight for.

IMG_9325.JPG


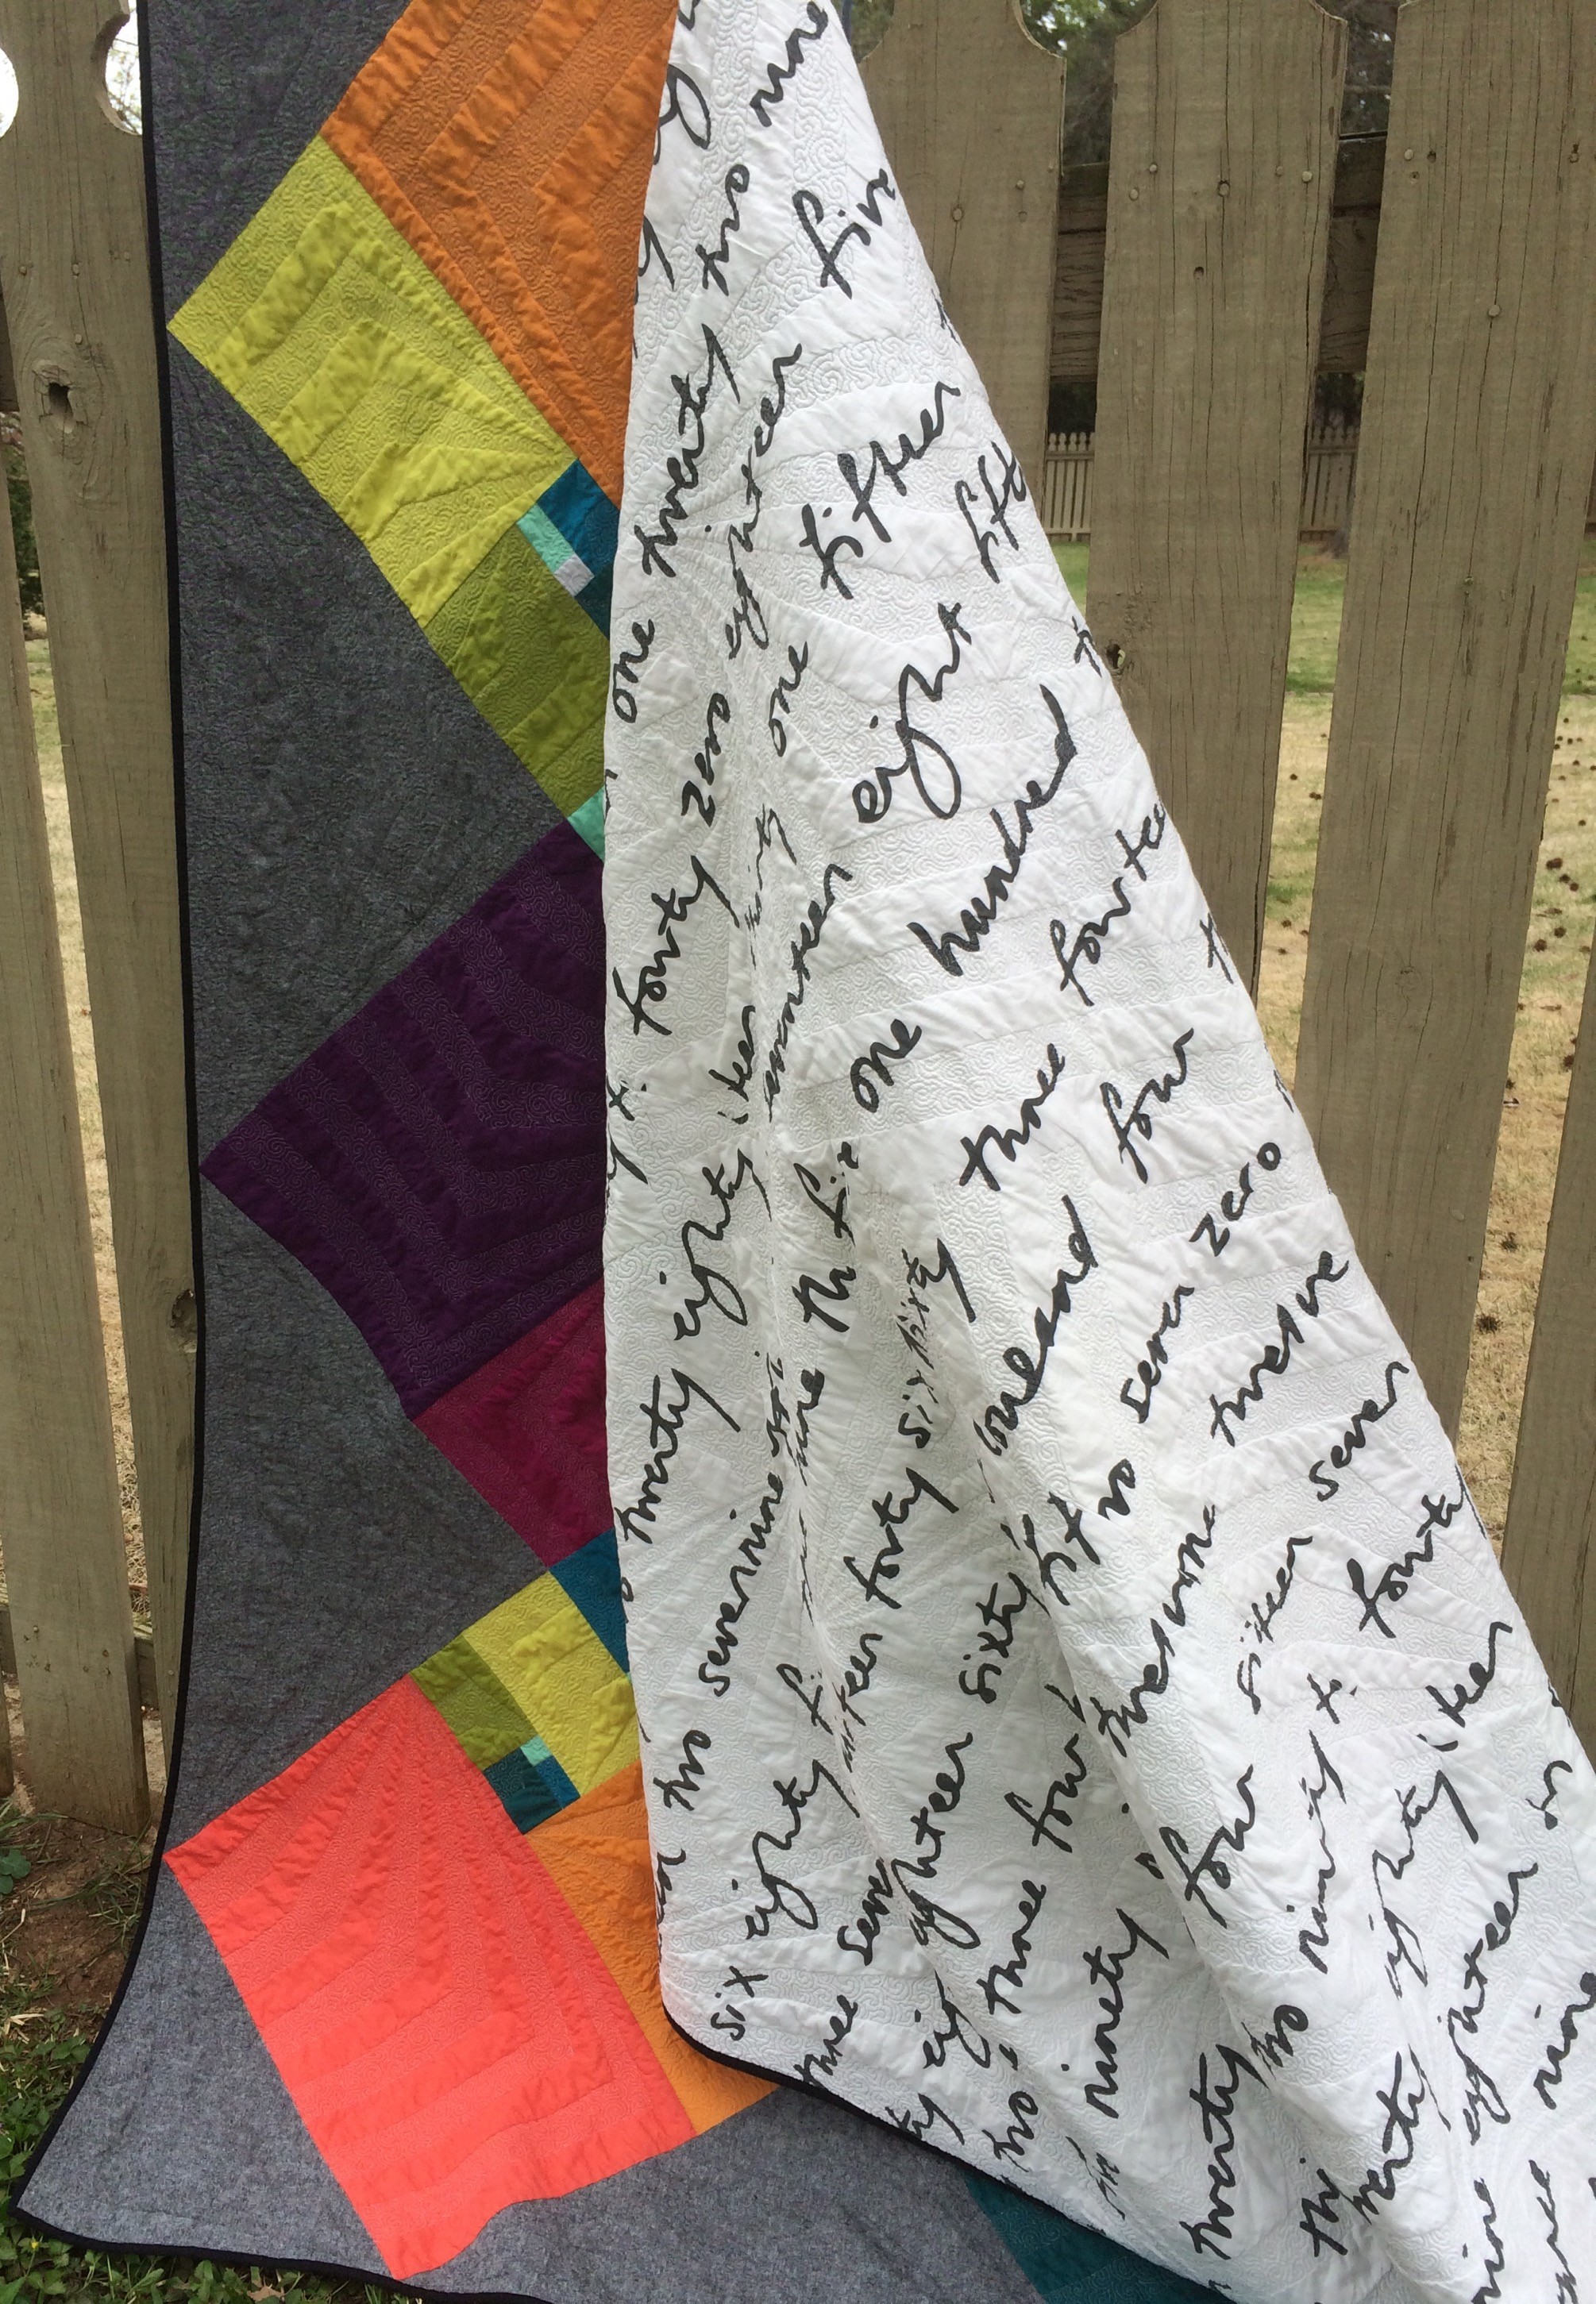
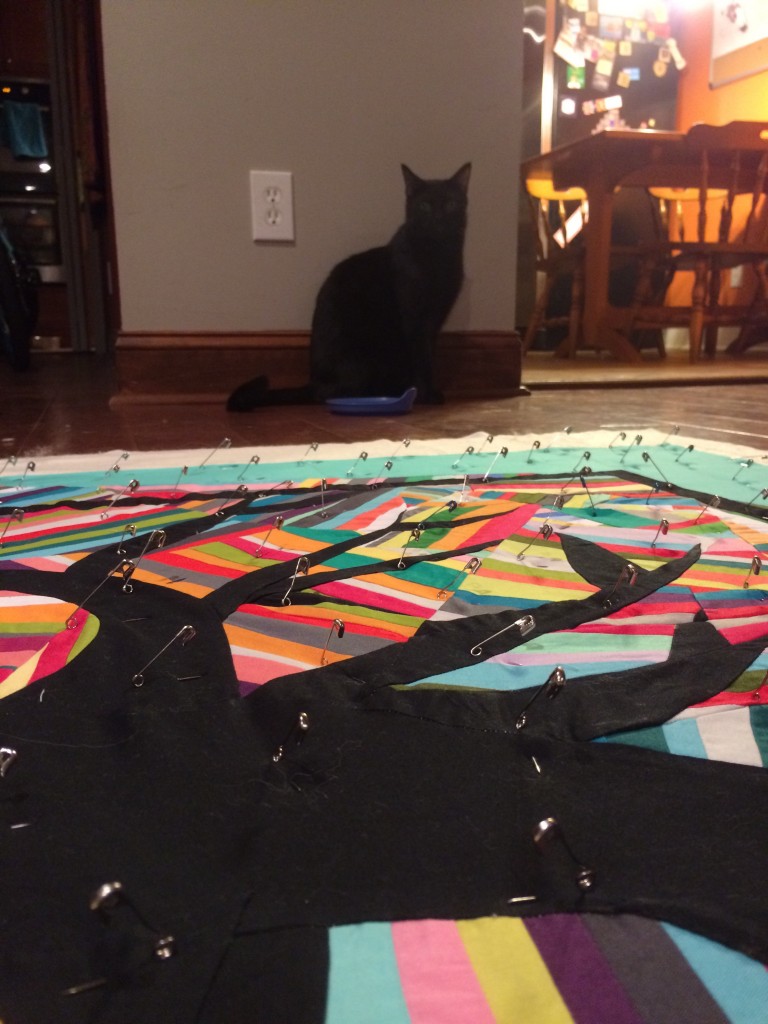
I layered and basted it last weekend. I’m using one layer of cotton batting and one layer of cotton/bamboo batting, and it will be very densely quilted so that there’s a lot of texture. Friday was close at hand for the basting process.

IMG_9366.JPG


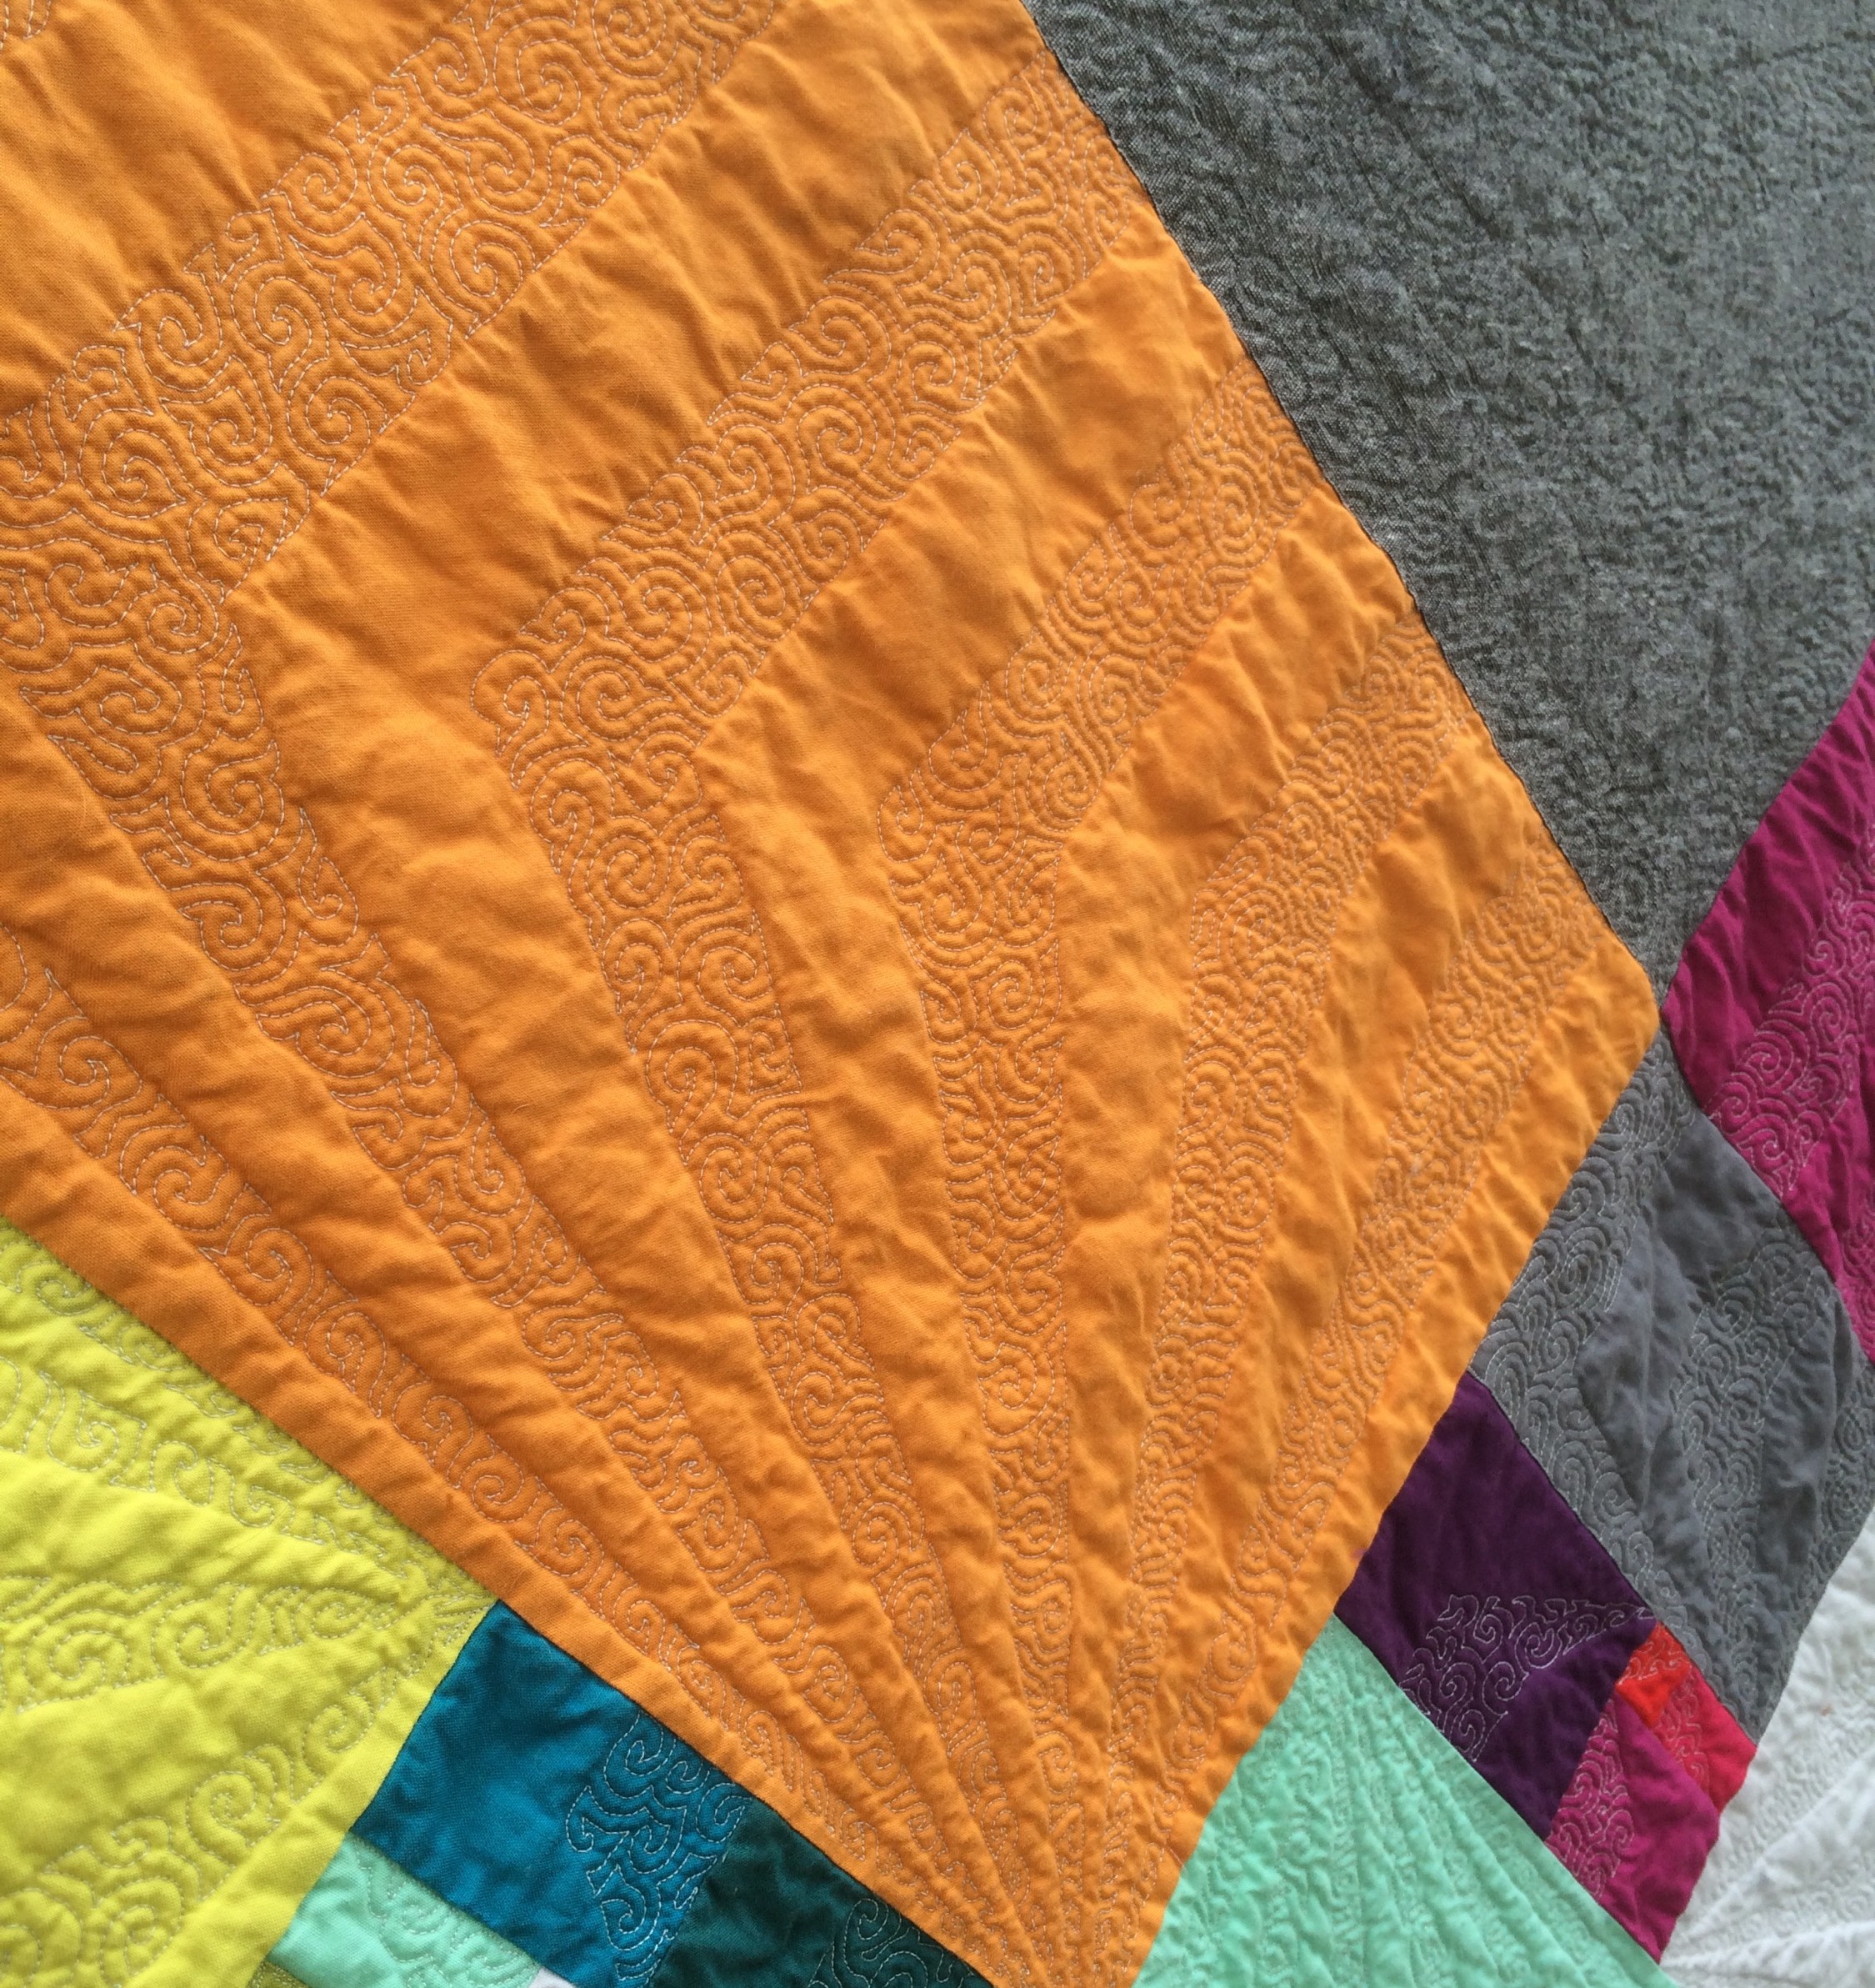
I started quilting organic lines in the background using a variegated gray/green Aurifil thread. I spaced them about 1/2″ apart, because I knew I would be adding more lines between in a different color.

IMG_9400.JPG


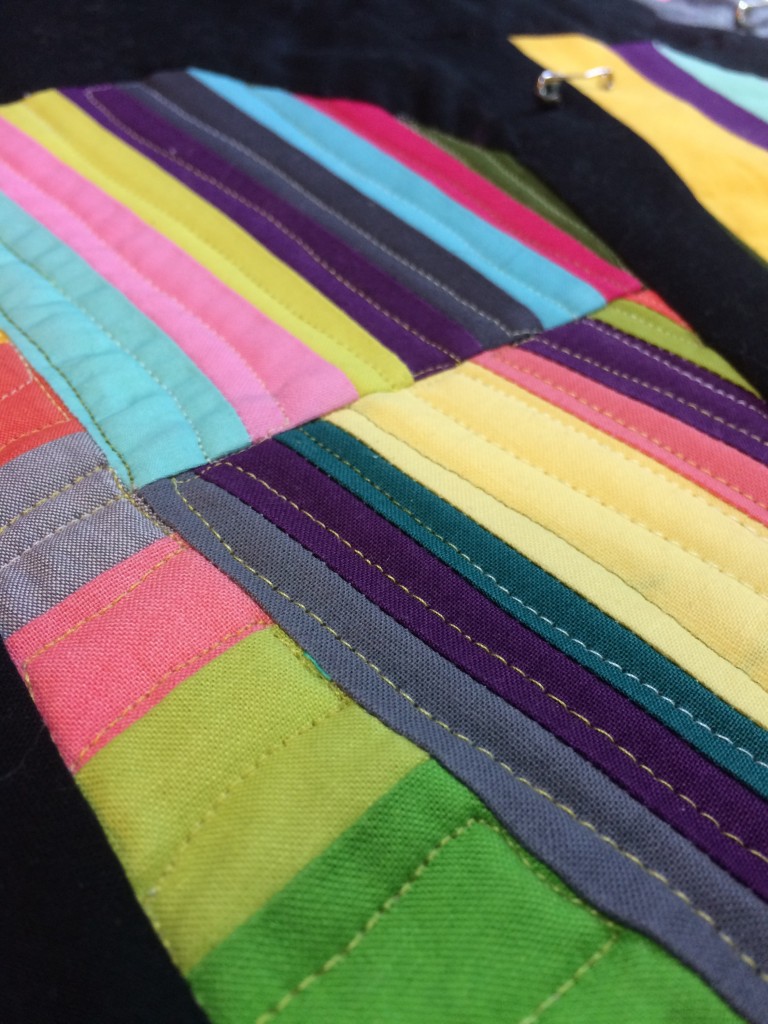
Then I added another variegated Aurifil thread in a cream/orange/rust colorway, and it started to come alive!

IMG_9401.JPG


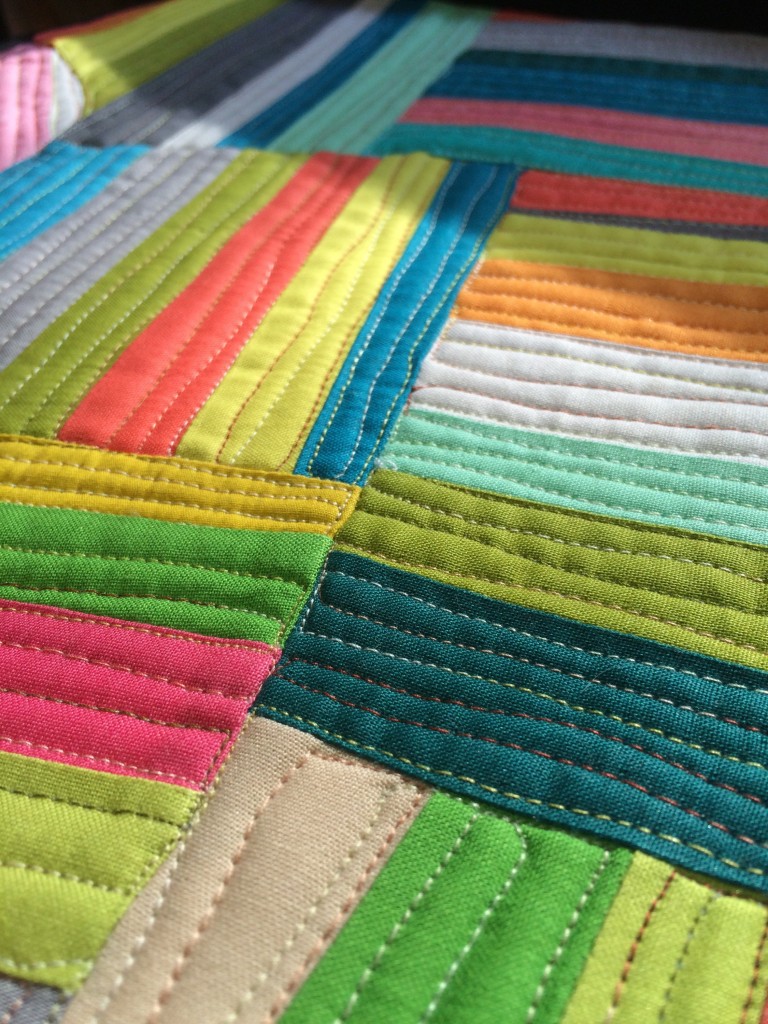
I love the wobbly lines and what they add to the wobbly piecing.


Then Ella informed me that it was time to stop for the day, since the Duke game was about to come on. OK then.

IMG_9403.JPG