So I was doodling in Adobe Illustrator. I started with circles that had diameters of 1″, 2″, 3″, 5″, 8″, and 13″ After playing with placements, I came up with this concept, which created an illusion. I wanted to incorporate flying geese, so I added the 10.5″, 6.5″, 4″, 2.5″ and 1.5″ circles to guide them.

Radiating from the center circle, I divided the 360 degrees into an even number of wedges, and built the geese on those divisions and colored them in — Duke Blue, naturally. Because I didn’t want the wings of the geese to end in the same places, I alternated the direction and placement of the geese so that they’d “float” and assembly would be easier. This created a pretty spectacular illusion, even in the monochromatic color scheme.
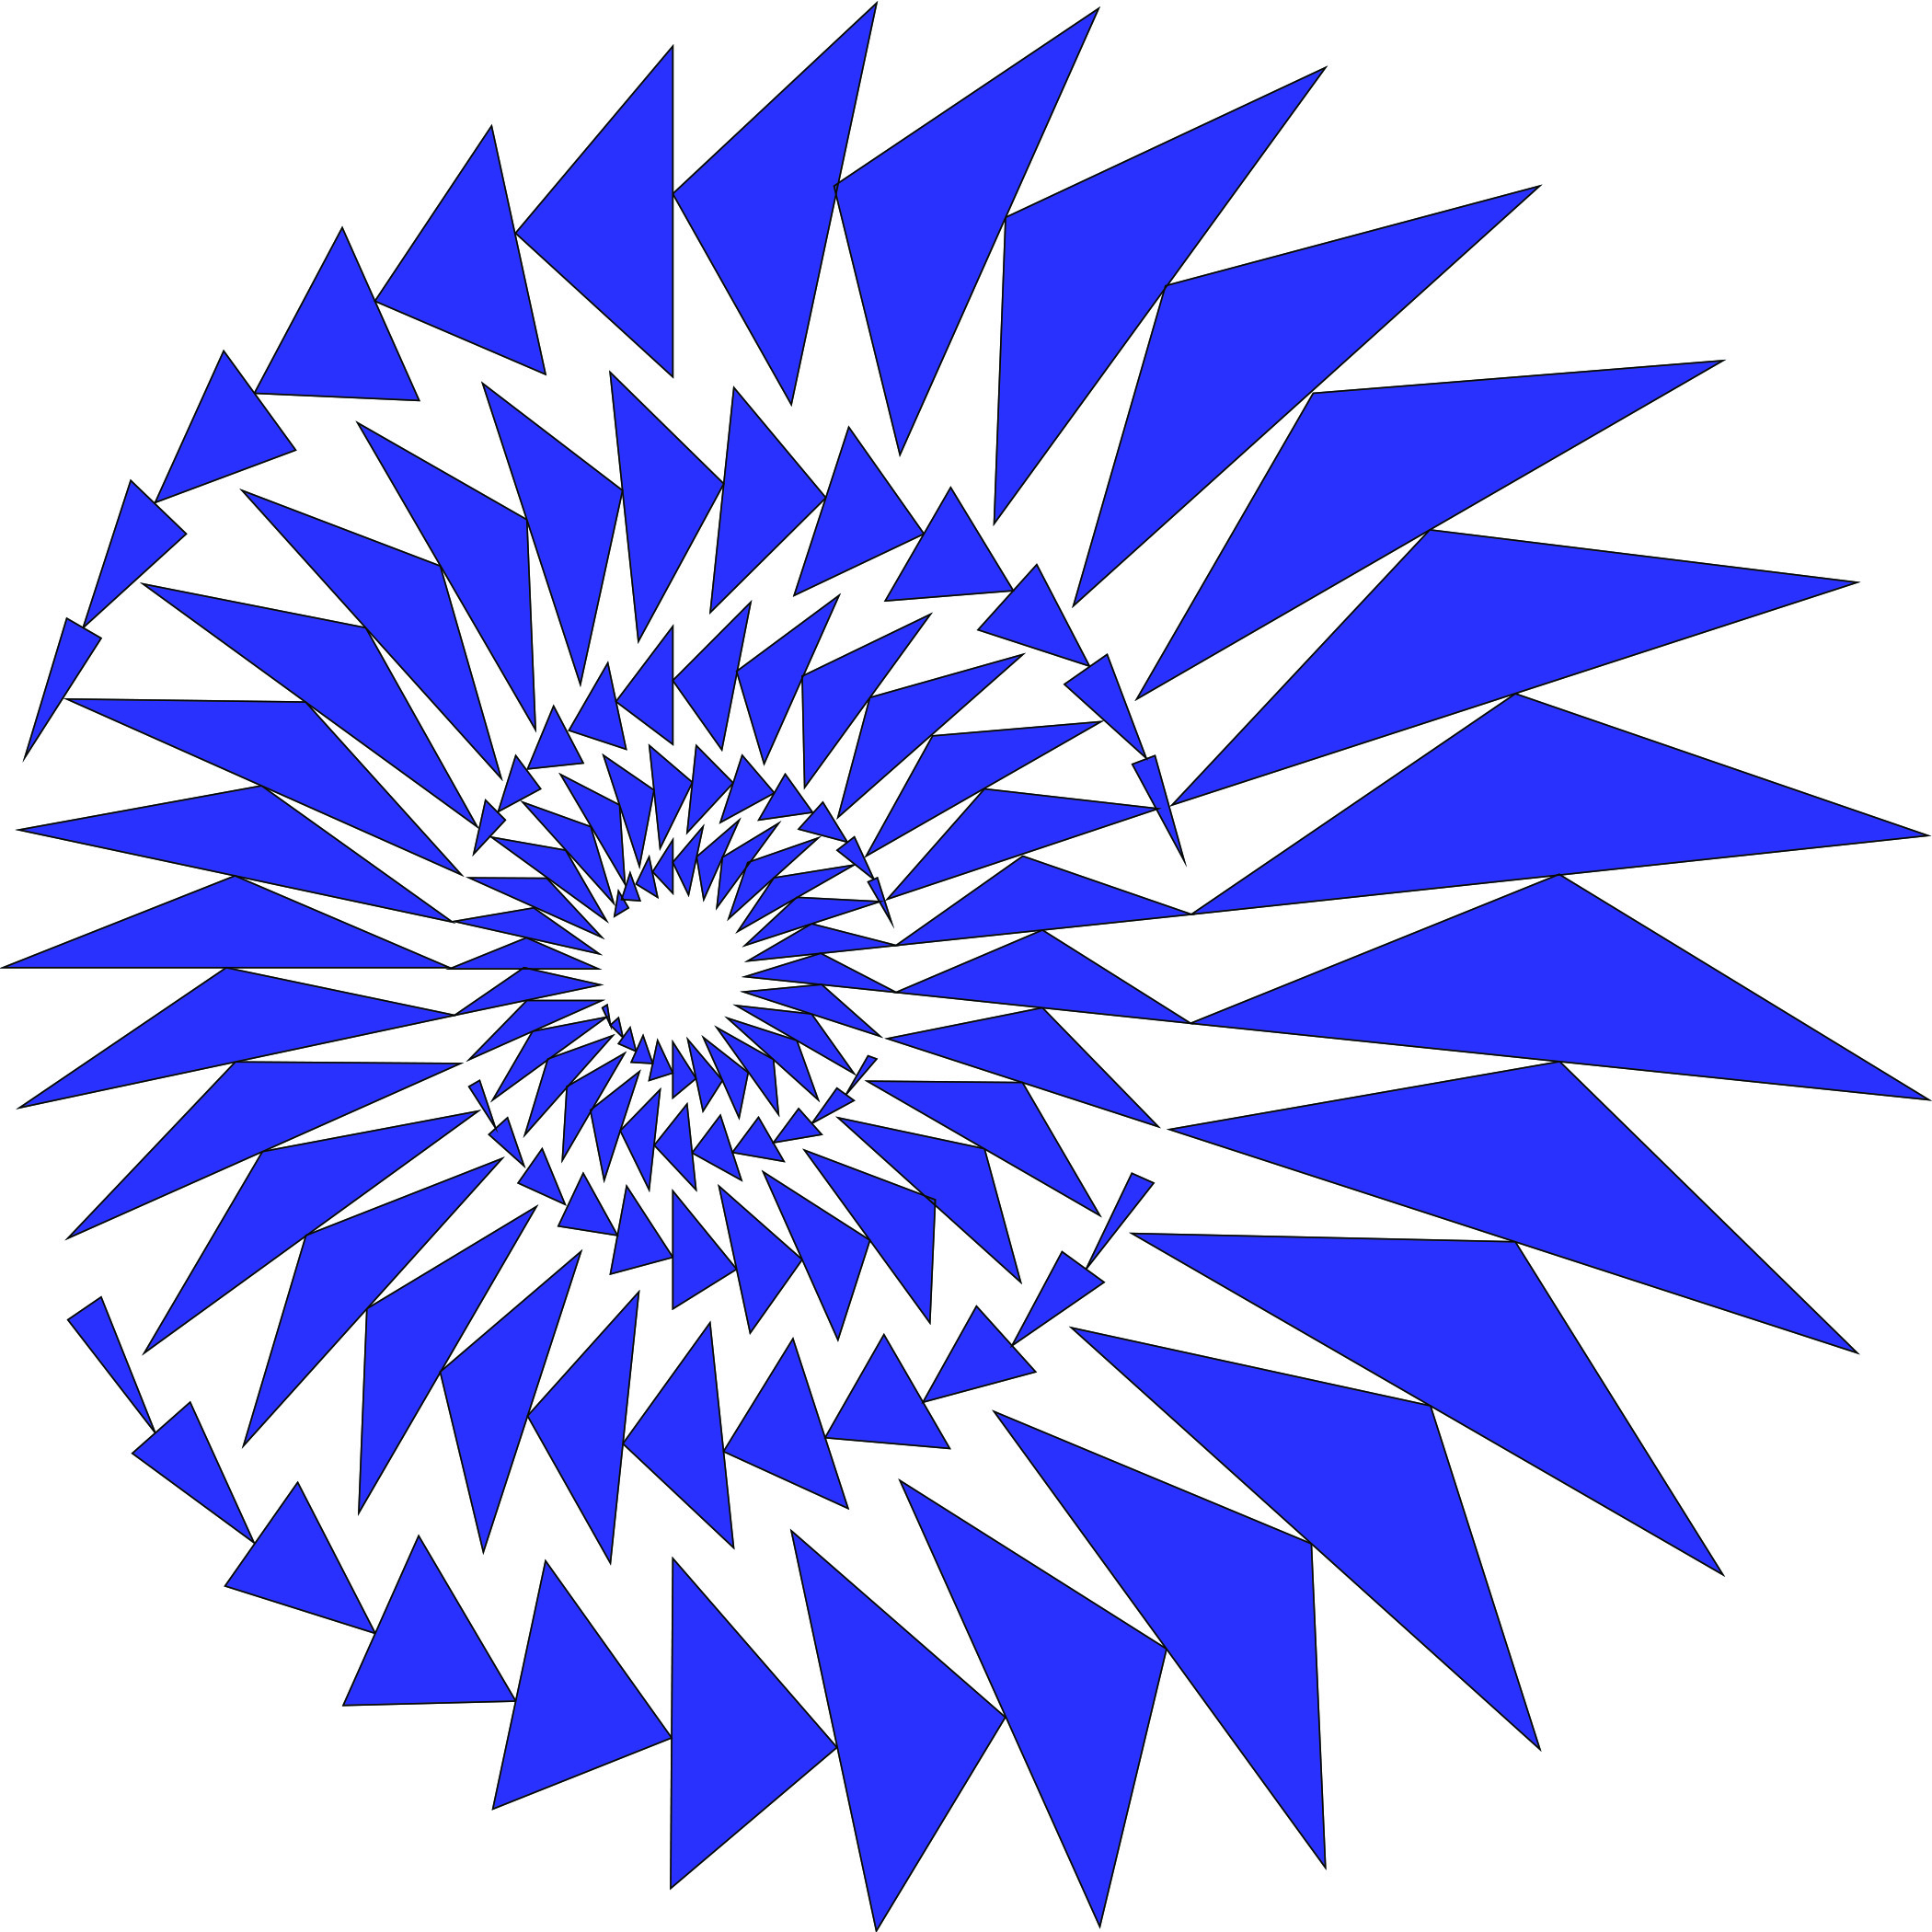
Then I sat down with my Prismacolor pencils and played (it’s flipped from the monochromatic version because my original design had the geese flying down on the outside ring, but I ultimately changed my mind about that).

Yes. I think so. I sent the foundations to my local copy shop, and they enlarged them for me on a large format printer. The biggest circle is about 37.5″ in diameter. The empty circle in the middle is 2.5″ in diameter. This makes the geese in the smallest ring really, really tiny. Turns out this was the easiest of the 5 rings to assemble because I wasn’t wrestling with a large foundation under the machine over and over. I didn’t want to cut any of them apart because I was concerned about the accuracy of trying to reassemble the rings after they were finished.
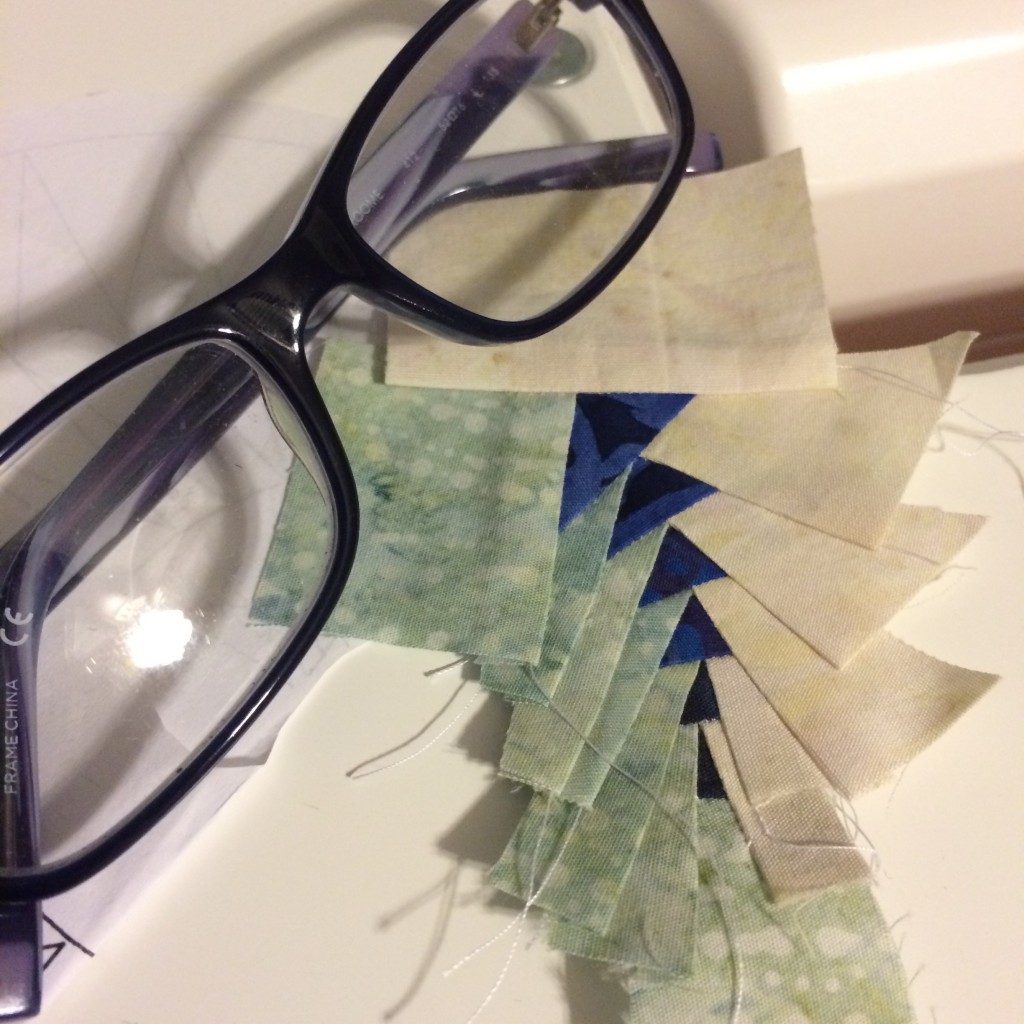
Each ring has 25 geese in it (except the biggest ring has 26, since the smallest piece isn’t microscopic), so each one had over 75 pieces of fabric. The process took a while.

The big blue ring was the hardest to do, by far. I put the green center in as a placeholder just so it wouldn’t be white, until I could get the red rings done and make a final decision about what color that center should be.
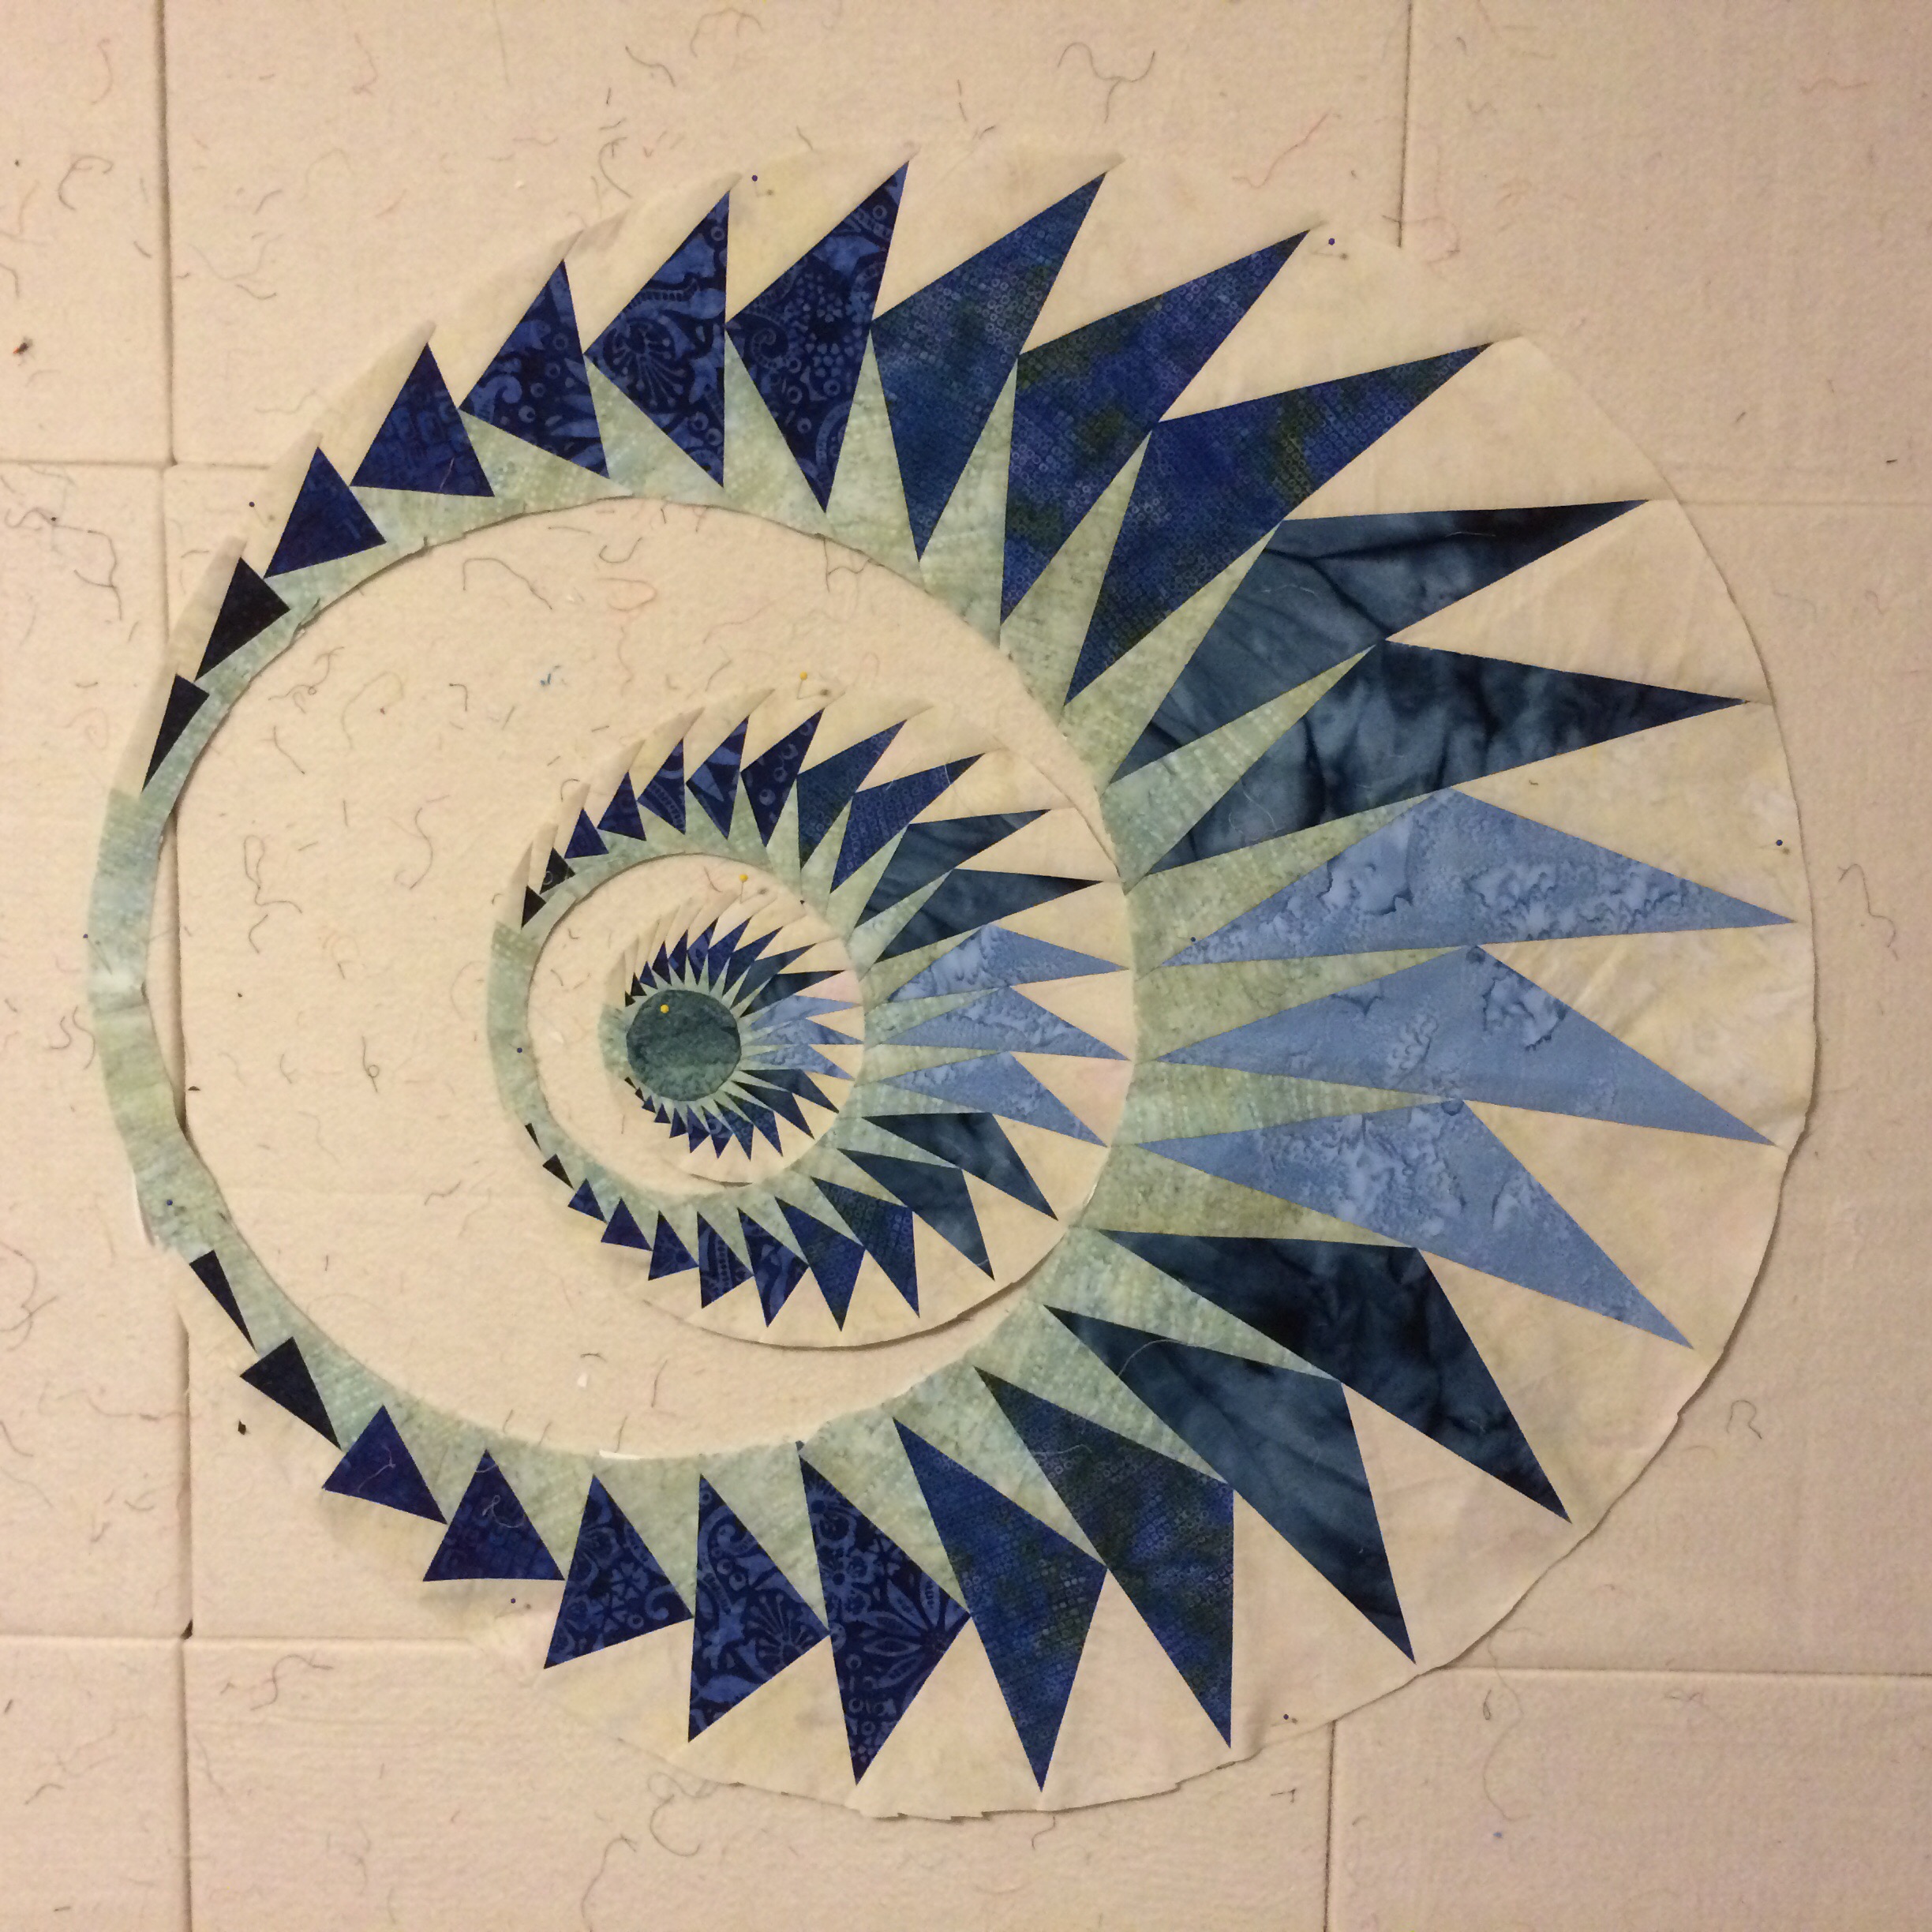
When all of the rings were assembled and the biggest one was stay-stitched around the edge, I reverse-appliqued the rings together from the inside out and then starched the circle almost rigid.
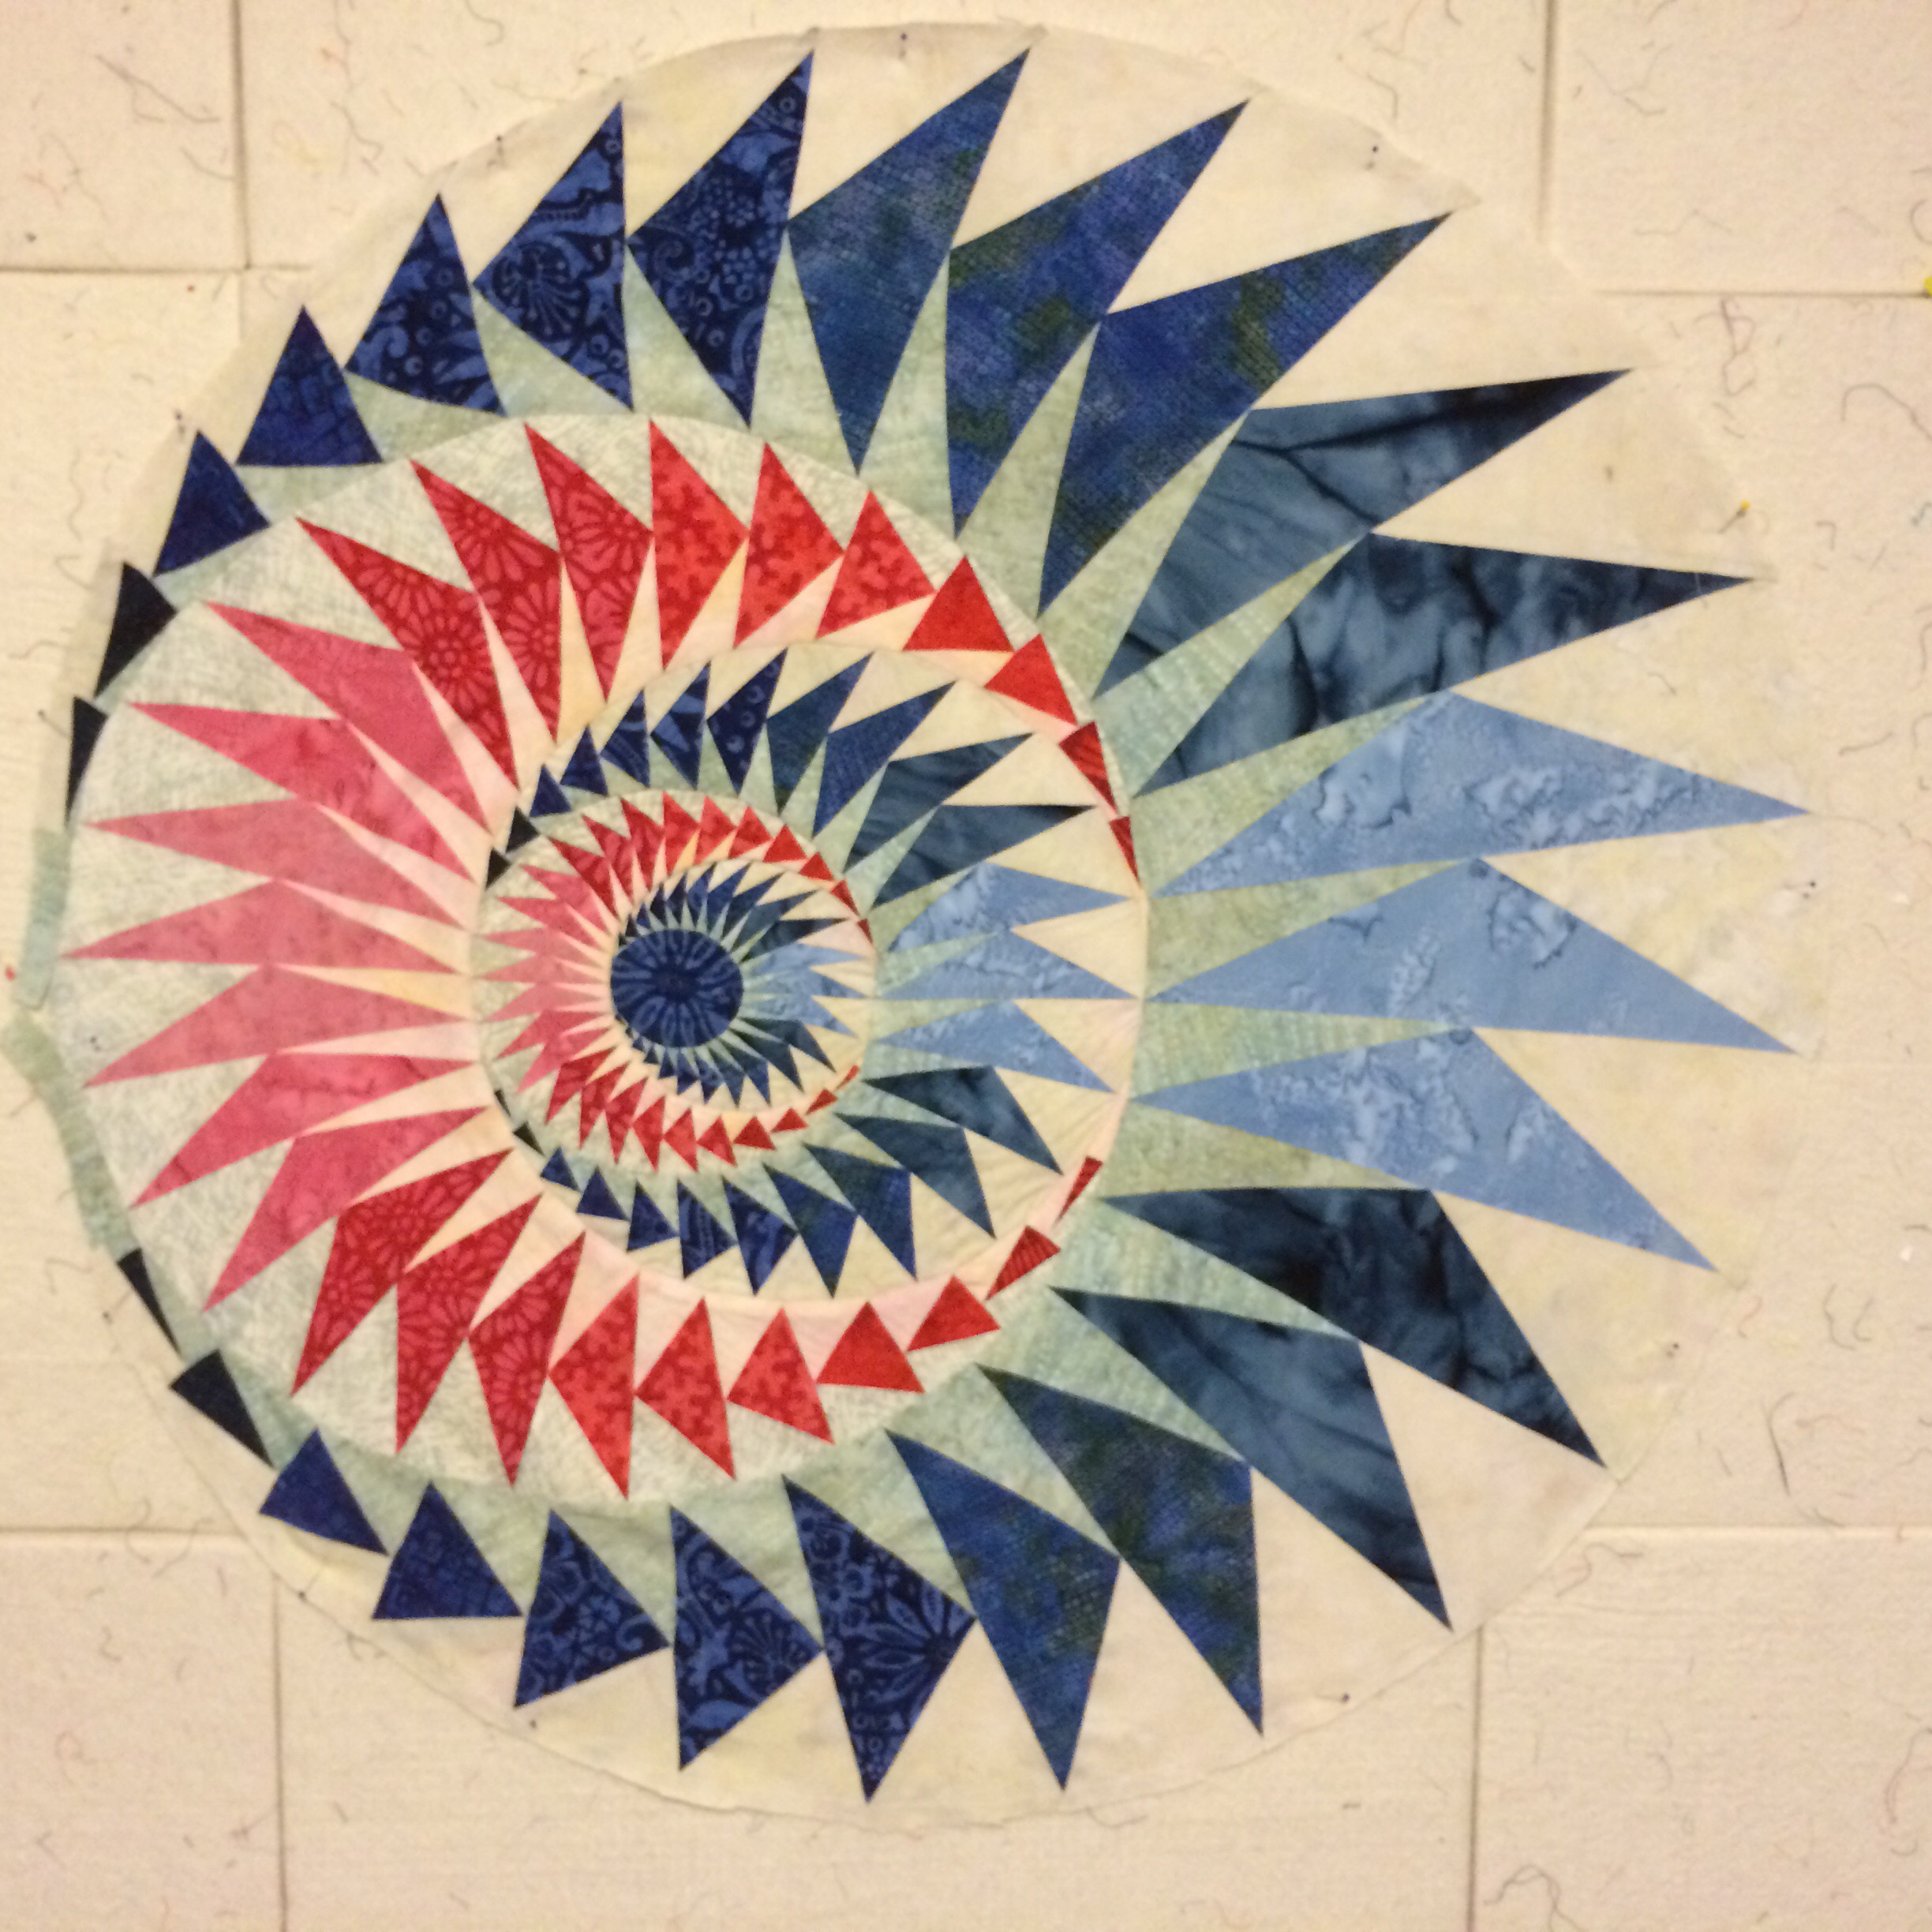
My mom thinks it looks like a dragon’s eyeball.
I may paint the light blue sections or something to calm them down, but they bother me less as time goes on.
For the moment, I’m just living with it on my design wall, trying to decide how I’m going to finish it. Trapunto to accentuate the 3D feel? Appliqued to something else? I’m not sure, but hopefully I’ll figure it out soon.
This thing was a beast to put together, but I love how it turned out. So far, anyway.
9 Responses
This is the coolest thing I’ve seen in a while. Awesome!
It’s wonderful. It’s also something I’d love to tackle making. Are you putting this out as a pattern?
I may market it as a pattern. It’ll have to be redrawn because the mockup I was working from is a bit inaccurate in places and I had to compensate. So it’ll be probably this fall before I can get that done and test it again.
Count me in. This is outstanding
Is
There a pattern download available?
??? ???????????? ?????? ?????? ??? ???????????? ?????? ??????
?????? ?????? ?????? ??????
?????? ?? ????? ?????????? ?????? ?? ????? ??????????
?????? ?? ????? ?????????? ?????? ?? ????? ??????????