Modern Quilt Pattern
© 2012 by Elaine Wick Poplin
UPDATED 3/23/2016 to remove bizarre symbols that were added in the most recent WordPress update. My apologies if you’ve had difficulty reading this tutorial in the past month — I was unaware that there was an issue until this morning.
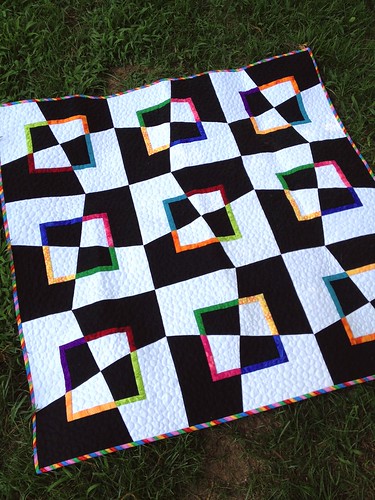
This quilt block is very simple to make with little waste and lots of opportunity for variation. Please feel free to contact me at epoplin (at) gmail (dot) com or @epoplin on Twitter if you have questions/suggestions about the pattern so I can improve the tutorial.
Materials:
24″x24″ wall-hanging or or 12″x48″ table runner:
¾ yard light solid
¾ yard dark solid
4 1″x30″ strips of brightly colored fabrics that contrast well with the light/dark solids
60″x72″ lap quilt:
2¼ yards light solid
2¼ yards dark solid
30 1″x30″ strips of different brightly-colored fabrics that contrast well with the light/dark solids
Wall-hanging/Table Runner Cutting Instructions
Light Solid
Cut 1 (one) 6.5″ strip WOF
– cross-cut 2 (two) 6.5″ squares from this strip
– set aside remaining piece of this strip.
Cut 2 3.5″ strips WOF
– cross-cut each strip into 2 (two) 7.5″ segments and 2 (two) 13.5″ segments
Dark Solid
Repeat same cutting instructions as for Light Solid.
Brights Cross-cut each 30″ strip:
– 2 (two) 6.5″ pieces
– 2 (two) 7.5″ pieces
You should end up with
2 6.5″ squares each of Light Solid and Dark Solid
4 3.5″x7.5″ pieces each of Light Solid and Dark Solid
4 3.5″x13.5″ pieces each of Light Solid and Dark Solid
plus the 30″ multi-colored bright 1″ strips cut into 4 pieces each.
Lap Quilt Cutting Instructions
Light Solid
Cut 2 (two) 6.5″ strips WOF (width of fabric)
– cross-cut into 6 (six) 6.5″ squares
Cut 1 (one) 7.5″ strip WOF
– cross-cut 3 (three) more 6.5″ squares from this strip (you will be trimming off 1″)
– from remaining part of 7.5″ strip, cross-cut 5 (five) 3.5″ segments
Cut 15 (fifteen) 3.5″ strips WOF
– cross-cut 5 (five) strips into 7.5″ segments
– cross cut 10 (ten) strips into 13.5″ segments
Dark Solid
Repeat same cutting instructions as for Light Solid.
Brights
Cross-cut each 30″ strip:
– 2 (two) 6.5″ pieces
– 2 (two) 7.5″ pieces
You should end up with
15 6.5″ squares each of Light Solid and Dark Solid
30 3.5″x7.5″ pieces each of Light Solid and Dark Solid
30 3.5″x13.5″ pieces each of Light Solid and Dark Solid
plus the 30″ multi-colored bright 1″ strips, cut into 4 pieces each.
Assembly Instructions for all sizes:
All seams should be scant ¼” seams, fabrics sewn right sides together. Seams should be pressed open or pressed to one side, whichever is your preference.
STEP ONE. To each Light Solid 6.5″ square, sew same-color bright 1″x6.5″ pieces on opposite sides, as shown in Fig. 1 below. Press seams according to your preference.
To each of the above units, sew same-color bright 1″x7.5″ pieces on the top and bottom, as shown in Fig. 2 below. Press seams according to your preference.
Repeat for each of the Dark Solid 6.5″ squares.
STEP TWO. To each of the Light Solid-centered pieced units from Step One above, sew 3.5″x7.5″ Dark Solid segments to opposite sides, as shown in Fig. 3. Press seams according to your preference.
To each of the above units, sew 3.5″x13.5″ Dark Solid segments to the top and bottom, as shown in Fig. 4. Press seams according to your preference.
Repeat for each of the Dark Solid units from Step One.
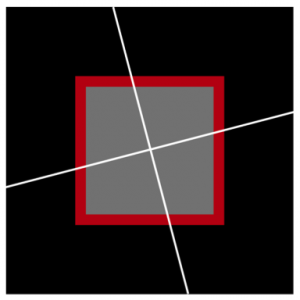
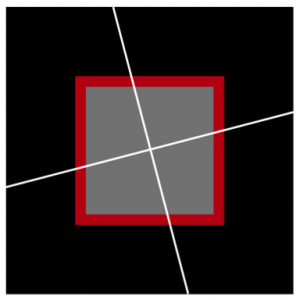
STEP THREE. With a Light Solid center block in front of you, make a mark 5″ to the left of the lower right corner, as shown in Fig 5.
Rotate the block in either direction and make the same mark in the same position for all four corners (always 5″ in from the right corner).
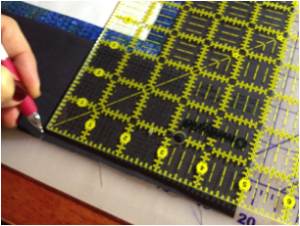
Using an 18″ (or larger) quilting ruler, cut the block from a marking on one side to the marking on the opposite side. Without moving the block between cuts, make a second cut joining the other two marks, as shown in Fig. 6.
Repeat for remaining blocks.
ALTERNATIVE CUTTING INSTRUCTIONS : Cut half of your Light Center and Dark Center blocks as above, but cut the rest by making marks 5″ to the right of the lower left corner, i.e. cut the MIRROR IMAGES for half of your blocks, as shown in Figs. 7a and 7b below. This will not work for the wall-hanging size, as you need at least four blocks cut in each direction for the design to work.
STEP FOUR. When all of your blocks are cut, it’s time to play! All of the pieces are (hypothetically) the same size, so you’ll be creating new blocks by mixing and matching the cut pieces and sewing them together.
Find a combination of four quadrants that you like, arranged so that the interior square is a checkerboard and the exterior square is also a checkerboard, as in Fig. 8. (Note: in the figure above, I used three different solids for my interior and exterior squares, which provides yet another interesting effect)
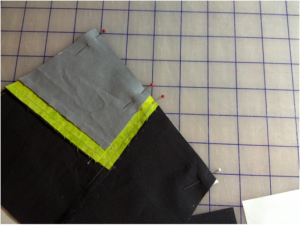
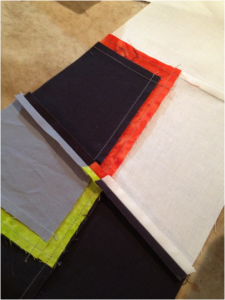
Pin two adjacent quadrants together, matching the thin contrast strips at the seam allowance. IT IS OK if the centers and edges don’t match perfectly at this point; you will be trimming them anyway.
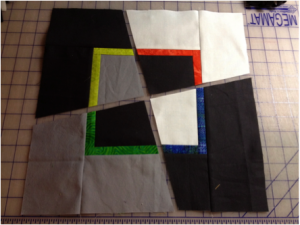
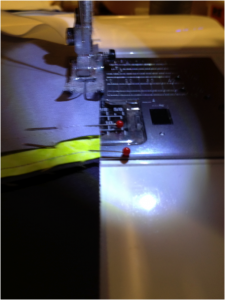
Sew the pieces together, starting on the INTERIOR SQUARE (the gray part in Figure 9) and working out to the outer edge, as shown in Figure 10.
Press seams open to reduce bulk, as in Figure 11.
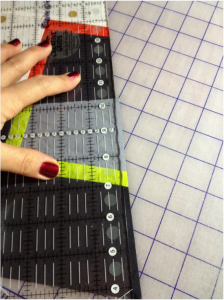
At this point, you will probably notice that the edges of the interior square do not line up exactly. This is fine! We will just trim it straight before proceeding to the next step as in Figure 12.
Match up your sewn halves, matching the centers and the contrast bright strips the best you can, being very careful with the bias edges (Figure 13). Sew the block and press the seams open (Figure 14).
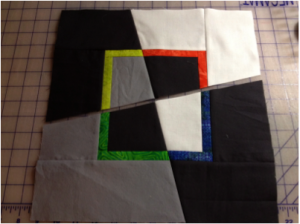
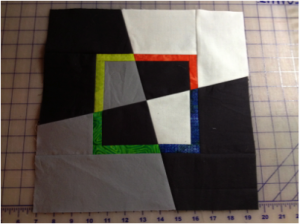
TA DA! Here’s the finished block. It’ll measure about 13″ unfinished, but none of the edges will really be perfect so it’s time to trim! You can carefully trim the blocks to 12.5″ unfinished for the effect I have in my samples, or to any other size larger than 8.5″ (smaller than that and there won’t be much of an effect). Your squaring can be straight or wonky, depending on the size square you choose. The smallest wonky block you can cut will be 9.5″ unfinished, or you’ll cut into the contrast strips.
Figure 16 – after trimming to 12.5″ unfinished
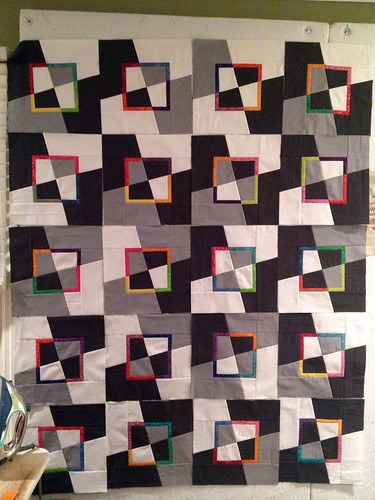
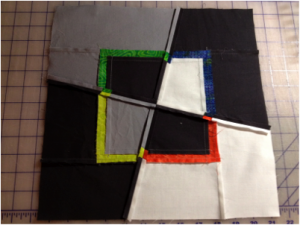
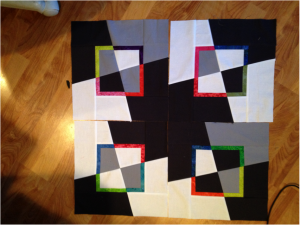
Here’s one arrangement I came up with after getting a few blocks made. This is the wall-hanging size. All of these blocks were cut the first way. Using the Alternative Cutting option and cutting mirror images would provide a very different (and cool!) look and I can’t wait to try it!
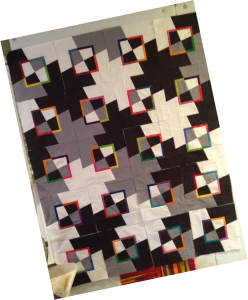
Then I started playing on my design wall.
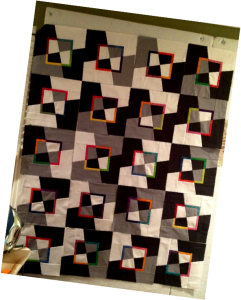
And here’s one with the Alternate Cutting instructions… I discovered that with the AC instructions you MUST HAVE MULTIPLES OF FOUR BLOCKS or it won’t be as easy to distribute your colored strips.

The possibilities are endless! Let me know what you come up with!




59 Responses
Thank you so much for this tutorial. I love the black and white Mad as a Hatter quilt you made. This is the pattern I will use when I decide to make a quilt.
Glad you like it! Let me know if you see anything that needs clarification. 🙂
You are so generous to provide your tutorial! It’s so cute.
Thanks! I was going to sell the pattern and then decided I’d rather just share it and have people enjoy it sooner. 🙂
Wow! I love how this came out! Thank you so much for the tutorial too!
I just saw this and it is fabloooolus! Can’t wait to make! will post pics when done! Thank you for sharing!!
Thanks, Olivia and Renae! You’ll have to link in here when you get your tops done. 🙂 Can’t wait to see them!
This is stunning and perfect for one of my grandson’s who appreciates things that aren’t exactly as they seem. Thank you so much for sharing.
So do love this quilt and its mood! Thanks for sharing!!!
Very nice technique, thanks for sharing. I like that you showed different variations of finished projects. I can see you really worked this through!
Love Mad as a Hatter!! I just finished making 12 blocks and am getting up the nerve to cut them!
Goody! Please post a link to pictures when you do — I can’t wait to see it!
I just posted my quilt top at http://www.quiltingboard.com in the Pictures section (thread name-Mad as a Hatter). Thanks for a great tutorial!
Thank you, Pat! I really appreciate you linking back!
WOW, this “hard” pattern is easy AND fun. Thanks for the tute. Will try soon.
Terri
I just saw link on the Quilting Board and had to check it out! What a great tutorial. I just “pinned” it and added it to my “Quiltly Bucket List”.
Thank you for sharing a great pattern!
I love this!! But I am quilt challenged !!! How much would you charge to make this??
Holly — email me at epoplin (at) gmail (dot) com and I might be able to answer your question. 🙂
This is a real eye-catcher! I didn’t realize there could be so many possibilities to arrange the cut blocks in. Thought I’d mention that you can avoid those little jogs where the strips meet if you match the thin strips *at the stitching line* instead of at the cut edge of the fabric. Thanks for the tutorial — I see one of these in my future 🙂
It`s just beautiful.Thanks for the tutorial and the pattern!
As a beginning quilter I am thrilled to see this tutorial. I’ve decided to make quilts for my girls and one of them loves black. THIS design pops and I know she’ll love it. I’m bookmarking and blogging about this.
Thanks again.
Cheers,
Lyric
http://www.sewandcro.com
Thanks so much! 🙂
Love your pattern and thank you for the tutorial.
I followed your instructions, but I cannot make the seems meet in the middle of the Square, when I sew the four pieces together. When I have the two halves they fit perfectly – without seem allowance. What am I doing wrong. Are my seems not scant enough or…?
Regards,
Yth
Without seeing a photo it’s hard to know what the problem might be… But I could get the seams in the middle to meet perfectly when trimmed. The seams of the colored boxes might not be perfectly aligned then but it doesn’t ultimately matter because the eye “sees” them as matching up. Do you have a photo anywhere of the issue you’re having?
WOW awesome quilt. Could you post some close up of the quilting? That’s always my problem “how do quilt the quilt”. thk
[…] […]
This has to be one of my all time favorite quilts! I can’t give any feedback on the tutorial yet, but I hope to make one one of these days. Thank you for the tutorial!
Hi, I’m a little confused on the fabric requirements if I want to make the 3 colored version of this quilt as it only lists 1 light solid and 1 dark solid. Could you please explain? I love this quilt and can’t wait to make it.
Thanks
The 3-colored one was the pattern test and I used what I had. If you make that one, just use 2/3 light, 2/3 medium, and 2/3 dark. I wasn’t that precise because the quantities in my stash varied.
I am seeing this in Red, Black and White. Excited to start one.
Thanks for sharing! Love this quilt!
Great quilt!
I just LOVE your quilts! Thank you so much for providing this tutorial. I’ve been looking for a pattern for my adult daughter and this is Perfect for her. Thanks again for sharing your modern aesthetic with us.
Thank YOU! I am finding my voice and it is so much fun! Let me know if you have any questions.
I love this and will be attempting in the near future. Question: for the strips of colors you said to cut 1″ by 30″. Did you possibly mean 1.5″ by 30″? Its hard to tell by looking in the picture. Also did you make your own binding with leftover fabric?
Thanks so much for the tutorial!
Melocup
1″ wide. They finish at 1/2″ wide. And the binding was a stripe that I had in my stash, cut on the bias.
I love this! How did you quilt it? What color thread?
Just free-motion quilted pebbles on my HandiQuilter 16 (but would be easy on a normal home machine) in thread that matched the background fabric on top and in the bobbin. I left the bright squares un-quilted so they’d pop.
Elaine, thank you so much for sharing your pattern and tutorial. It’s fabulous. Quick question. How many finished blocks is the lap size? 4×6? 3×5?
Thank you.
Jeri
5×6, so 30 blocks.
Such a fun, cute quilt. I think I’ll make it for my grandson. Thank you for sharing.
Can you contact me about this pattern and purchasing wholesale if available? If not can I purchase pattern and make copies and send you the total for each pattern used?
Hi, I just love this pattern and have made a couple of blocks but they ended up as placemats, as I could not quite match up the coloured strips. Is there a paper piecing version of the pattern available so that I can be more accurate on my stitching. Thanks. Mary
Thank you for sharing Elaine….it is greatly appreciated. I love this quilt and need to make a non gender baby quilt….this is perfect!
That is such an interestingly fascinating pattern – thank you so very much for the tutorial. A lot of hard work went into that!
I am hoping you will be selling a pattern for your Vertigo Quilt. Please send me a message if you do, it is stunning.
I love this mad hatters quilt. Thank you for your generosity in sharing this beautiful design and tutorial. I can’t wait to make it.
I have noticed you don’t monetize your website, don’t waste your traffic, you can earn additional bucks every month because you’ve got hi quality content.
If you want to know how to make extra bucks,
search for: Boorfe’s tips best adsense alternative
ES COLORIDO, DIFERENTE, Y ELEGANTE. ME HA ENCANTADO ESTE MODELO. MUCHAS FELICIDADES.
Thank your for providing this tutorial and sharing your design. I went a slightly different route and painted a barn quilt using this block. I posted it on my blog, Rock Ridge Farm (with full credit and a link to your site of course). Thank you!