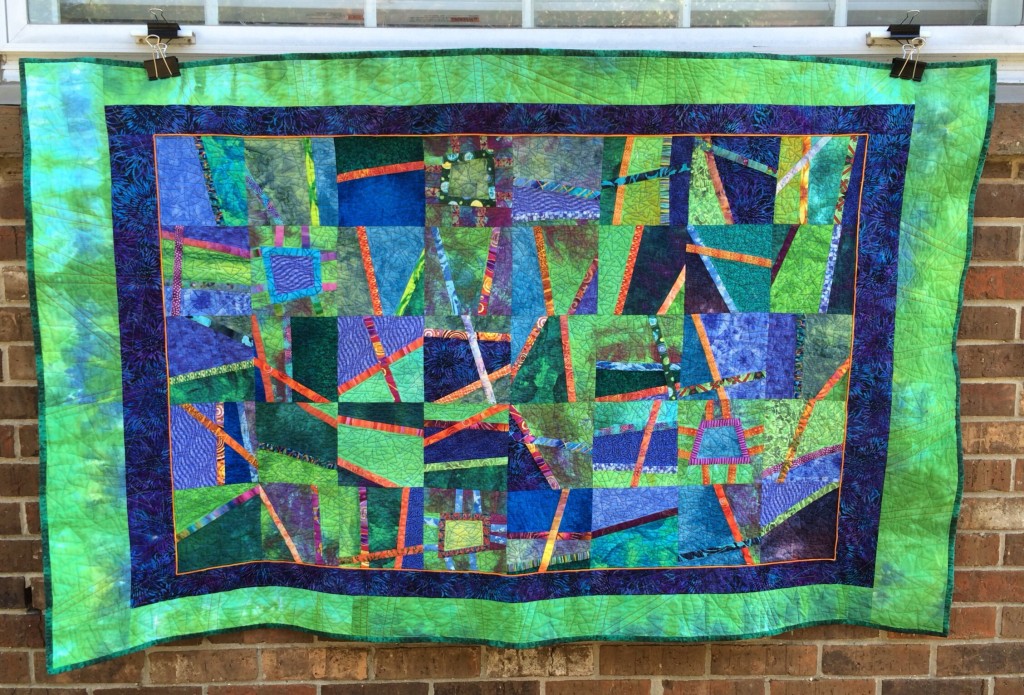
So…. Back in 2005, I made this quilt in a class at Lydia’s. It was my first experience with “improv” piecing, and we were slicing and inserting narrow strips of fabric and then sewing more pieces on. I was trying to make a quilt entirely out of blue and green, but on probably the second block I was already bored so I started adding shots of orange. I named it “Sticks and Stones My Break My Bones, But I LOVE ORANGE.” Jerry was not amused.
When I started playing with the blocks on the design wall, I think I had 48 blocks to work with. I decided to just use 40 of them arranged in 5 rows of 8, and pay homage to the Italian mathematician Fibonacci, whose sequence has always completely fascinated me. The borders on this quilt are 2″ wide, 3″ wide, and 5″ wide. The quilt has been in my classroom for 4 years, and is pretty stretched out from being pinned and unpinned so many times, because I always have to show my students the back of it.
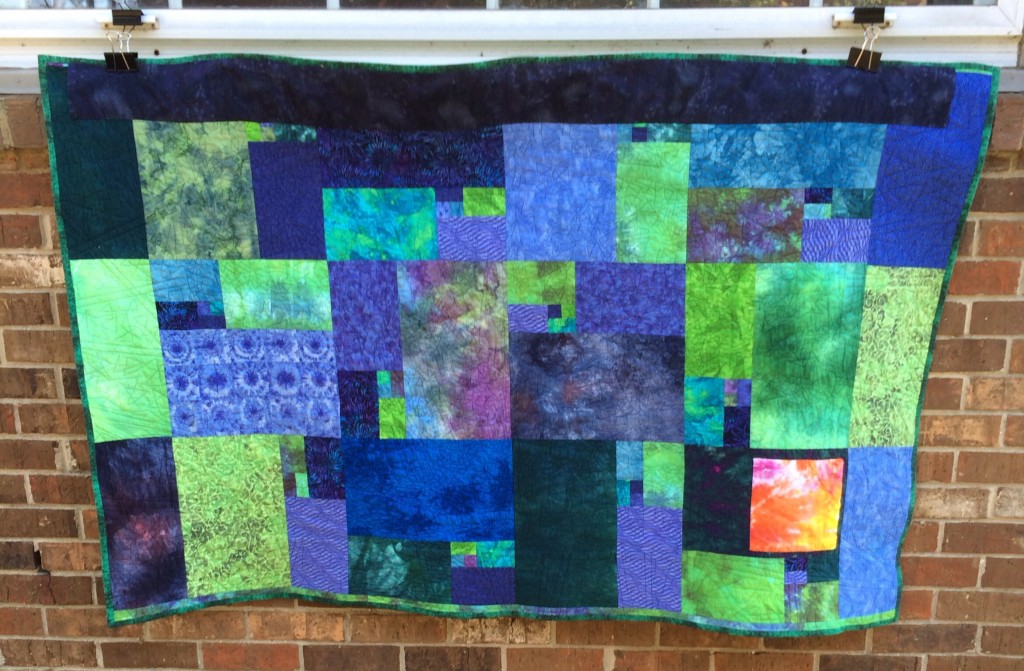
As much as I love the front, the pattern on the back has been of more interest to me. Exactly ONE time during my early parenting career, both girls took a very long nap simultaneously. I can count the number of times they have done this on one finger. ONE TIME. And this is what I did with that naptime and the pile of fabrics left over from making the front. I realized that if I paired neighboring Fibonacci numbers and made rectangles instead of squares, and put them together in a sort of spiraling fashion, every other rectangle would cause the shape to be square again.
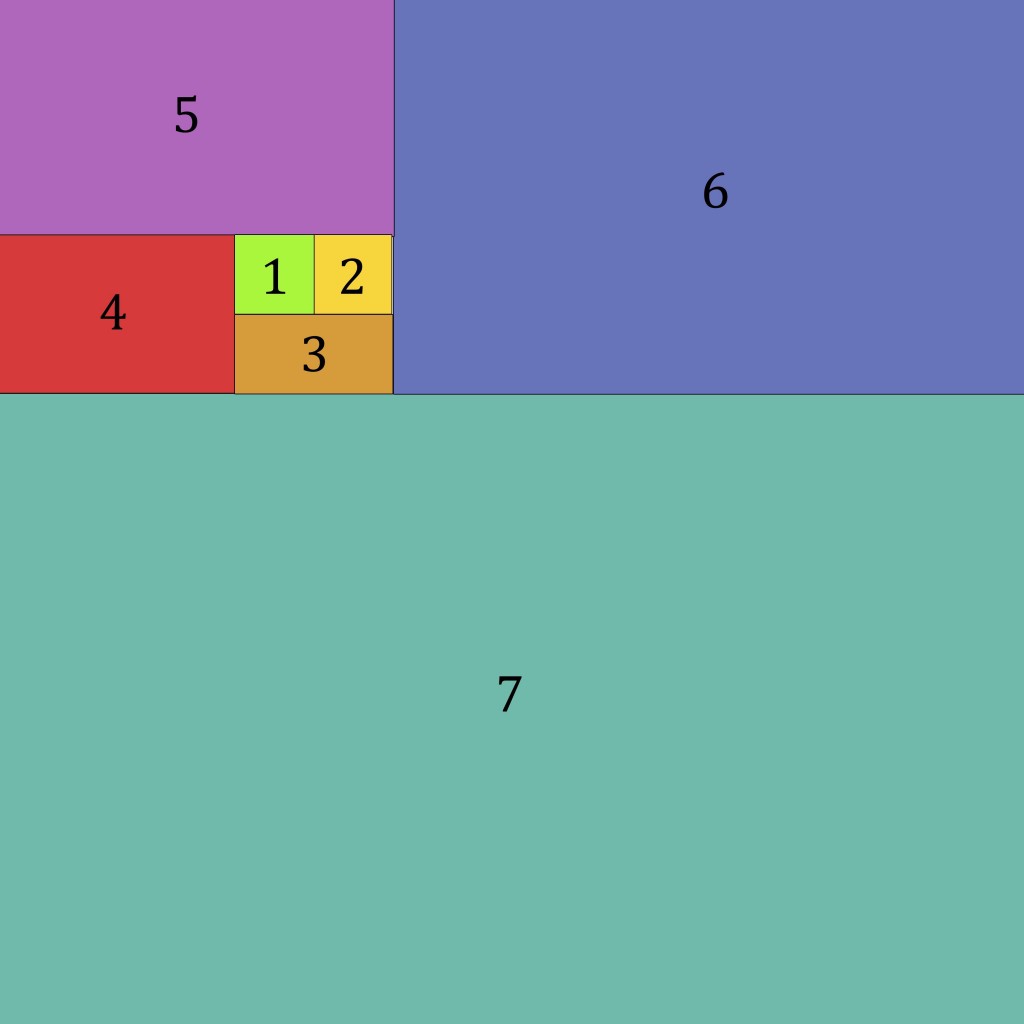
1″x1″ and 1″x1″ create a rectangle, right? Well, when you put the long edge of a 1″x2″ rectangle next to them, the three shapes now form a 2″x2″ square. Then add a 2″x3″ rectangle, and your shape is 2″x5″. Put the long edge of a 3″x5″ rectangle next to that, and now you have a 5″x5″ square. And so on.
Here’s a diagram I drew in Photoshop of the order in which the pieces get sewn together. Depending on when you stop, you could have 2″ squares, 5″ squares, 13″ squares, 34″ squares… etc.
So this idea has been banging around in my head for a while. I’d show kids the back of the quilt and they’d be underwhelmed, party because the colors were so muddy. And partly because “there goes the weird math teacher getting all goofy about quilting again.”
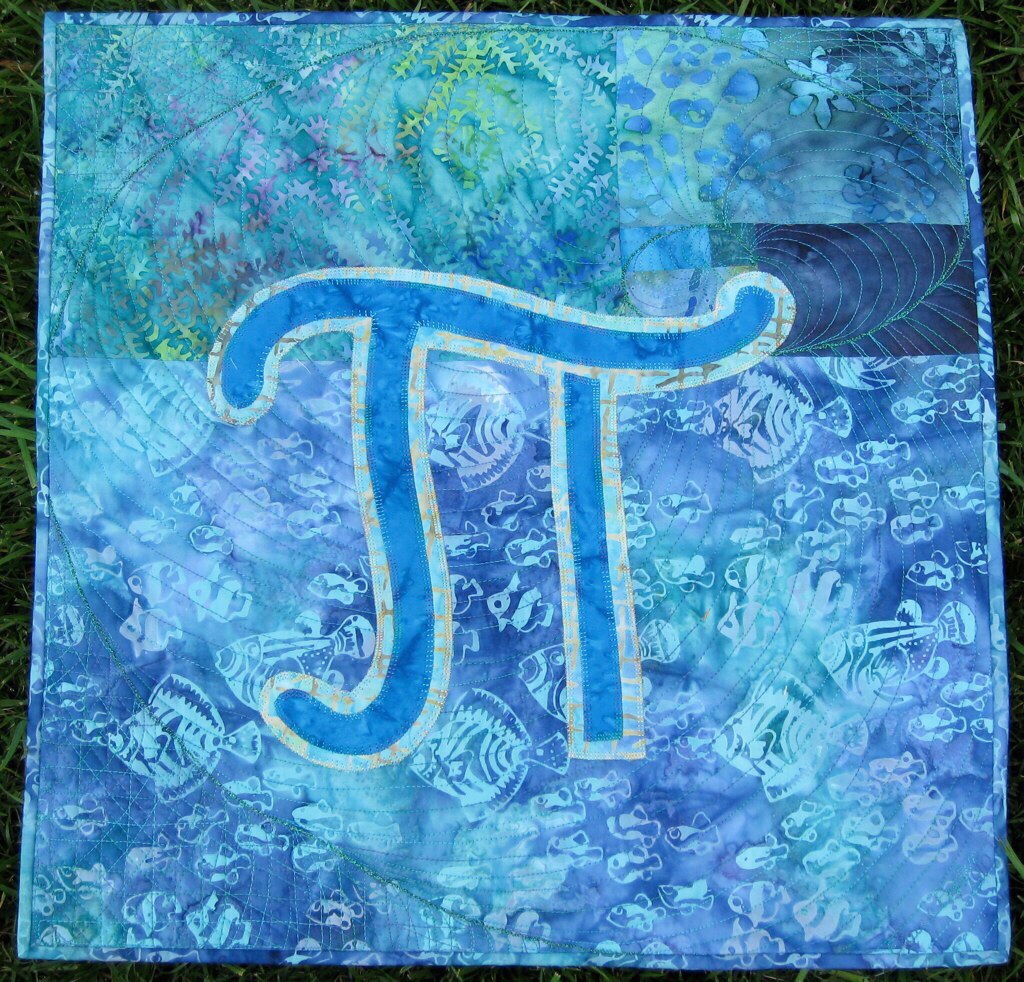
Another teacher retired in 2009, so the math department asked me to make a small wall hanging for him. His initials are “JT,” which he always signed to look like a Pi symbol. So I did a version of the Fibonacci Square as a background, and superimposed his familiar “signature” on top of it.
In Jim’s piece I left off the first 1″x1″ square so that I could get a 21″ square instead of having a dinky 13″ square, but the effect was the same. (Possible size square blocks if you leave off the first 1″x1″ square: 1″, 3″, 8″, 21″)
So I kept knocking the idea around in my head, and finally was inspired to do something about it this fall.
My requirements for this quilt: I wanted a Fibonacci number of 13″ square blocks. 5 would make an interesting table runner, but I wanted a wall hanging. 8 blocks would have to be arranged  4×2 or have a hole in the middle and I didn’t really like that idea. 13 blocks when set on point? PERFECT. So I needed 13 fabrics.
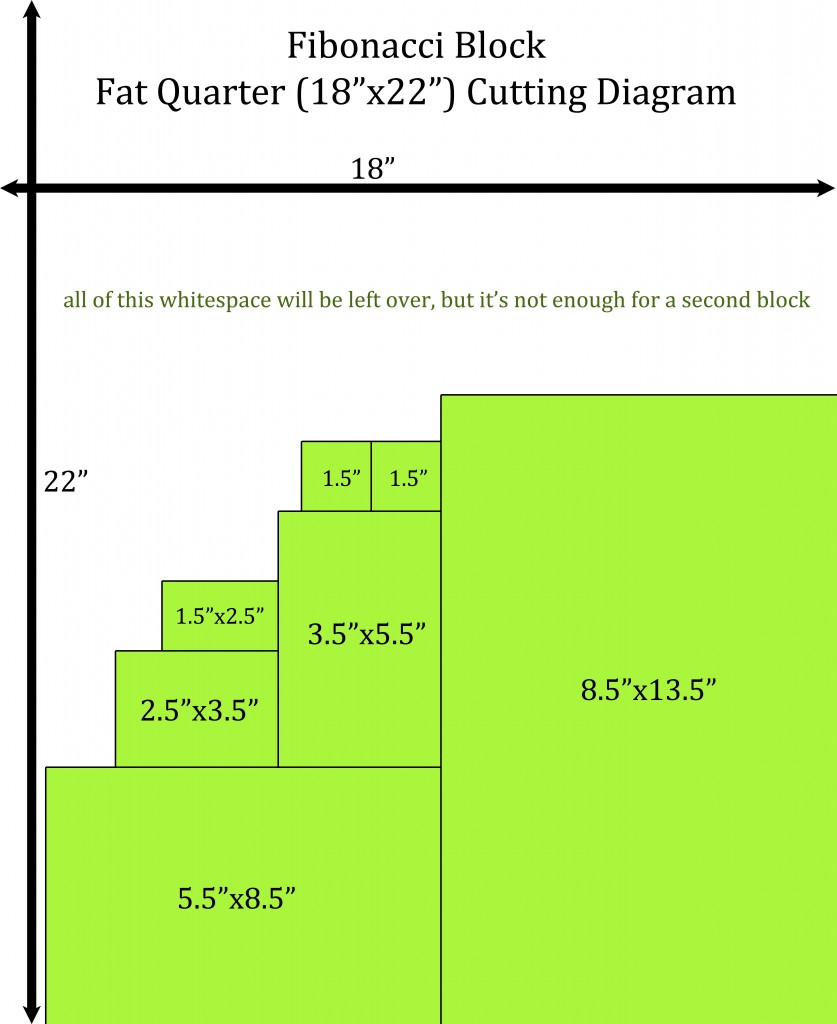
I had purchased a Bottled Rainbows pack of fabric from Marmalade Fabrics sometime last summer, but I didn’t have big plans for it. There are 16 colors in that pack, so I chose the thirteen that had the best circular flow — meaning there wouldn’t be an obvious beginning or ending to the colors. Each block had 7 colors in it (I was bummed that it wasn’t 8 because that would have been So! Much! More! Fibonacci! but I guess you can’t win ’em all, huh?)… So I cut one each of each needed size piece (plus seam allowances) in each of the 13 colors. Here’s how my cutting diagram worked so that I’d maximize the amount of fabric I had left at the end of the project.
Then I lined up all of my little stacks in order (two stacks of 1.5″x1.5″ squares). For the second stack, I moved the top fabric to the bottom. For the third stack, I moved the top two fabrics to the bottom, keeping them in that same order. For the fourth stack, I moved the top three fabrics to the bottom, keeping them in that same order, and so on. Then I began assembling the blocks, pressing always towards the newly added block to minimize bulk. Because there are only 6 seams in each block, these go together REALLY fast, but you have to pay attention that you’re doing them in the right order so that you get the desired spiral. Here’s the sewing diagram again:
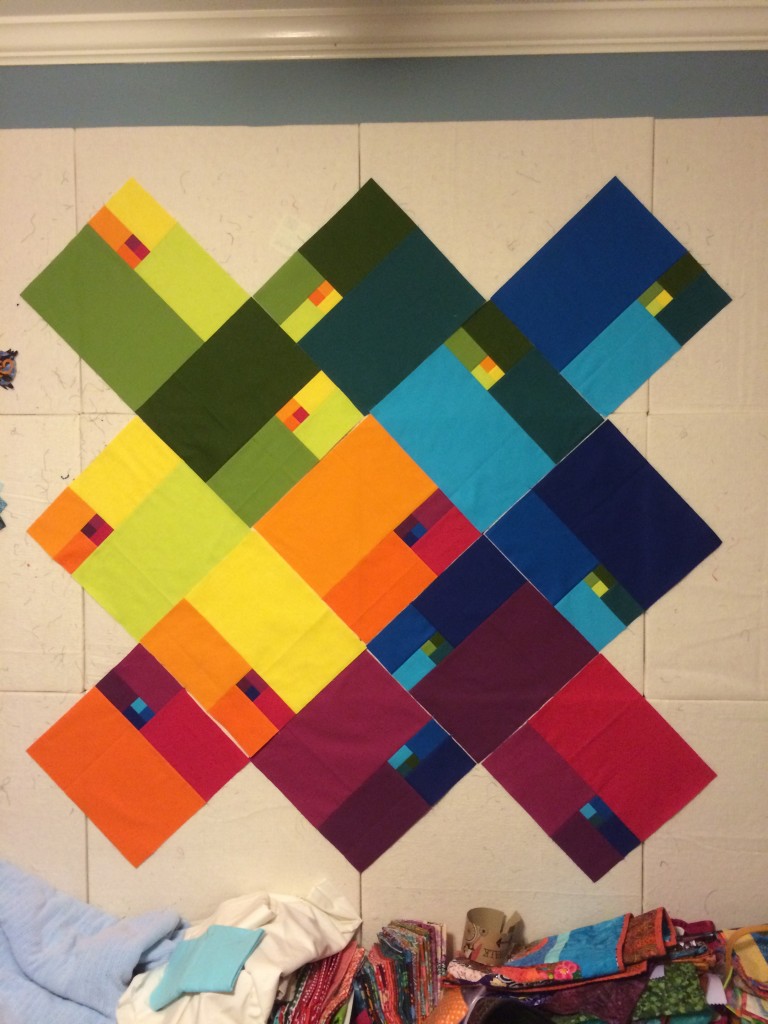
Once I had all 13 blocks made, I put them up on the design wall and started arranging them, trying to find an arrangement that was pleasing and that didn’t have a color against itself more than absolutely necessary.
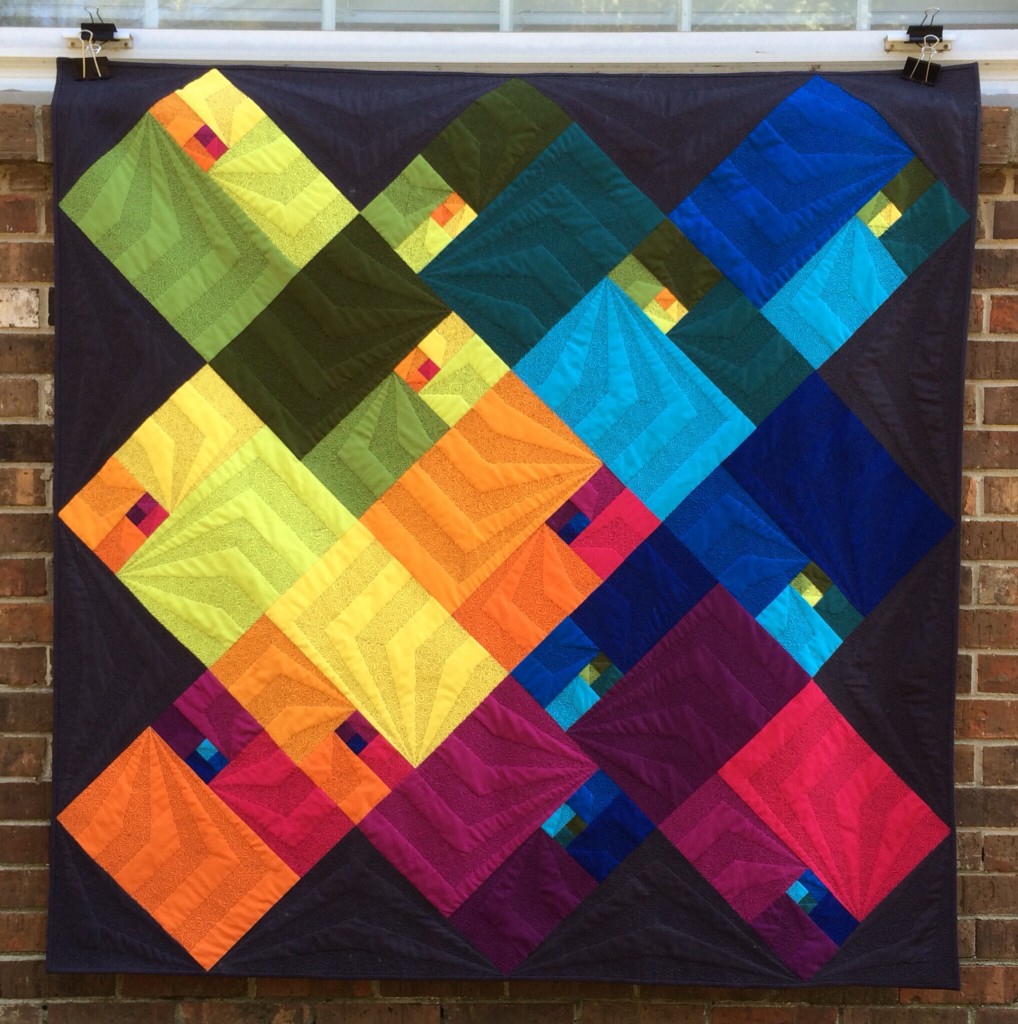
With the above arrangement, the closest a color got to itself was corner-to-corner, and I was OK with that. I also didn’t want all of the small pieces in 4 blocks to come together in a single corner, and I didn’t want the blocks to appear to be arranged in any sort of structural pattern. I was also trying to get some good color flow to the quilt so that the eye would move around on the piece.
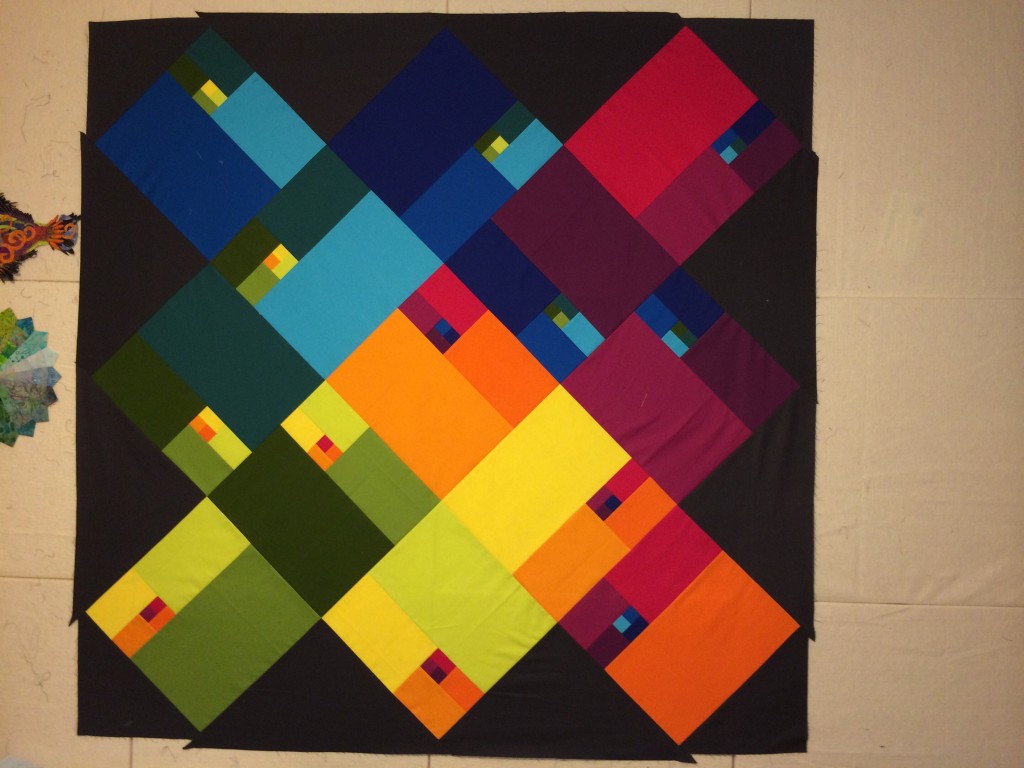
I chose to use charcoal gray for the setting triangles because white and black were too stark, and medium gray was too boring. Essex Yarn-dyed Linen in Flax was pretty, but fell flat with the vibrance of the rest of the colors. The charcoal seemed to make all of the colors sing the best.
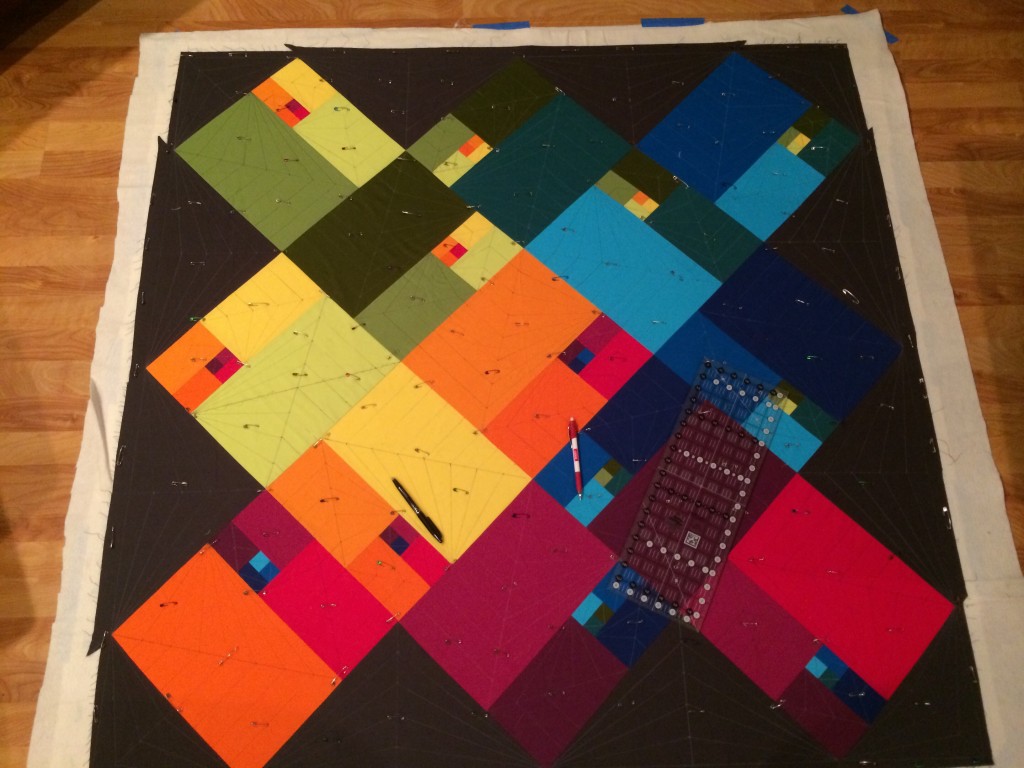
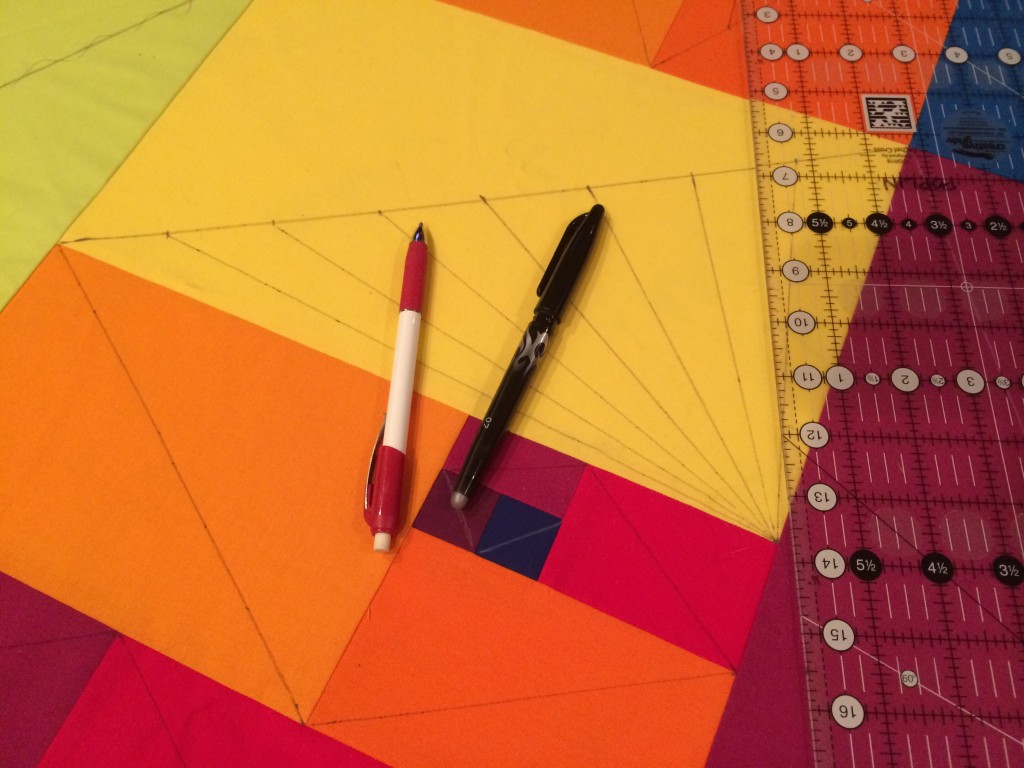
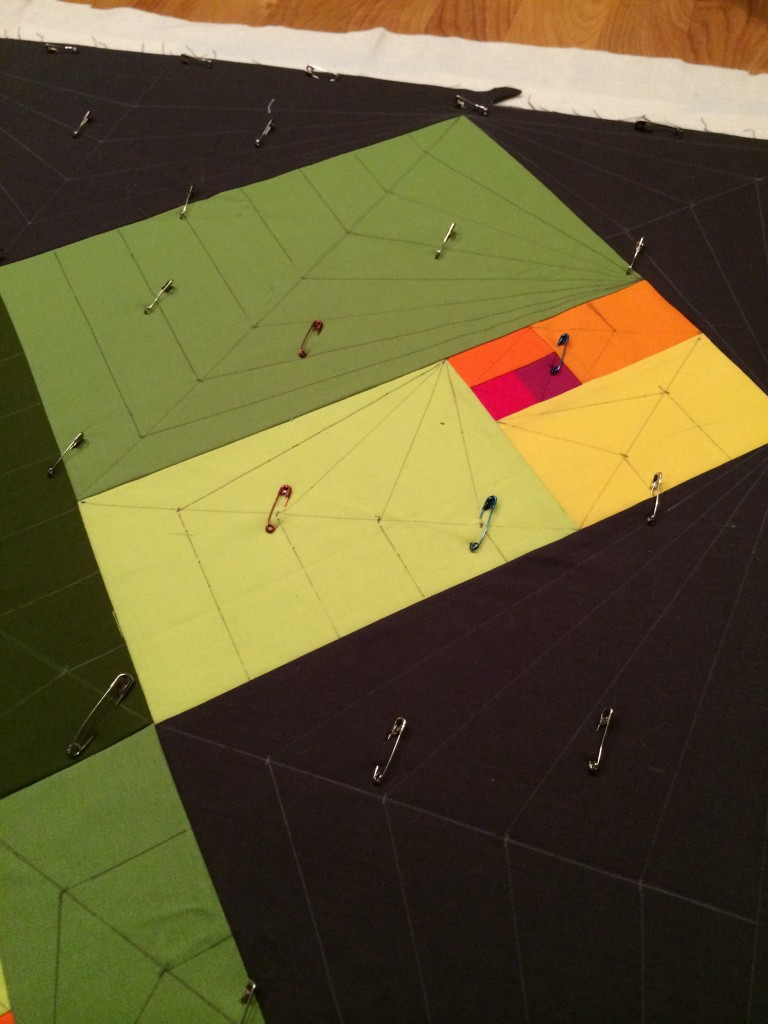
So now I had to decide how to quilt it. I knew that with this much open space, I had to do something dramatic for the quilting design. I watch all three shows on CBS on Tuesday nights, so one Tuesday night I spread the backing, batting, and quilt top out and marked the diagonals that spiraled out from the smallest squares in each block.
I divided each diagonal by the smaller dimension of its rectangle, and then drew lines connecting those points the same way in each block.
I still didn’t really have any idea how I was going to quilt these triangular sections, even though the marked “spider web” effect was pretty cool. But I finished marking the quilt that night anyway and pin basted it…
And then I thought about it for about a month, procrastinating because I couldn’t figure out how I was going to quilt it.
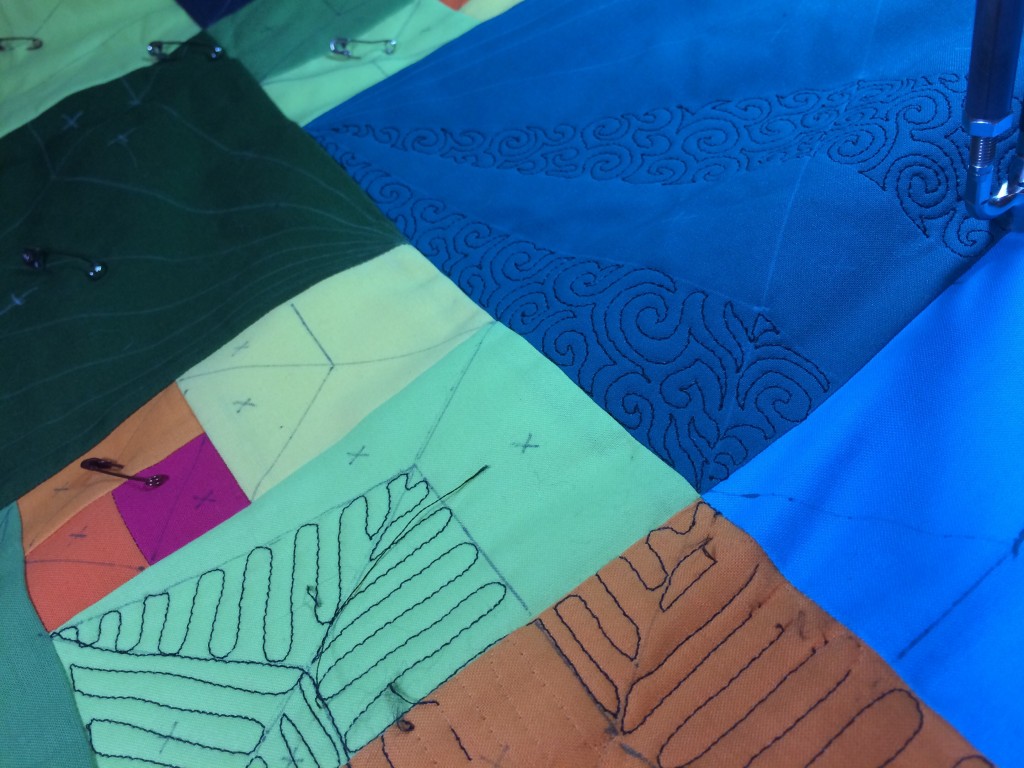
One day I was giving tests in all of my classes that were meeting that day, so I took the quilt and my marking tools and marked alternate sections with an “X,” indicating that I was to leave those sections unquilted. The largest unquilted area would be less than 2″x8″ so I knew that would be acceptable for the cotton batting I had chosen.
I sat down to quilt it and decided at the last minute that maybe that wasn’t the best idea after all, and I’d quilt all sections with alternating direction straight lines. The problem with this? On my machine, I can’t really quilt truly straight lines because I’d need a third arm to stabilize a ruler since the other two are busy moving the quilt around and keeping it flat under the needle.
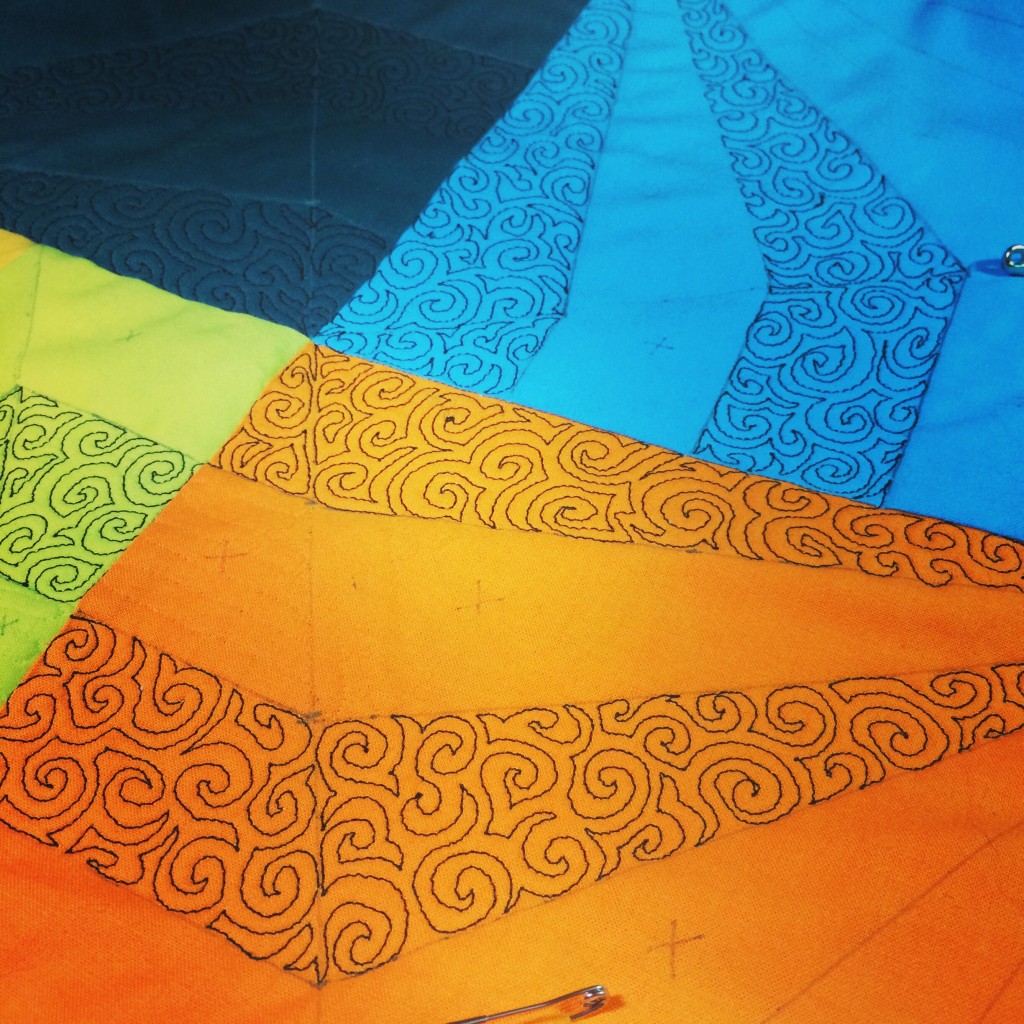
Five minutes in and I hated the new plan, so I decided to rip out all the straight line quilting. I went to a different section and tried something else — spiky swirls — to see if I liked that better. And I went with my original leave-every-other-section-unquilted plan. Much better. So I ripped out all of the straight line quilting, remarked those sections, and began again.
It was fun.
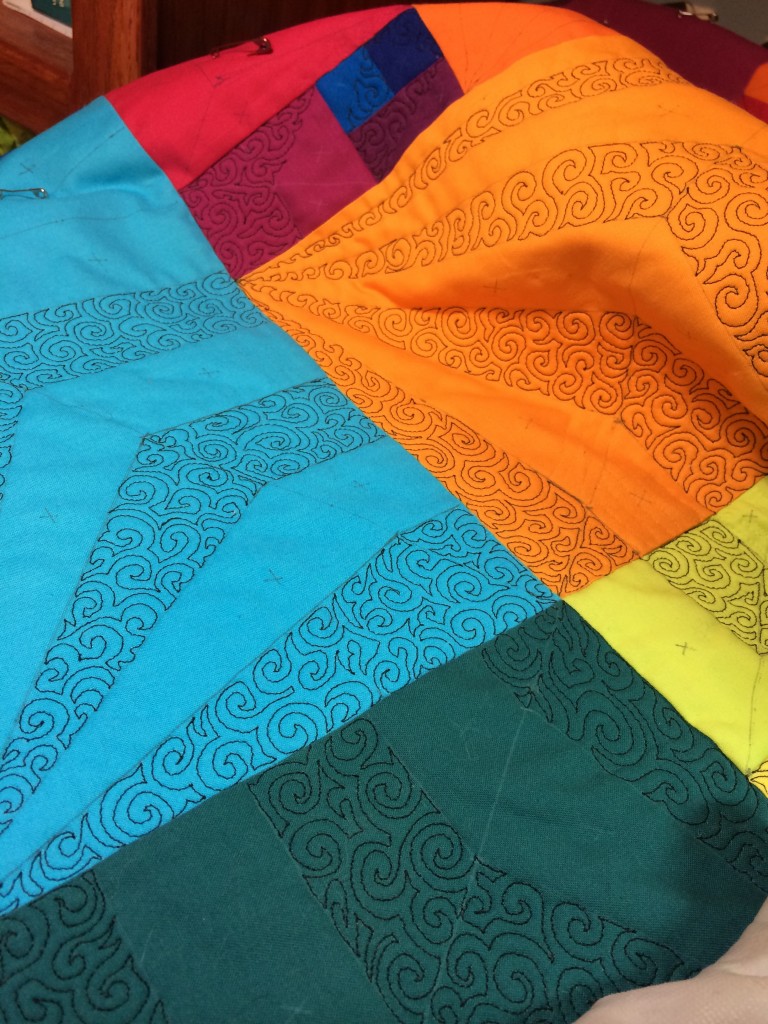
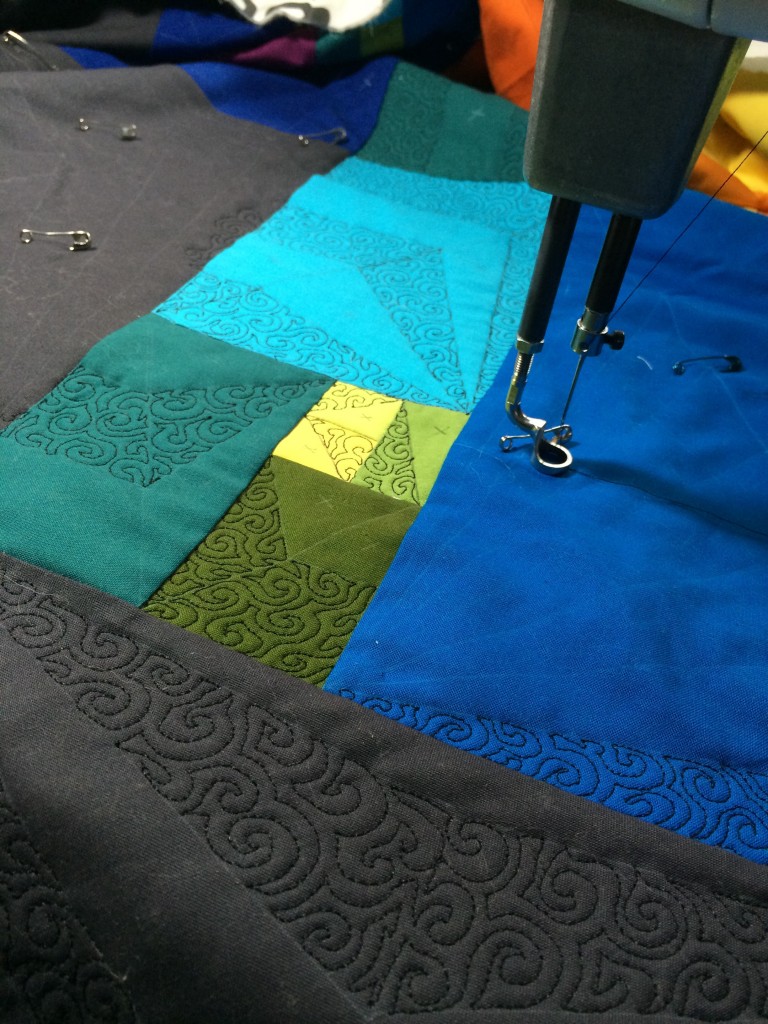
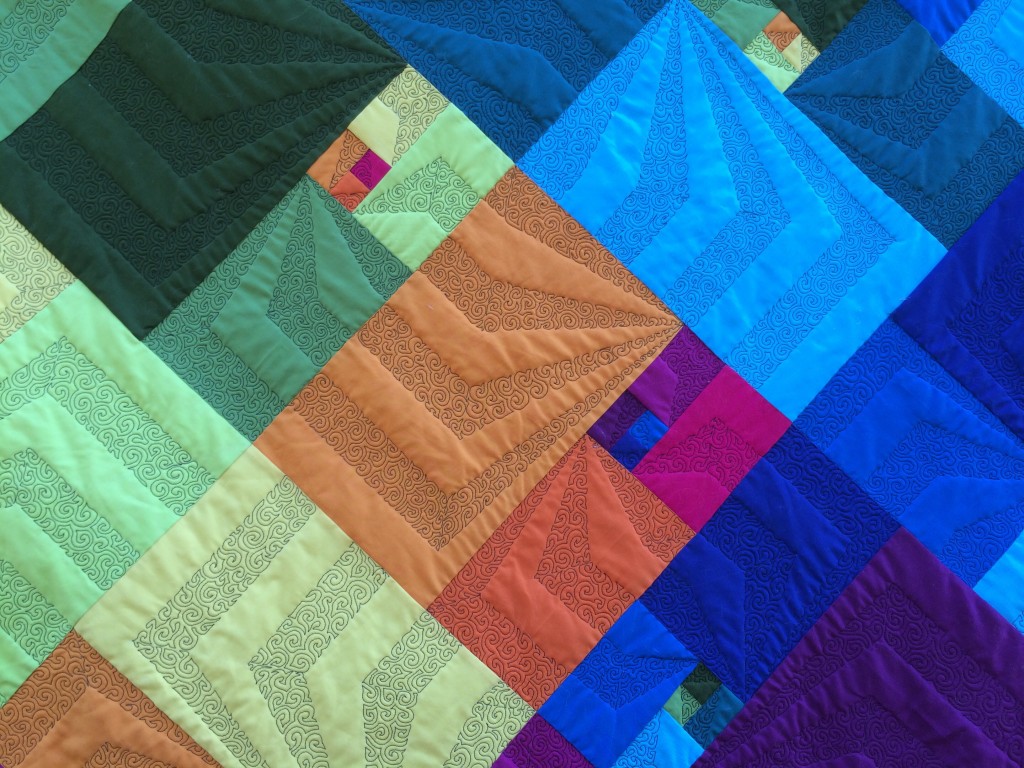
The scale of my spikes varies a bit since I didn’t do it all in one sitting, but I decided that’s OK. Each section is uniform at least, so I figure it works out.
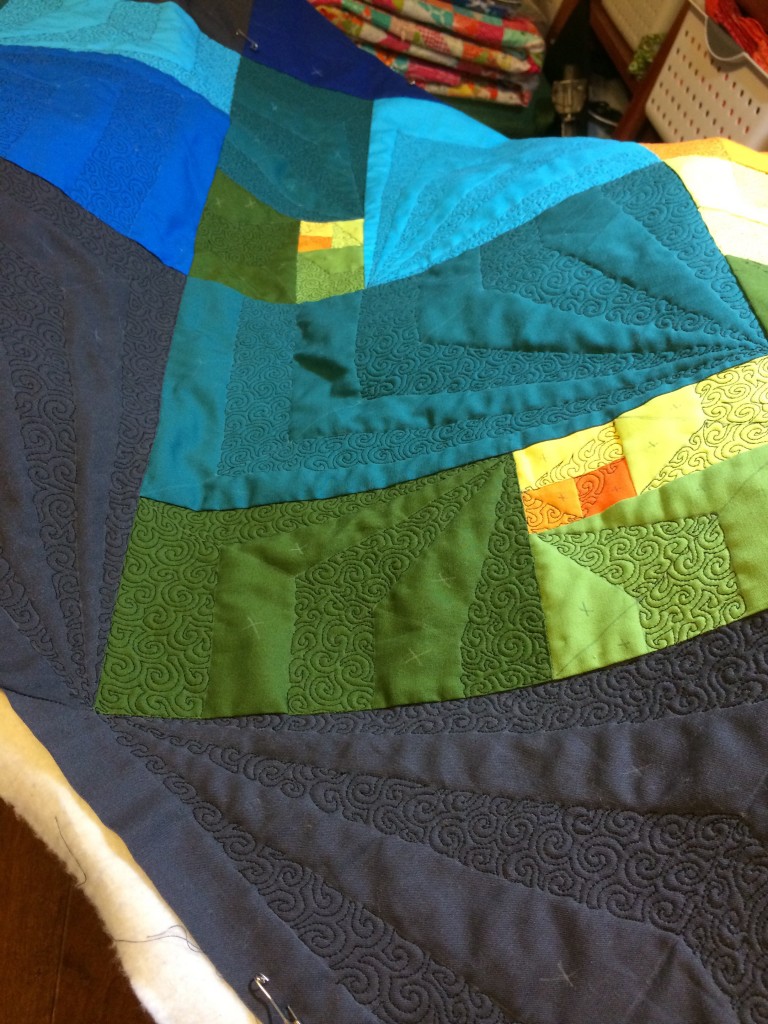
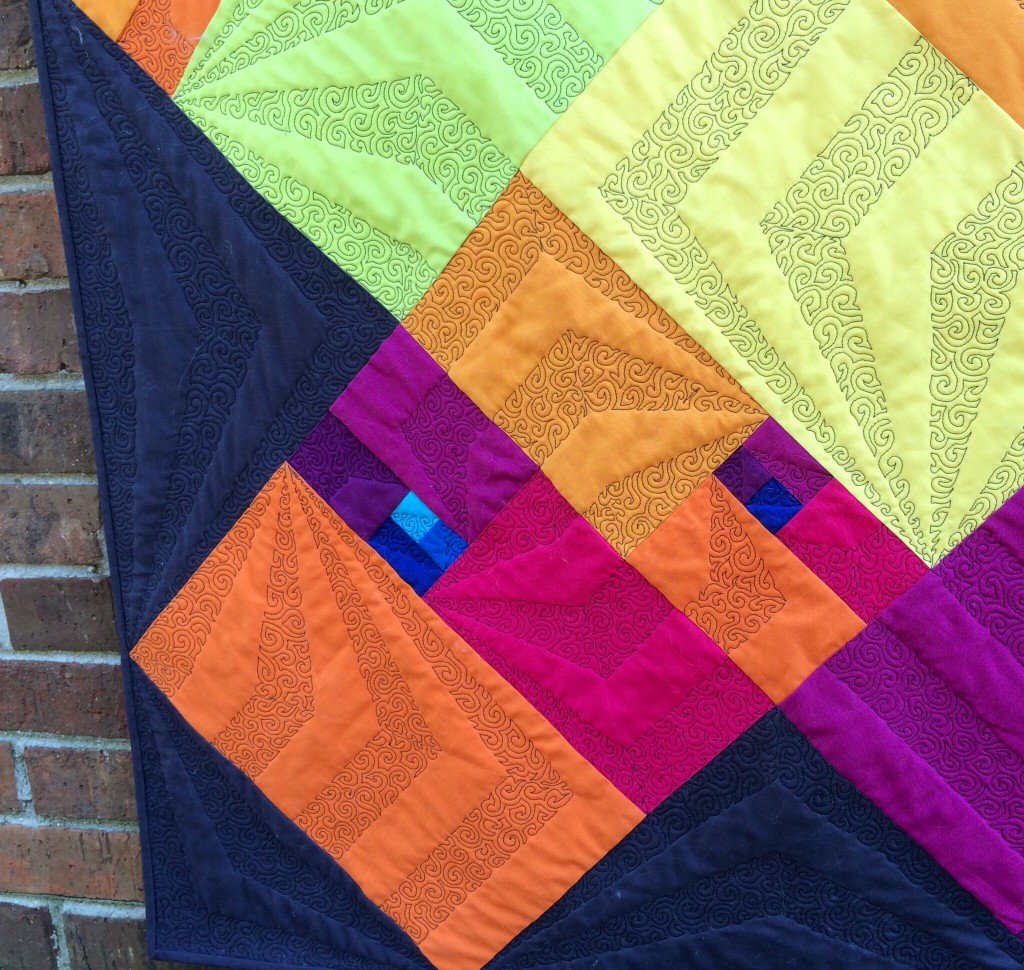
I got really excited when I started quilting in the setting triangles, because that’s when the texture really started to pop and the “O-em-gee I’m going to ruin this cool quilt” feeling dissipated. I did have to fight with the thread (Glide) the entire time, though. I hunted online and trolled quilting boards where people encountering similar problems asked questions, and tried all kinds of things that were suggested to get the tension more consistent, but it just wouldn’t cooperate with me. Glide worked so well on Entropy (but I was using a different machine and not free-motion quilting) that I didn’t anticipate having this much trouble. I would have switched to a cotton thread, but the King Tut is so much thicker and I didn’t want to have to wait on an order of Aurifil. Plus the Glide has a sheen to it that a cotton thread wouldn’t have, so I decided to carry on and just deal with the challenges. I won’t use Glide again until I talk to someone at the company about the problems I was having and how to avoid them in the future. My mom tried to use it on her machine and had similar problems, so we’ve both decided only to use it for threadplay on our domestic machines until we can get the issues resolved.
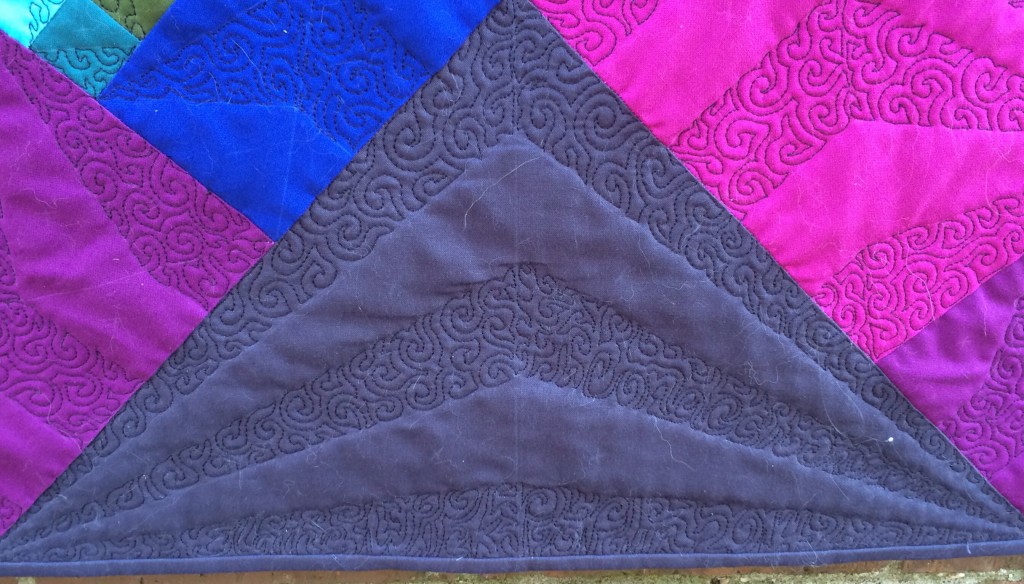
As I was nearing the end, I realized that I had saved the bottom right corner for last. I wrote my name and the year and the name of the quilt in that setting triangle. It’s a little hard to read, but it’s there… “Fibonacci Squared” in the middle section to the right of the peak, and “Elaine Wick Poplin 2014” in the bottom one.
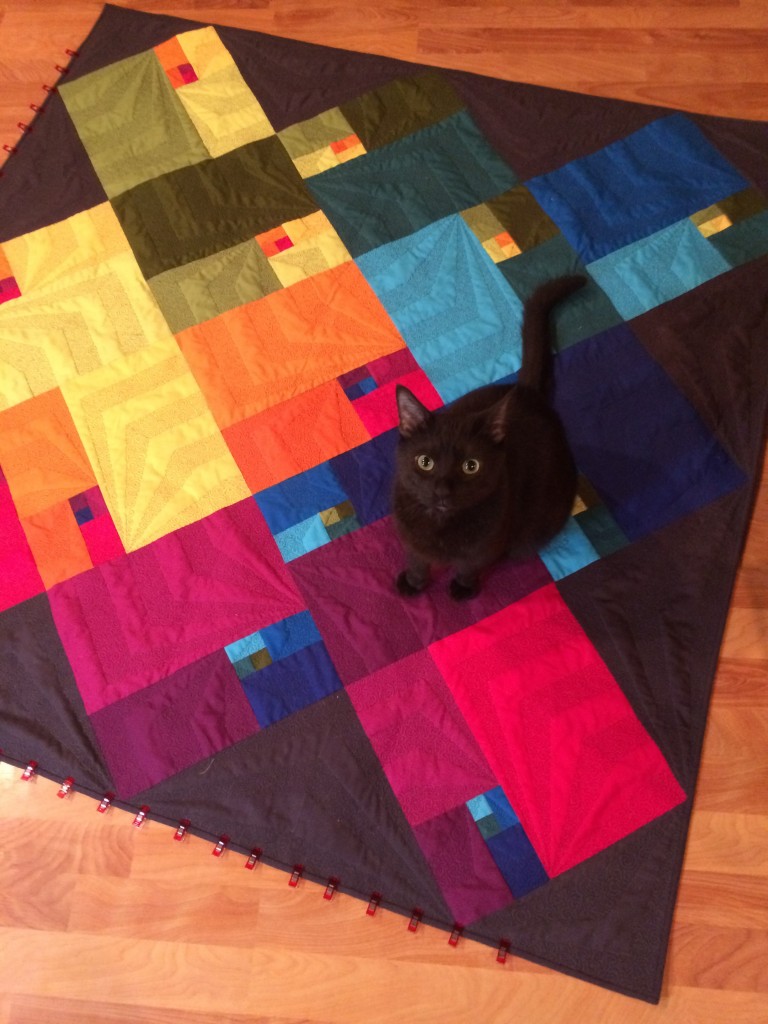
When I trimmed it and started adding the binding, I put it on the floor to admire it (as I always do) and Friday appeared out of nowhere to sit on it within about thirty seconds. I think he must have some sort of alert system that lets him know when a quilt hits the floor, because his timing is uncanny.
Today I was finally able to take it outside and get some pictures of it in natural lighting. It’s difficult to photograph well because the colors are so very saturated that they can blow out the camera sometimes and distort and look muted at other times.
One thing is for certain, though — that texture sure shows up.
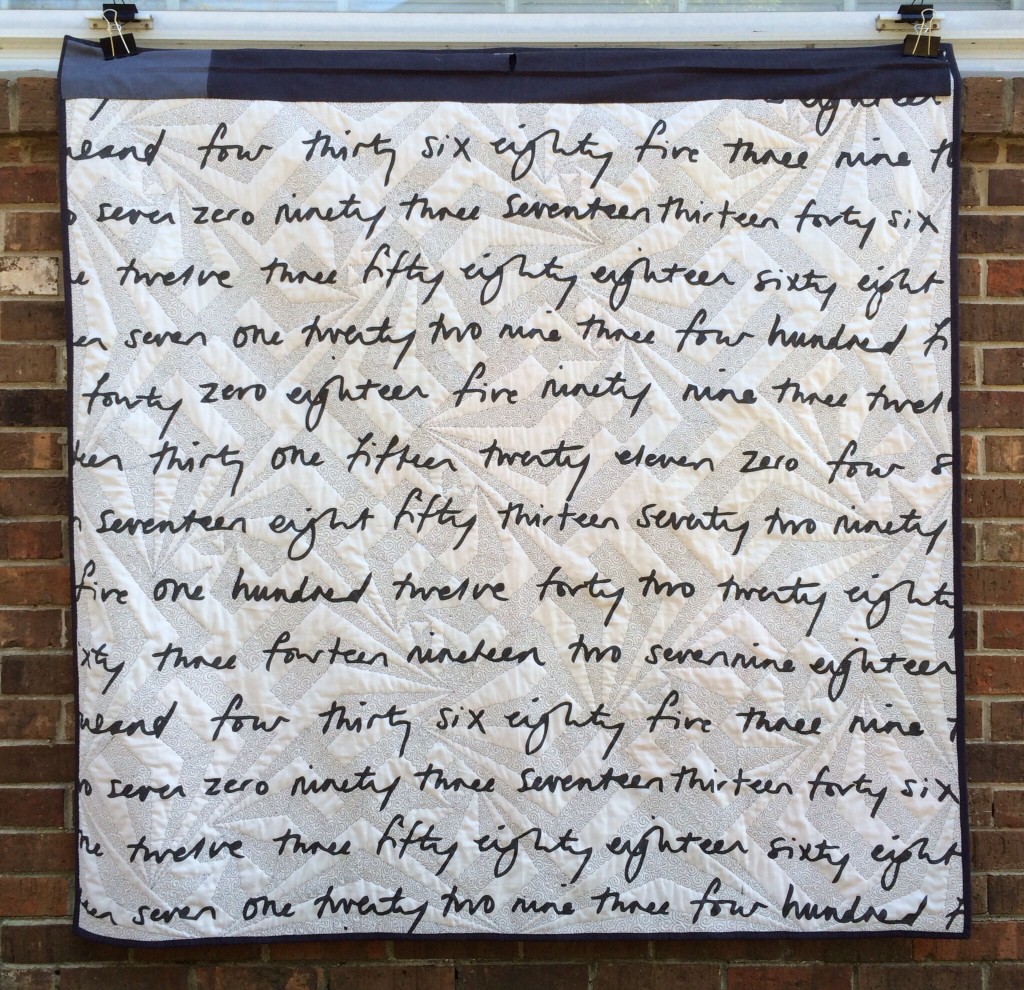
The Ikea numbers fabric is perfect for the back of it, don’t you think? And I love how the quilting texture has a shattered effect on the back. Cool surprise!
This quilt is currently hanging at the bottom of the stairs in our living room, because it matches all of the paint colors we have in the house. I am so very happy with the way it turned out.
Oh, and THIS is cool: Thirteen 13″ blocks on point like this create a 55.1″ square. 55 is another Fibonacci number. Out of curiosity, I calculated what quilt made of thirteen 21″ blocks on point would create … and the answer is an 89.08″ square. 89 is another Fibonacci number! 34″ blocks in this format would create a 144.2″ square. Another Fibonacci number!
I’m telling you, it’s everywhere… Jerry just rolls his eyes at me but the mathematical coincidences of Fibonacci numbers just keep showing up.
And I have more ideas for more Fibonacci quilts… my own personal Fibonacci Sequence. Ahem.
Heh. See what I did there?  Nerd humor.
“Fibonacci Squared,” designed, made, and quilted by Elaine Wick Poplin, 2013-2014.
9 Responses
wow. amazing. I want to make one for my nephew and his bride–they are both university math teachers. Yours is spectacular. Thank you for the tutorial for making the blocks. Now I definitely know what quilt I will be making the happy couple!
You are truly an artist! It is amazing what you can do with some pieces of fabric and a machine.
I love your quilt, the quilting is fantastic and the blocks are really lovely. I think that the fibonacci sequence is pleasing for us to see. And it must be in the quilty air this spring, MR is making similar blocks over at Quilt Matters.
So cool! Leanne told me about your quilt because I’m playing with the Fibonacci sequence as well. I LOVE your quilt. It’s fantastic! I recently finished Innocence Lost, Courage Found using the sequence in a linear formation: http://www.quiltmatters.blogspot.ca/2014/03/tgiff-innocence-lost-courage-found.html. Now I’m playing with it in similar tile formation as yours.
And will the sizes of the following quilts also increase proportionately?
I love the quilting and how you calculated the quilting lines. The effect is totally stunning. Thanks for the tutorial and the maths lesson. It is fascinating how you have found the numbers of this sequence everywhere. I remember learning about the sequence at school, but it didn’t have a name, and was a purely theoretical exercise.
I visited you via “Quilt Matters”.
Dear Elaine,
Fibonacci Squared is probably the most impressive modern quilt I have ever seen. And then you added the quilting and it is out of this world. I am in total awe of your work and the level of involvement your quilts depict is exemplary. I am your newest fan and I am adding your blog to my reading list.
In awe,
Preeti.
that quilting just makes things look awesome.
best of luck to you in the auditions!
This quilting gives this such great texture. Thank you for sharing your process and Good Luck!!
Hello,I read your new stuff named “Fibonacci Squared – messygoat” like every week.Your humoristic style is awesome, keep up the good work! And you can look our website about free proxy.