Sometime last year, I made a very impulsive purchase of some fabrics for which I had to pay international shipping… These Oakshott Cottons had been popping up in projects on Instagram, mostly by quilters in the UK that I follow with puppy dog-like admiration, and I just had to have them. When the Lipari collection came out and Easter had come and gone (so my fabric fast was over) I was no longer able to resist the temptation, and these found their way to me. I bought a fat quarter pack, which really isn’t as much fabric as one would think, so I had to find a way to use every. last. bit. of the fabrics in a quilt to justify the expense in getting them here.

I liked them with steel gray, with charcoal gray, and with black. I tried matching them with other fabrics but they didn’t seem to sing as strongly when put with prints, so I decided to keep them in their purest form and just use them together with a small accent of solids.
I was also very much inspired by this quilt by Charlotte Narunsky, the wee pixie on Flickr. Go ahead and click the link; I’ll wait.
Wasn’t it amazing?!
I decided that to do something like that with the Lipari fabrics would showcase them beautifully.
At a retreat in September, I cut them into squares. With the light coming in sideways from the window, I got the best picture I’ve ever seen that shows the shimmer of these unique fabrics.

They’re woven with color in one direction and black in the other, much like sari silks are woven. Because of this weaving process, they are slightly iridescent. They also are very fine in weight, so they fray a lot so I wanted to handle the fabrics as little as possible during the design process.
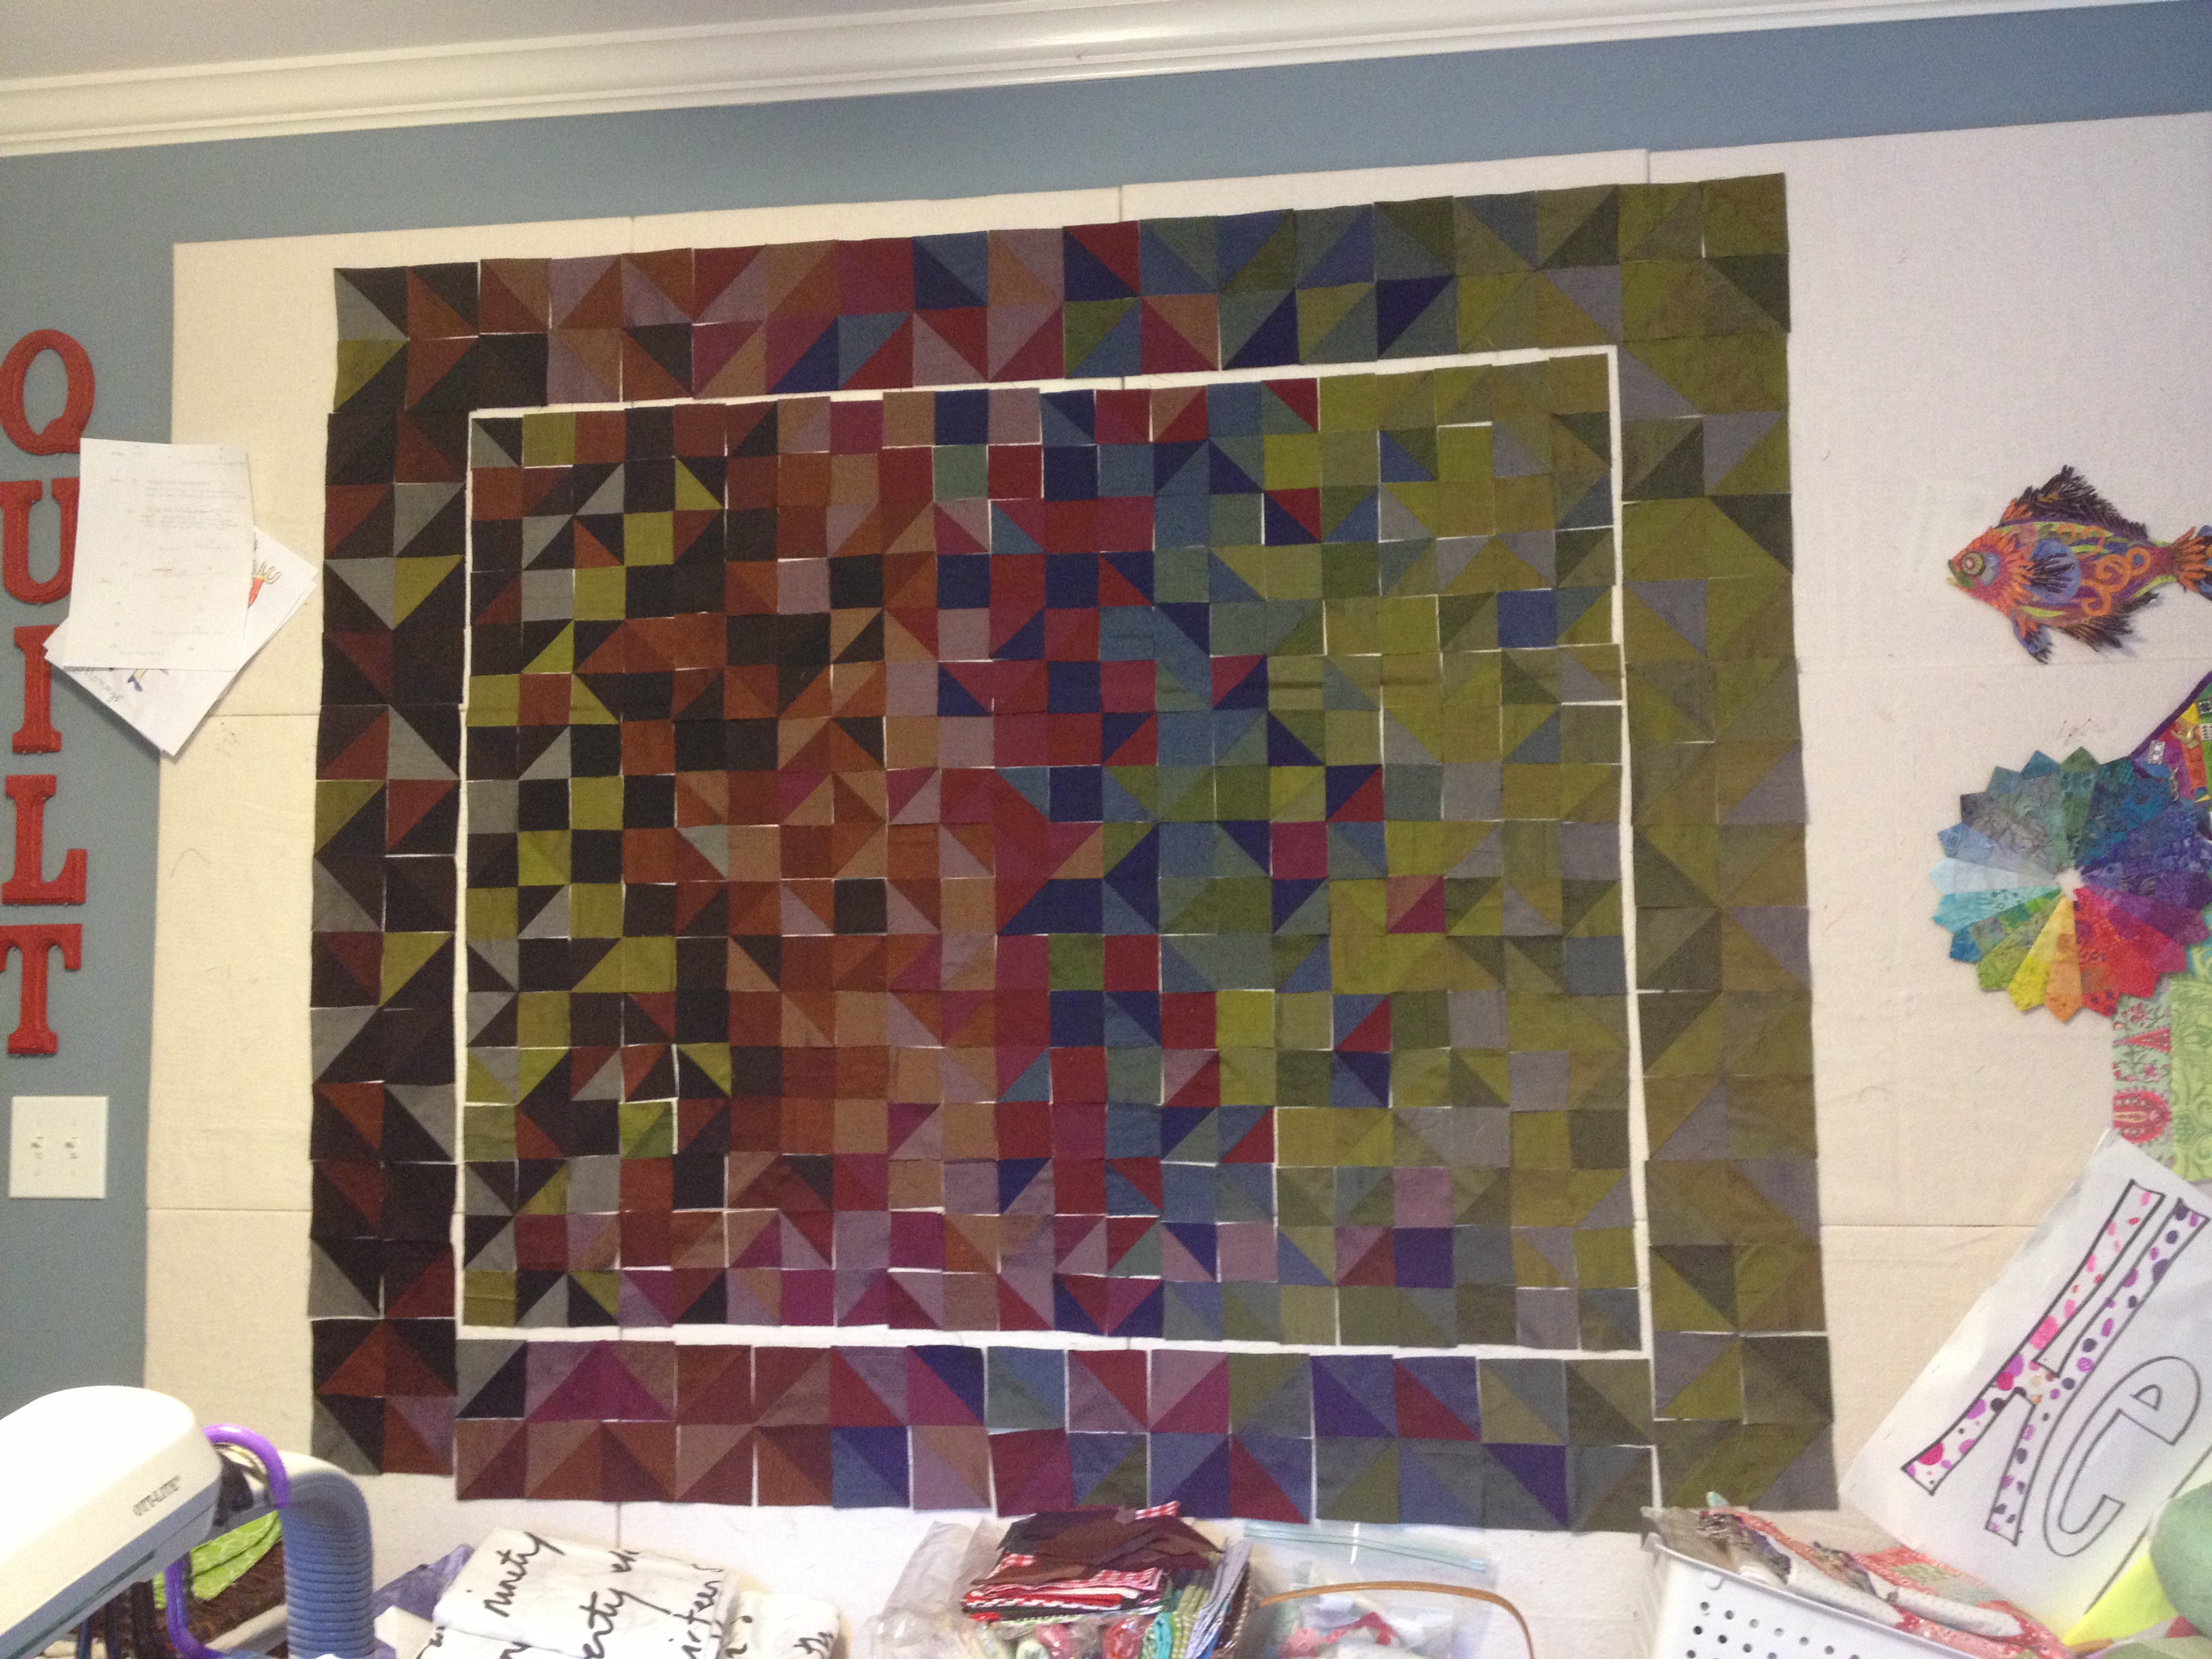
I started by tossing the smallest squares up on the wall and just arranging them in a very mathematically-organized color flow (of course I did).

I built half-square triangles from the other-sized squares, pairing colors in a very systematic way through the stack. The medium-sized squares had four sets of HSTs with their neighboring colors, 3 with the the colors two steps away, 2 with the colors three steps away, and 1 with the colors four steps away, and so on. The larger squares only went three steps away because I didn’t have as many of them to distribute, but again the matching was very systematic so that I’d get the best color flow possible. Then I started tossing those up on the wall.

Initially I had wanted to have three sizes of HSTs, but as I got going I realized I’d need to order another whole fat quarter pack of the Lipari fabrics to make enough small HSTs to pull that off. And then the assembly of the quilt top would have been a nightmare with all of the partial-seam construction. So I decided to let the small squares remain as squares rather than making them into HSTs. And I decided to keep the interior all medium HSTs and squares of the same size, so that assembly would be simpler and I might actually finish this project in a reasonable amount of time.
Here are all of the HST units and squares for the center of the quilt.

At this point I figured out that I had 357 pieces to work with (squares and HST units), so to use all of them I’d have 17 units by 21 units. Yes, I used all of them, and redistributed the squares accordingly. Then I added the border of the larger HSTs around the edge, trying to repeat the same color scatter as much as I could.
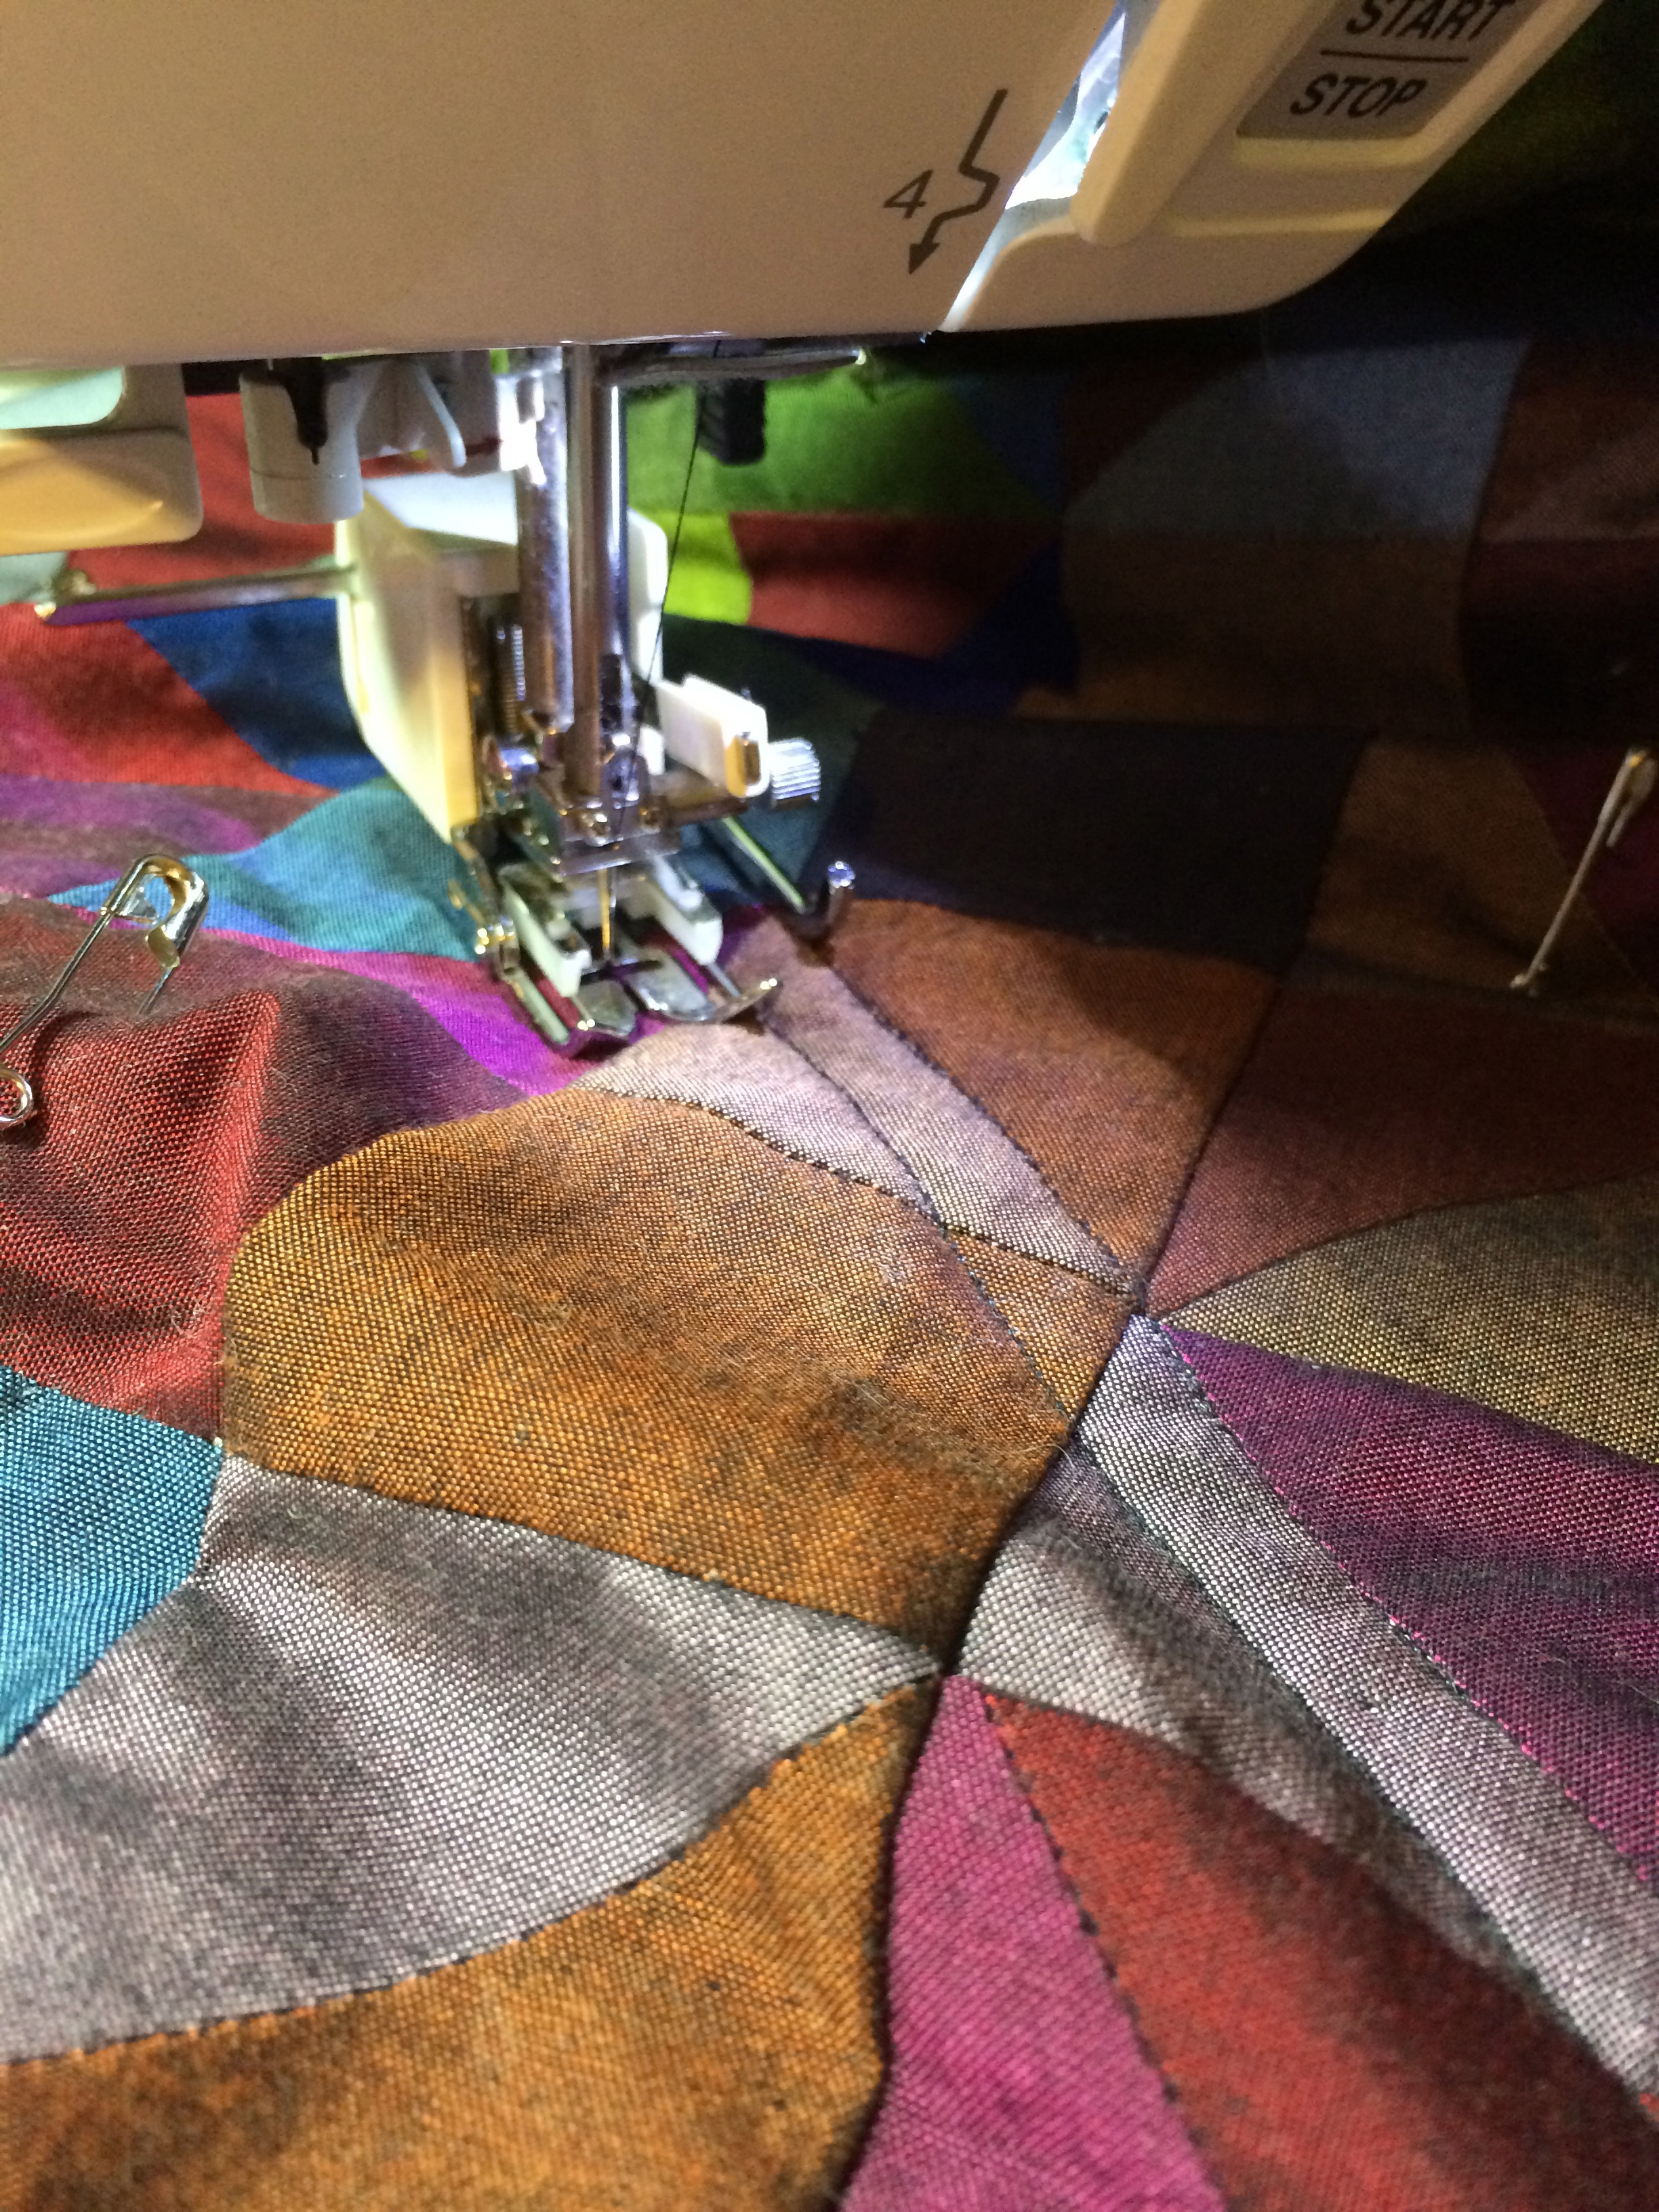
To get the outer border to fit nicely around the interior of the quilt, I had to add coping strips 1″ above and below the interior, and 1.5″ to the left and right. This made the interior of the quilt a clean 48″x36″ so that my 3″ finished HSTs in the outer border would fit evenly. I chose Kona’s Medium Gray as my inner border, since it framed the Lipari fabrics nicely without competing. Then I began assembling the interior of the quilt.

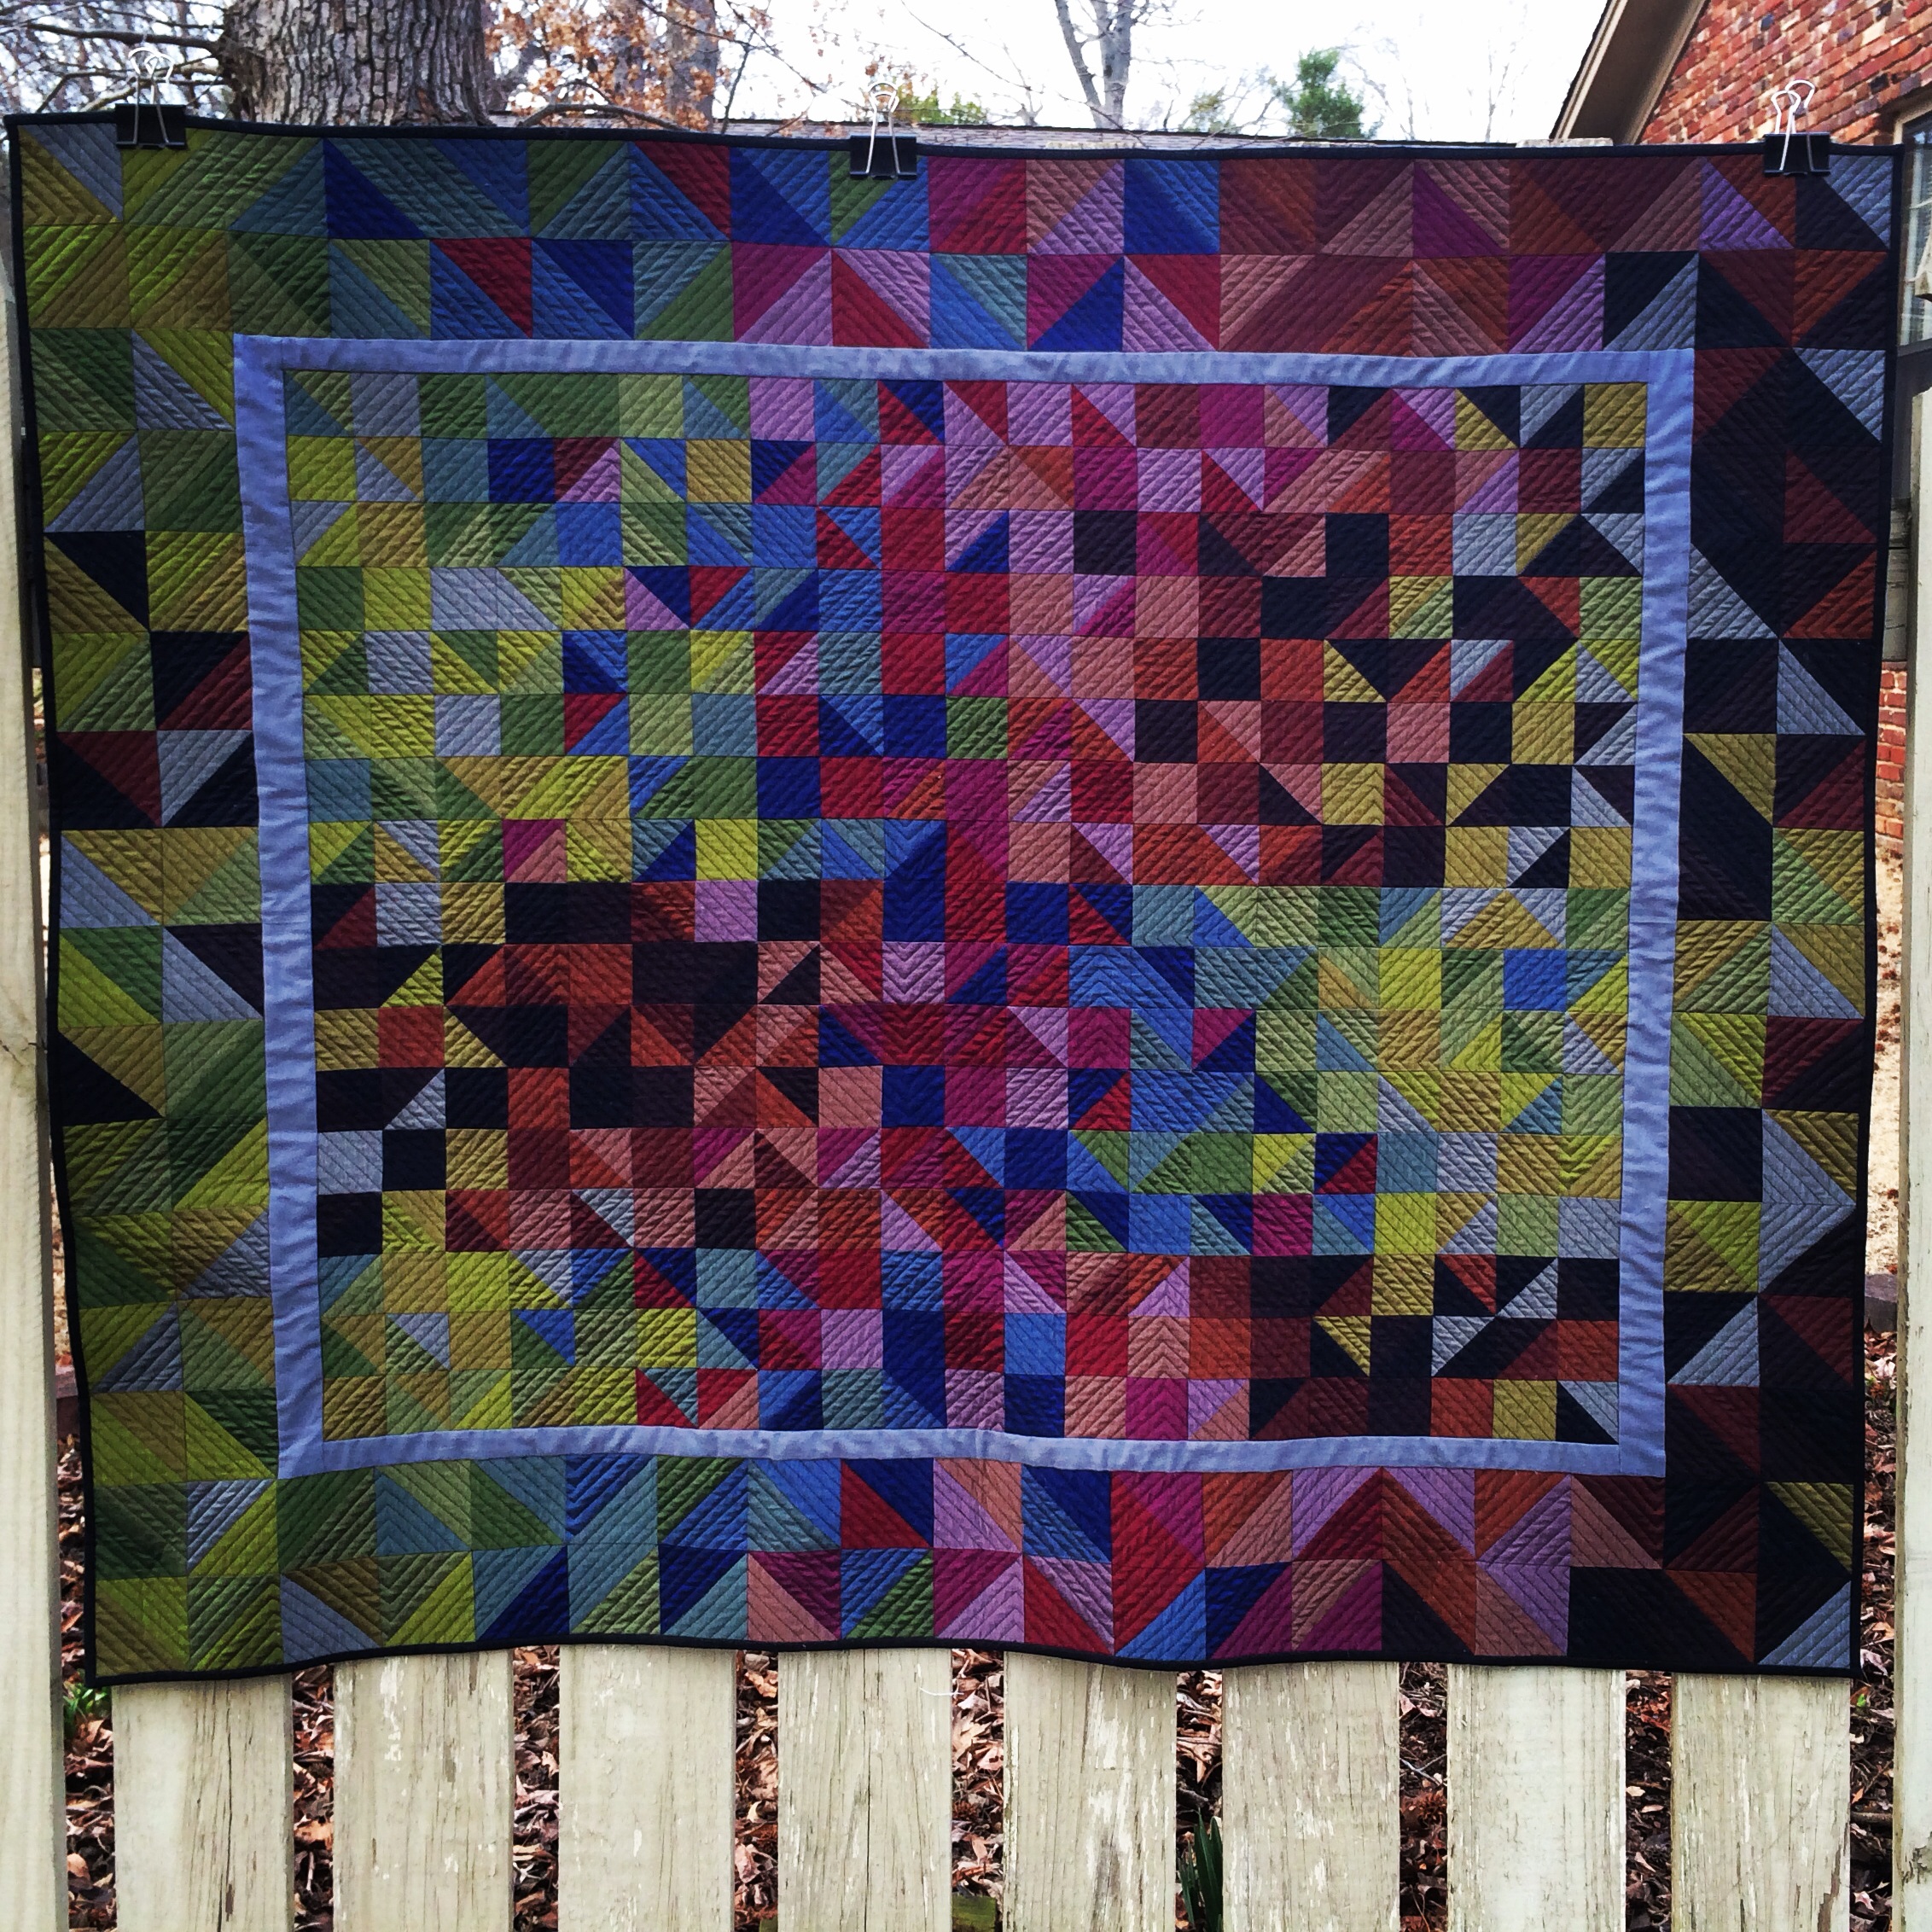
As I got going, I would assemble chunks of the top and put them back up on the wall, and after one such chunk-assembly, I had an idle thought… I wonder what would happen if I put this middle section up but rotated it 180 degrees?

I got SO excited at this point, because this simple adjustment gave the piece some tension that it hadn’t had before! So I changed around the outer borders to support it and suddenly loved the quilt.

I had liked it before, but now it had a personality and wasn’t just a color study anymore. And I knew the name in that moment, too — “Entropy,” because I had tried to be so organized and systematic in the process of the layout of the colors, but chaos won out anyway and made it interesting.
And then I got stuck. How in the world was I going to quilt this so that the quilting didn’t compete with the fabrics? I considered feathers, but decided that would pull too much focus. Anything I did would be very visible, since the fabric has a shimmer to it. I decided on straight-line quilting, which I’ve never really done before because, quite frankly, I’m not good at sewing straight lines for more than a few inches at a time. And on my big machine, I’m especially terrible at them. They’re always very…. organic. Organic works for most quilts, but I knew it wouldn’t work for this one.
This poor quilt sat, layered and basted and ready, for a while.

So I kept procrastinating and procrastinating and working on other projects., until I was finally forced to take the big quilting machine in for repairs… It was there for three weeks, having the timing fixed and getting a new foot pedal, so I decided to get out my even-feed foot and try straight-line quilting on my little Janome machine.

I was reminded why I had wanted a larger quilting machine in the first place, as turning the quilt under the tiny harp of the Janome was so painful after a while… My poor shoulders!
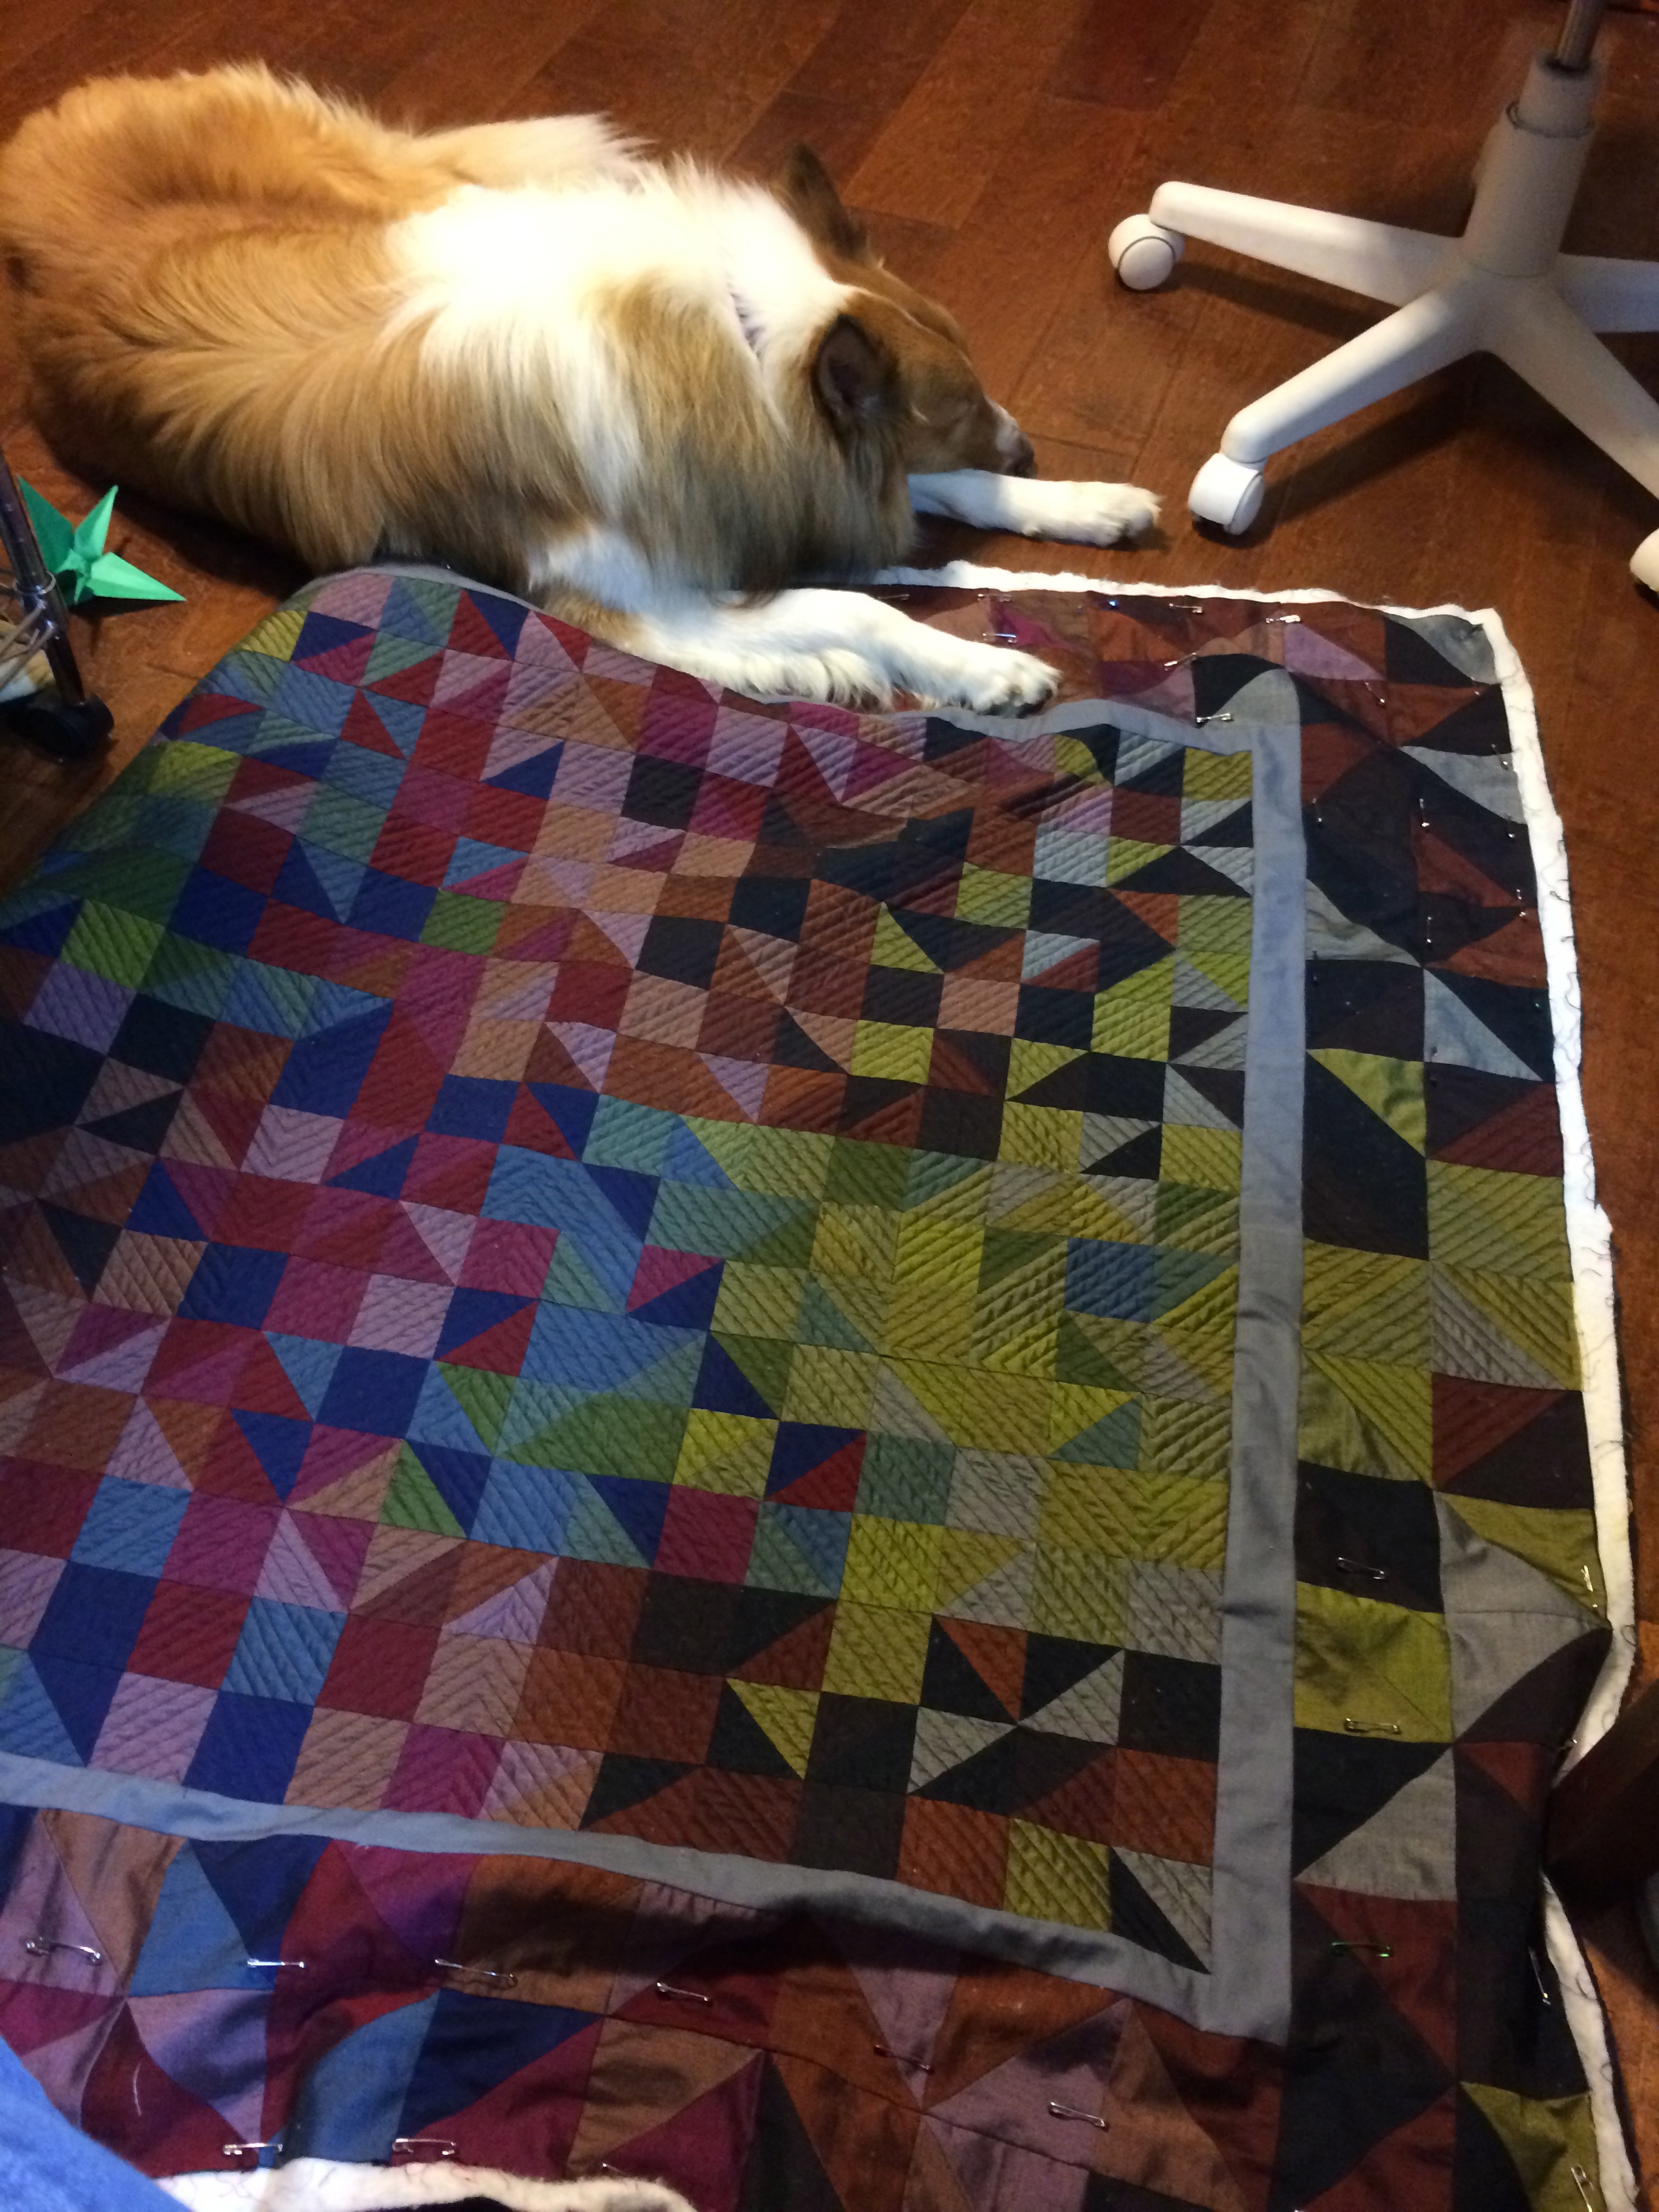
But it looked good, so I kept going. I took frequent breaks to admire it and to give my shoulders a rest.
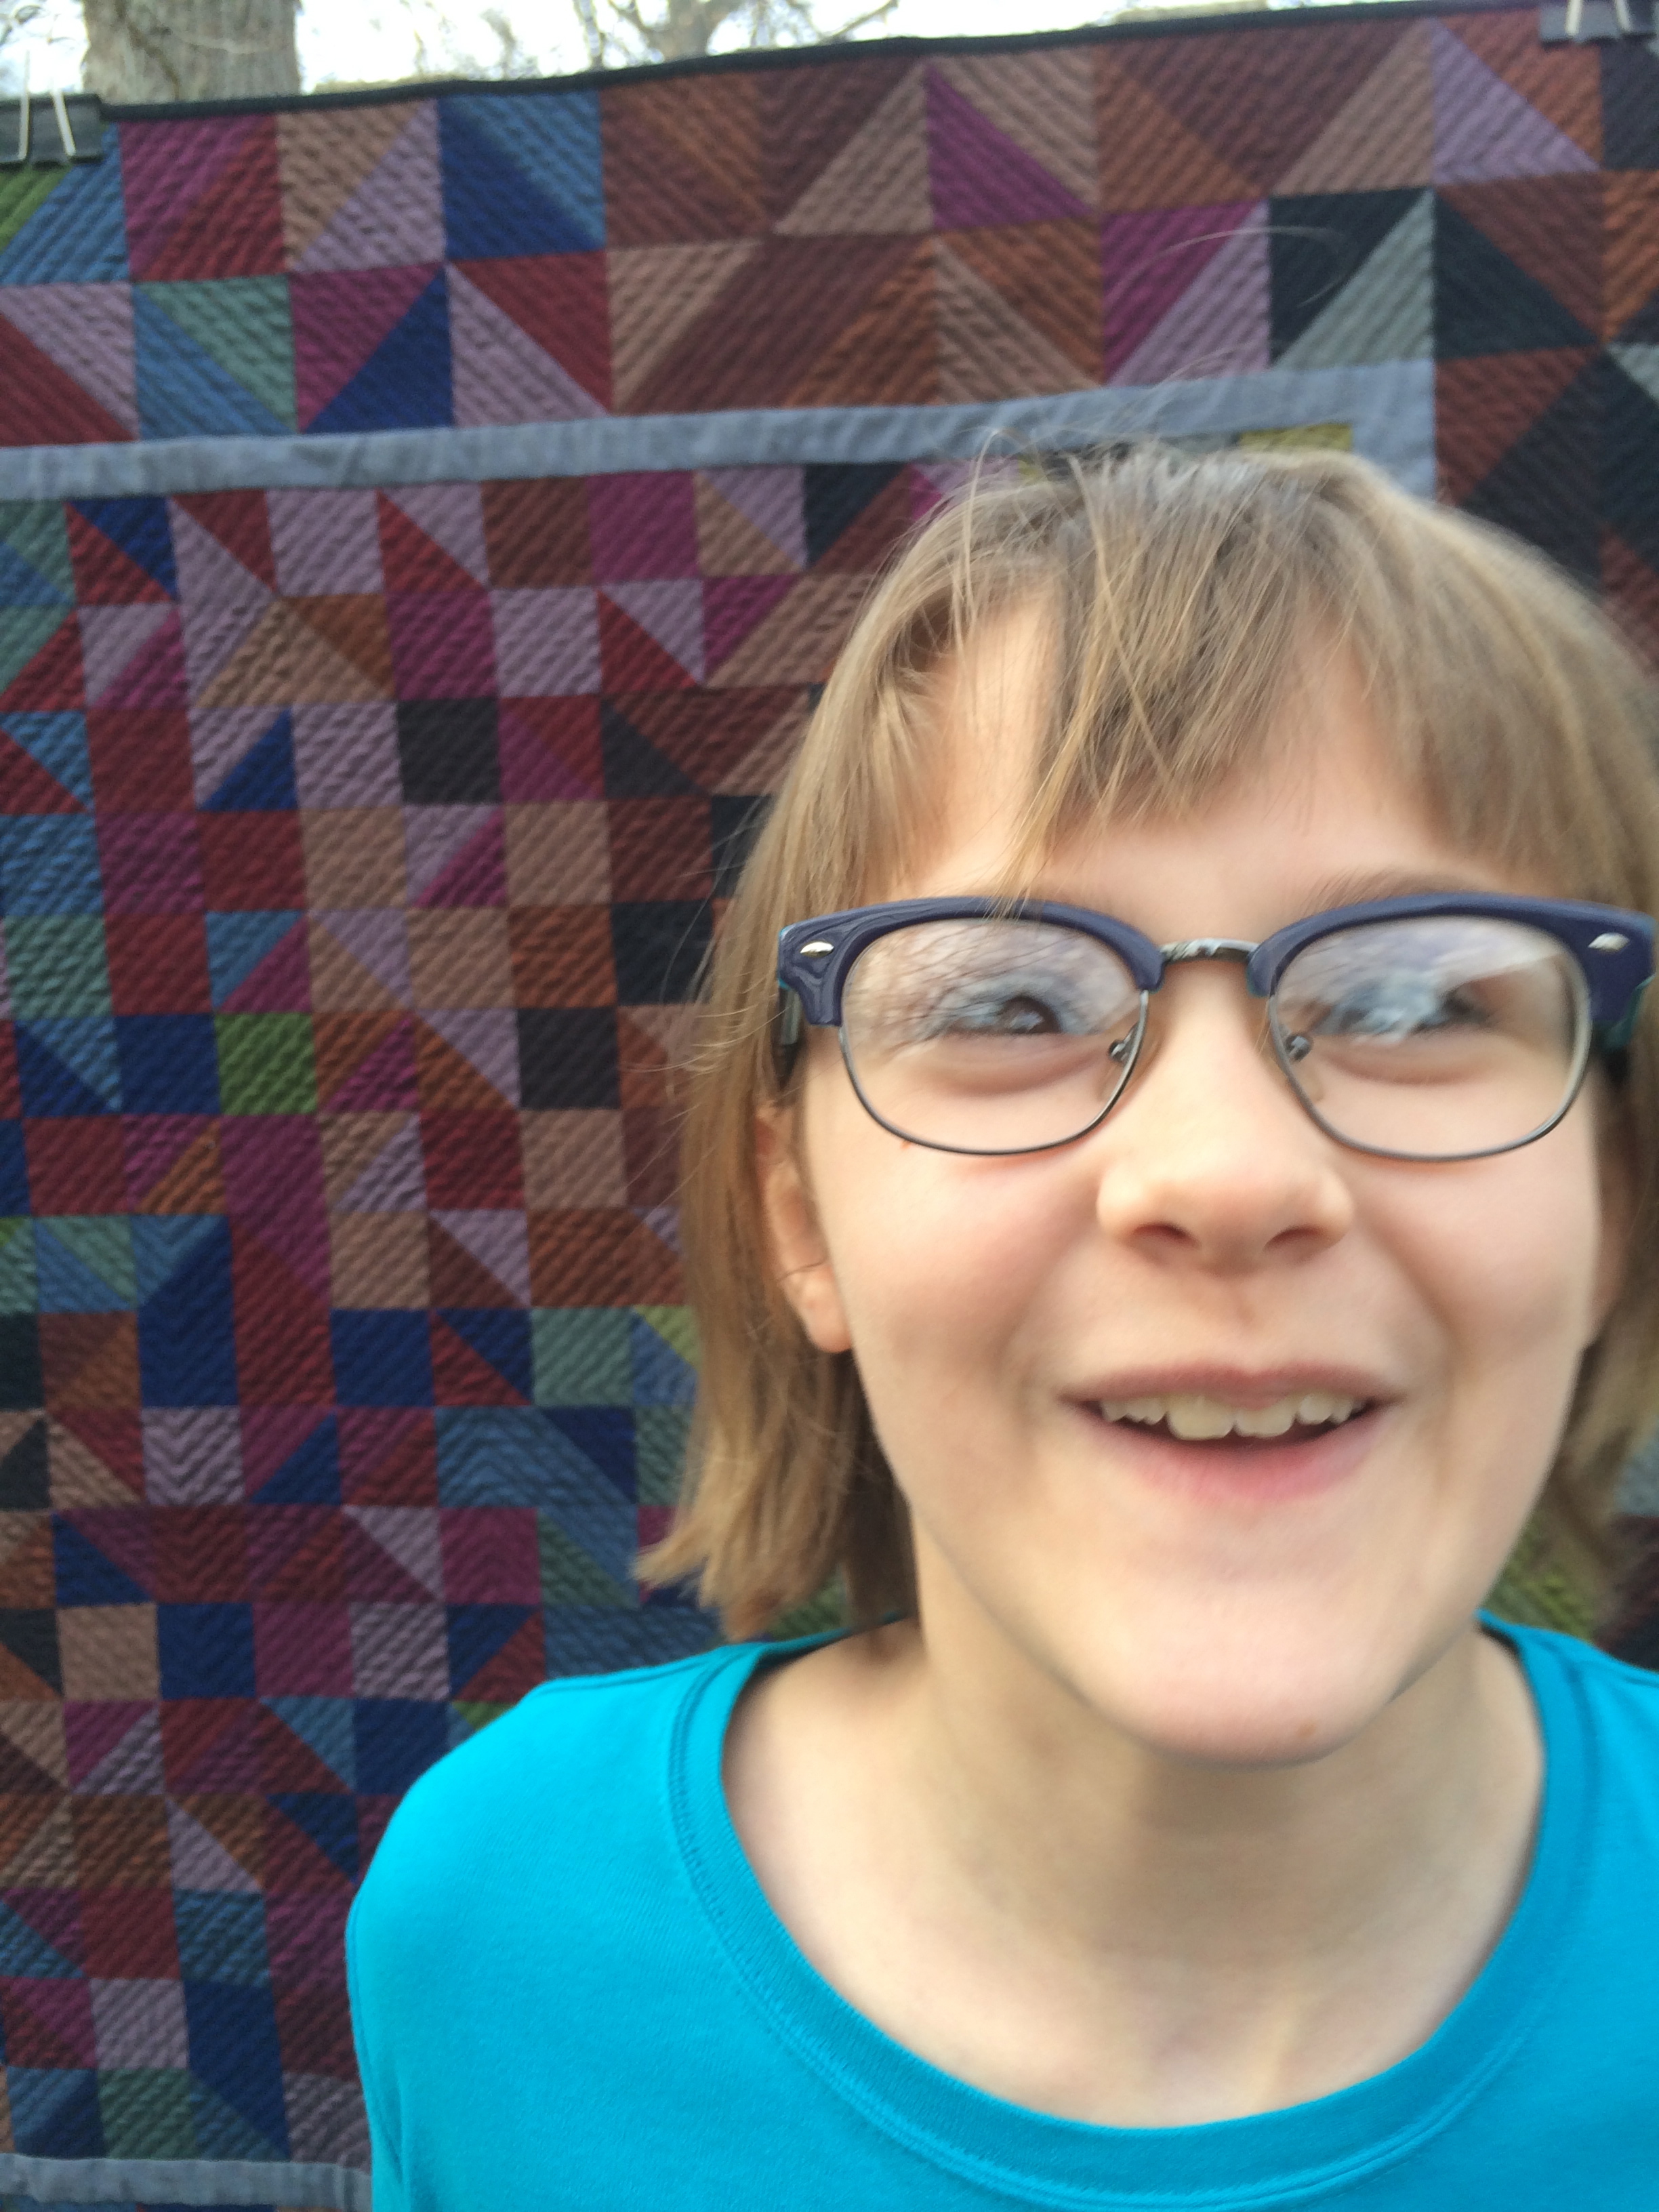
Finally, it was done! I spread it out on the floor and reached for my camera, and Friday showed up out of nowhere.

The binding went on — just a simple black binding, since I didn’t want any competition for the center of the quilt.

And the fence photos, of course…
My assistant, decided to “help” with the photos… So nice of her, no?
After seeing the quilt up on the fence, I have decided that I will quilt down the medium gray borders with simple straight line quilting — vertical lines in the top and bottom borders, and horizontal lines in the side borders… I just have to work up the courage to try that on my big machine. I am NOT willing to do any more quilting on the little Janome — no thanks!
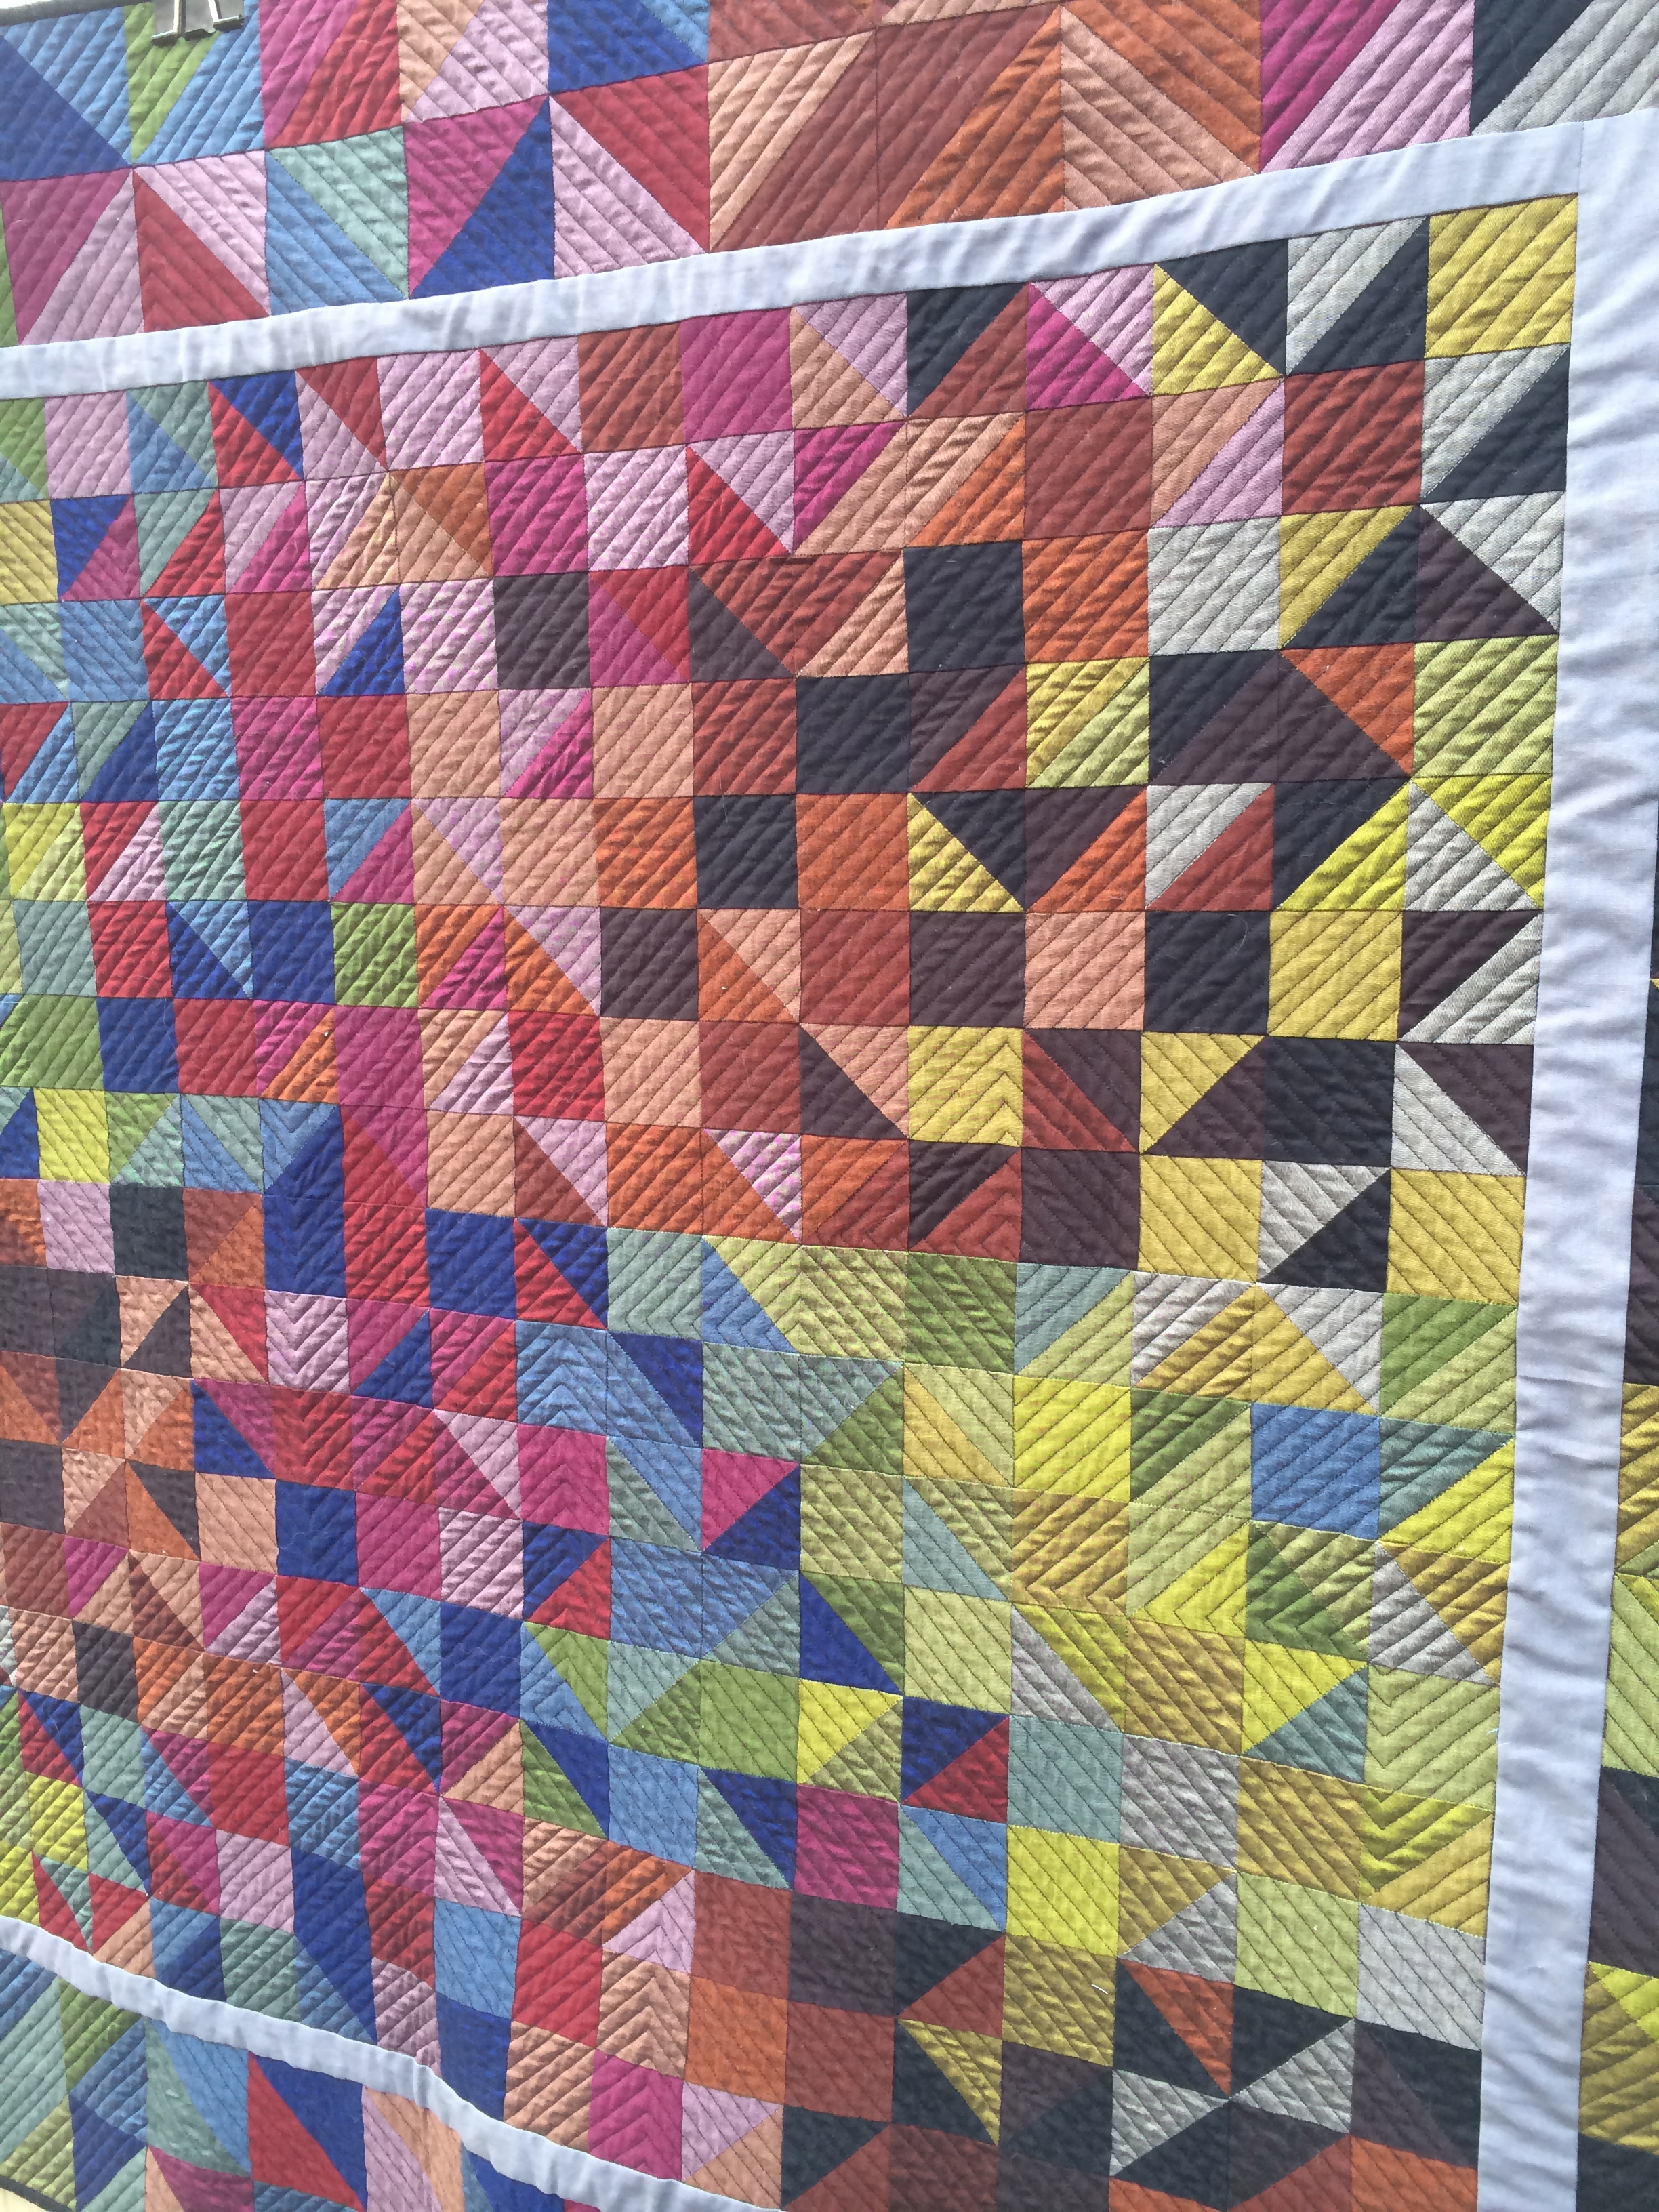

But I think the puffy characteristic of the narrow borders pulls focus off of the gorgeous fabrics, and I don’t want that to happen. I’ll add photos once I’ve done that, but it’ll need a pretty substantial lint-rolling before it goes in front of the camera again. This quilt will have to go to Jerry’s office to live because with all the animals here it just gets coated with hair. I bought the fabrics intending to make a quilt for him anyway, so I guess that’s OK, right? I’ll miss it, though — I love this quilt.
“Entropy,” Completed in March, 2014. Finished size: 60.5″x48.5″, including the bound edge.

One response
It’s wonderful. I enjoyed reading about your process.